Knitted Christmas Stockings

Our family has for decades enjoyed the Christmas stocking tradition. A Christmas stocking is an empty sock or sock-shaped bag that is hung on Saint Nicholas Day or Christmas Eve so that Saint Nicholas / Father Christmas can fill it with small toys, candy, fruit, coins or other small gifts (known as stocking stuffers). For our family, the only essential item is a chocolate orange placed in the toe of the stocking. Every year the remaining goodies are surprises!

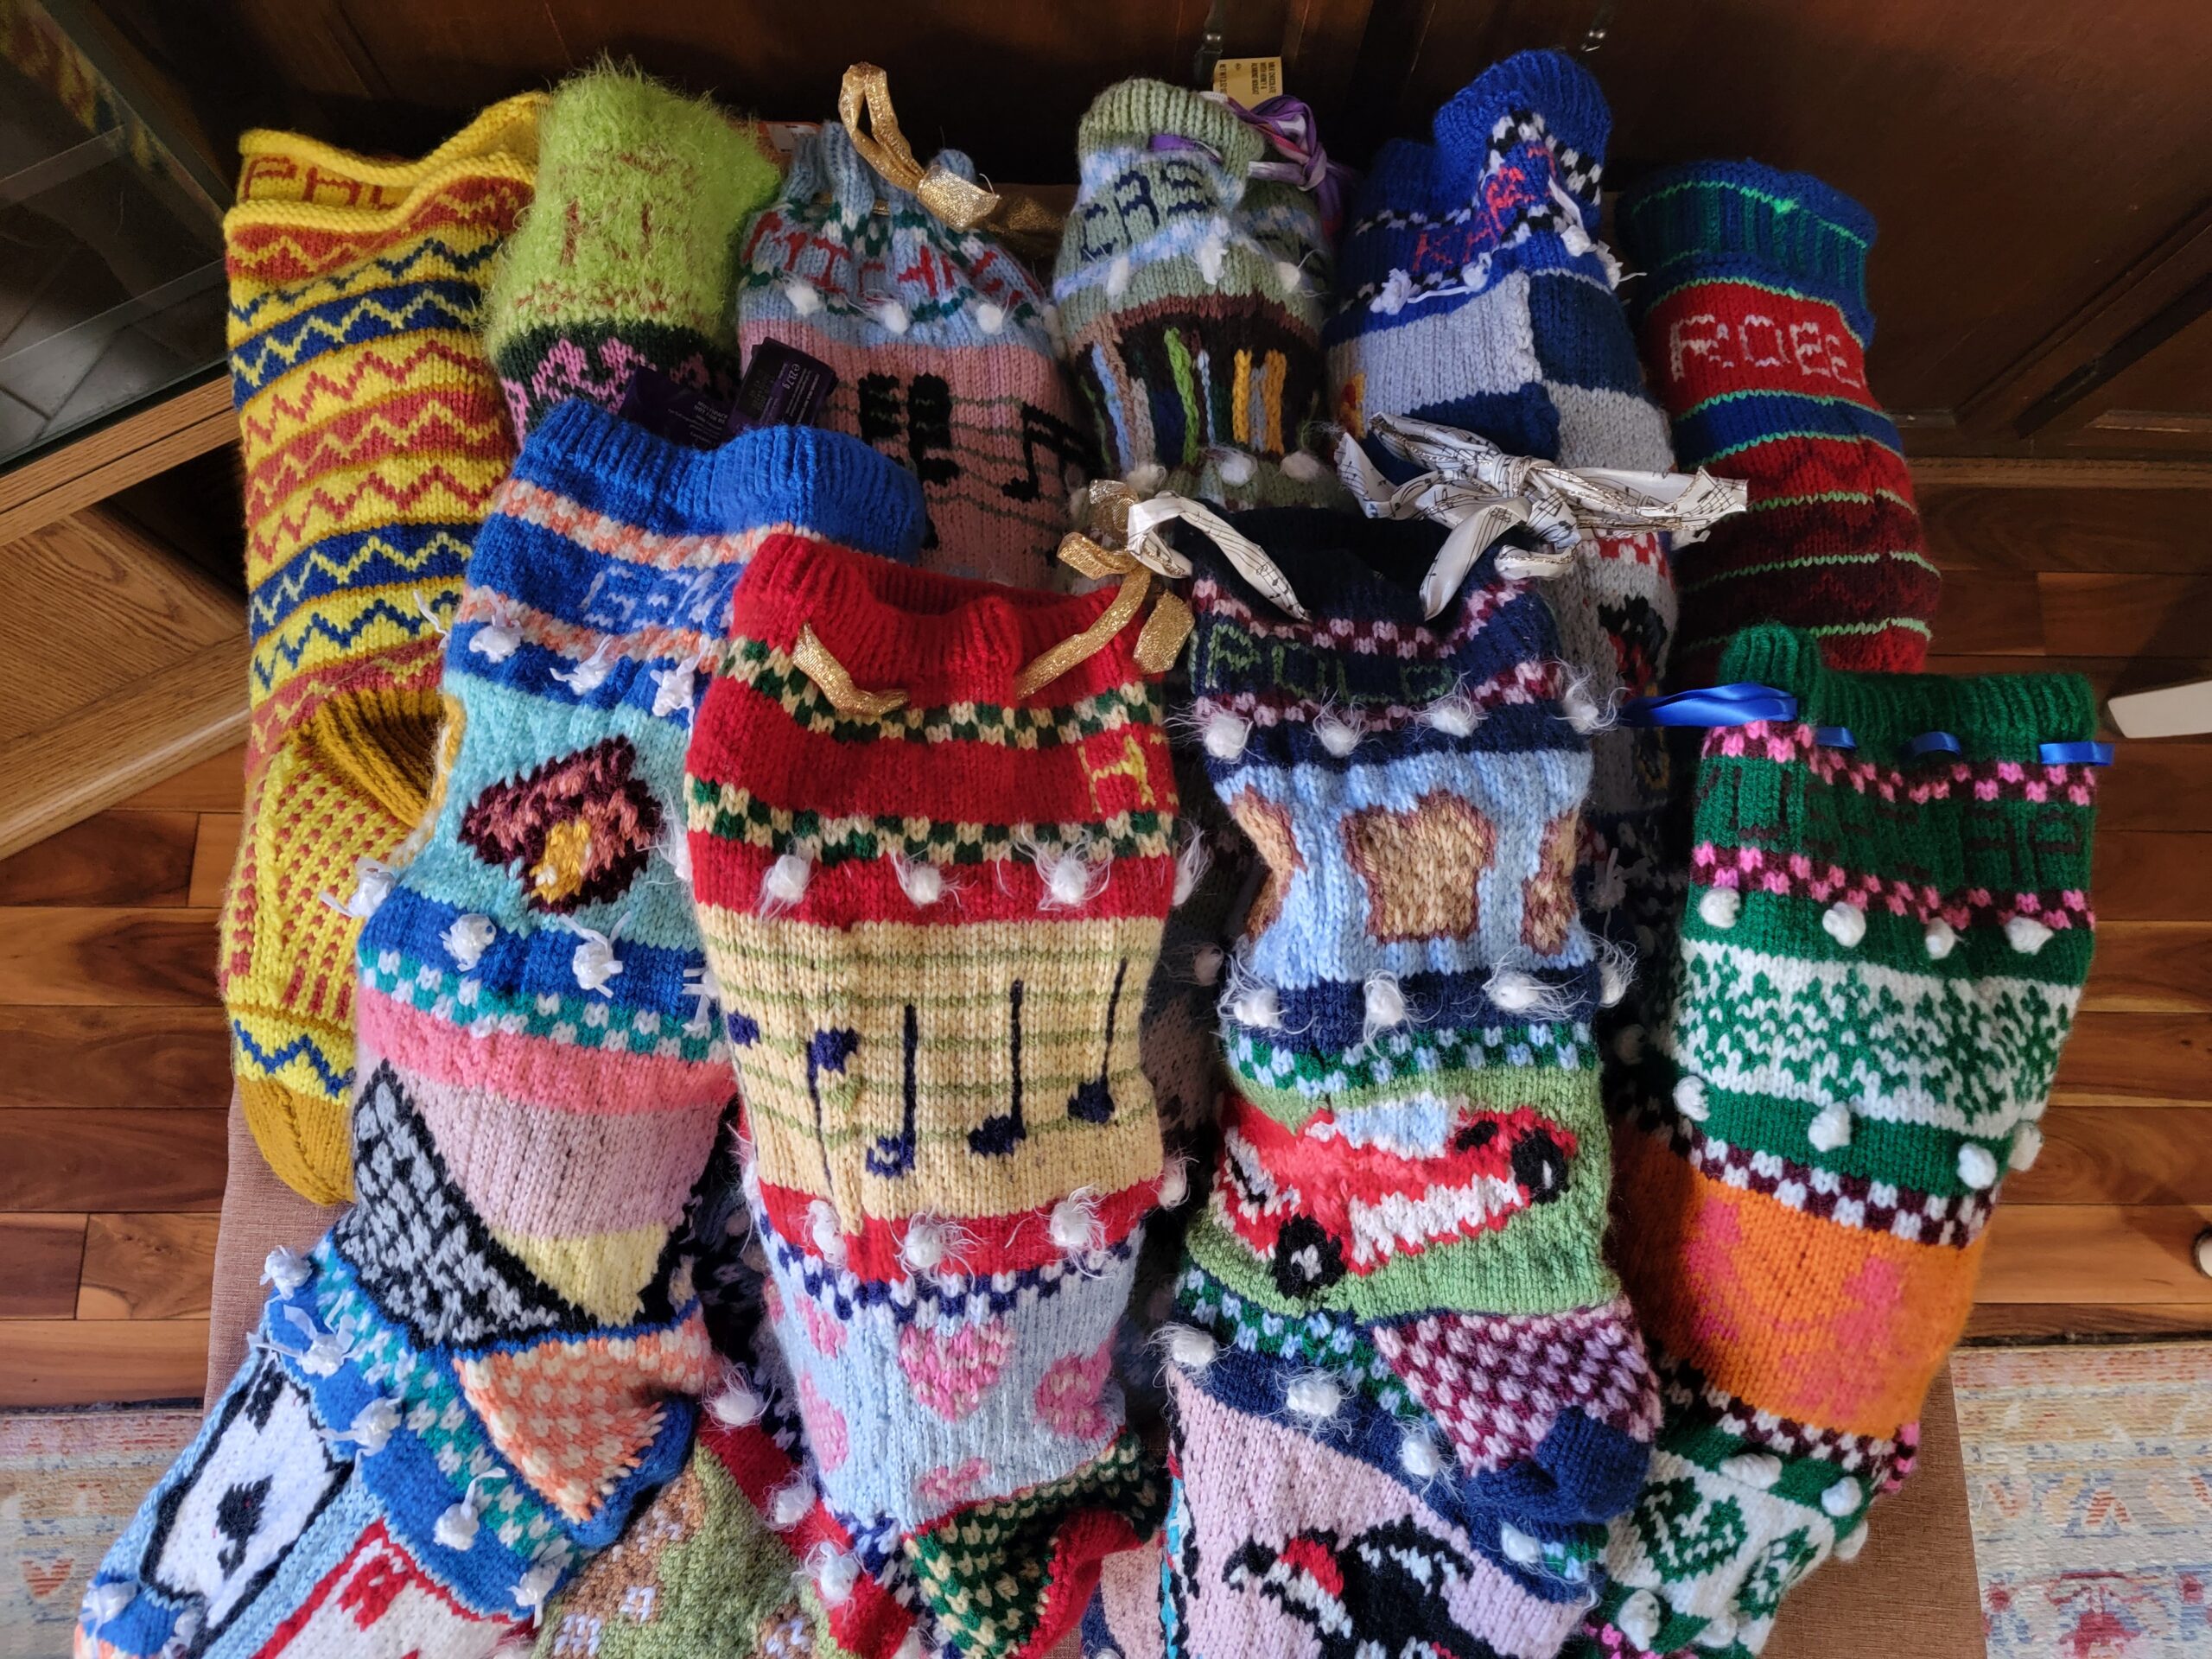
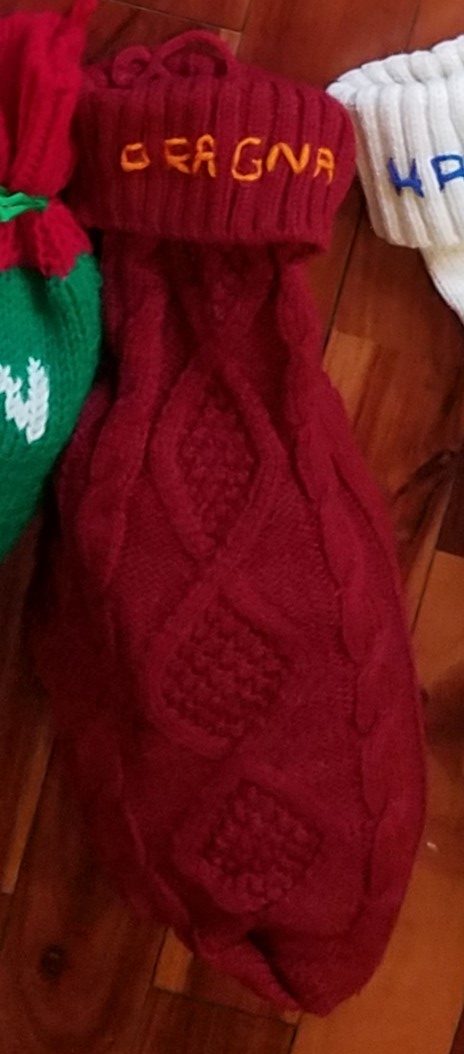
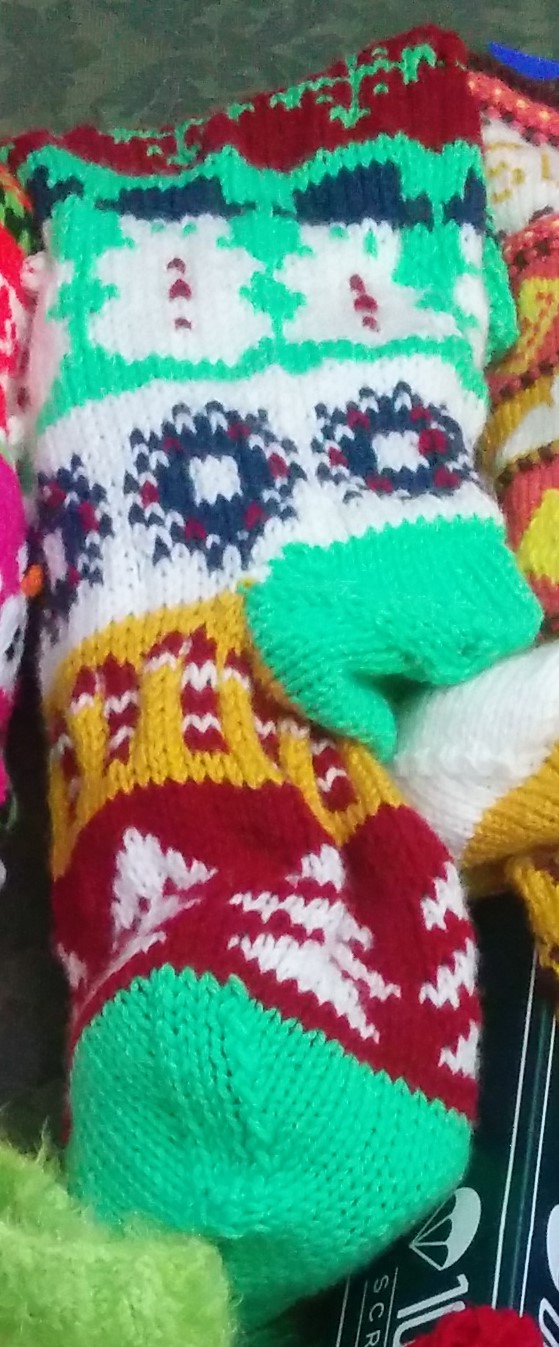
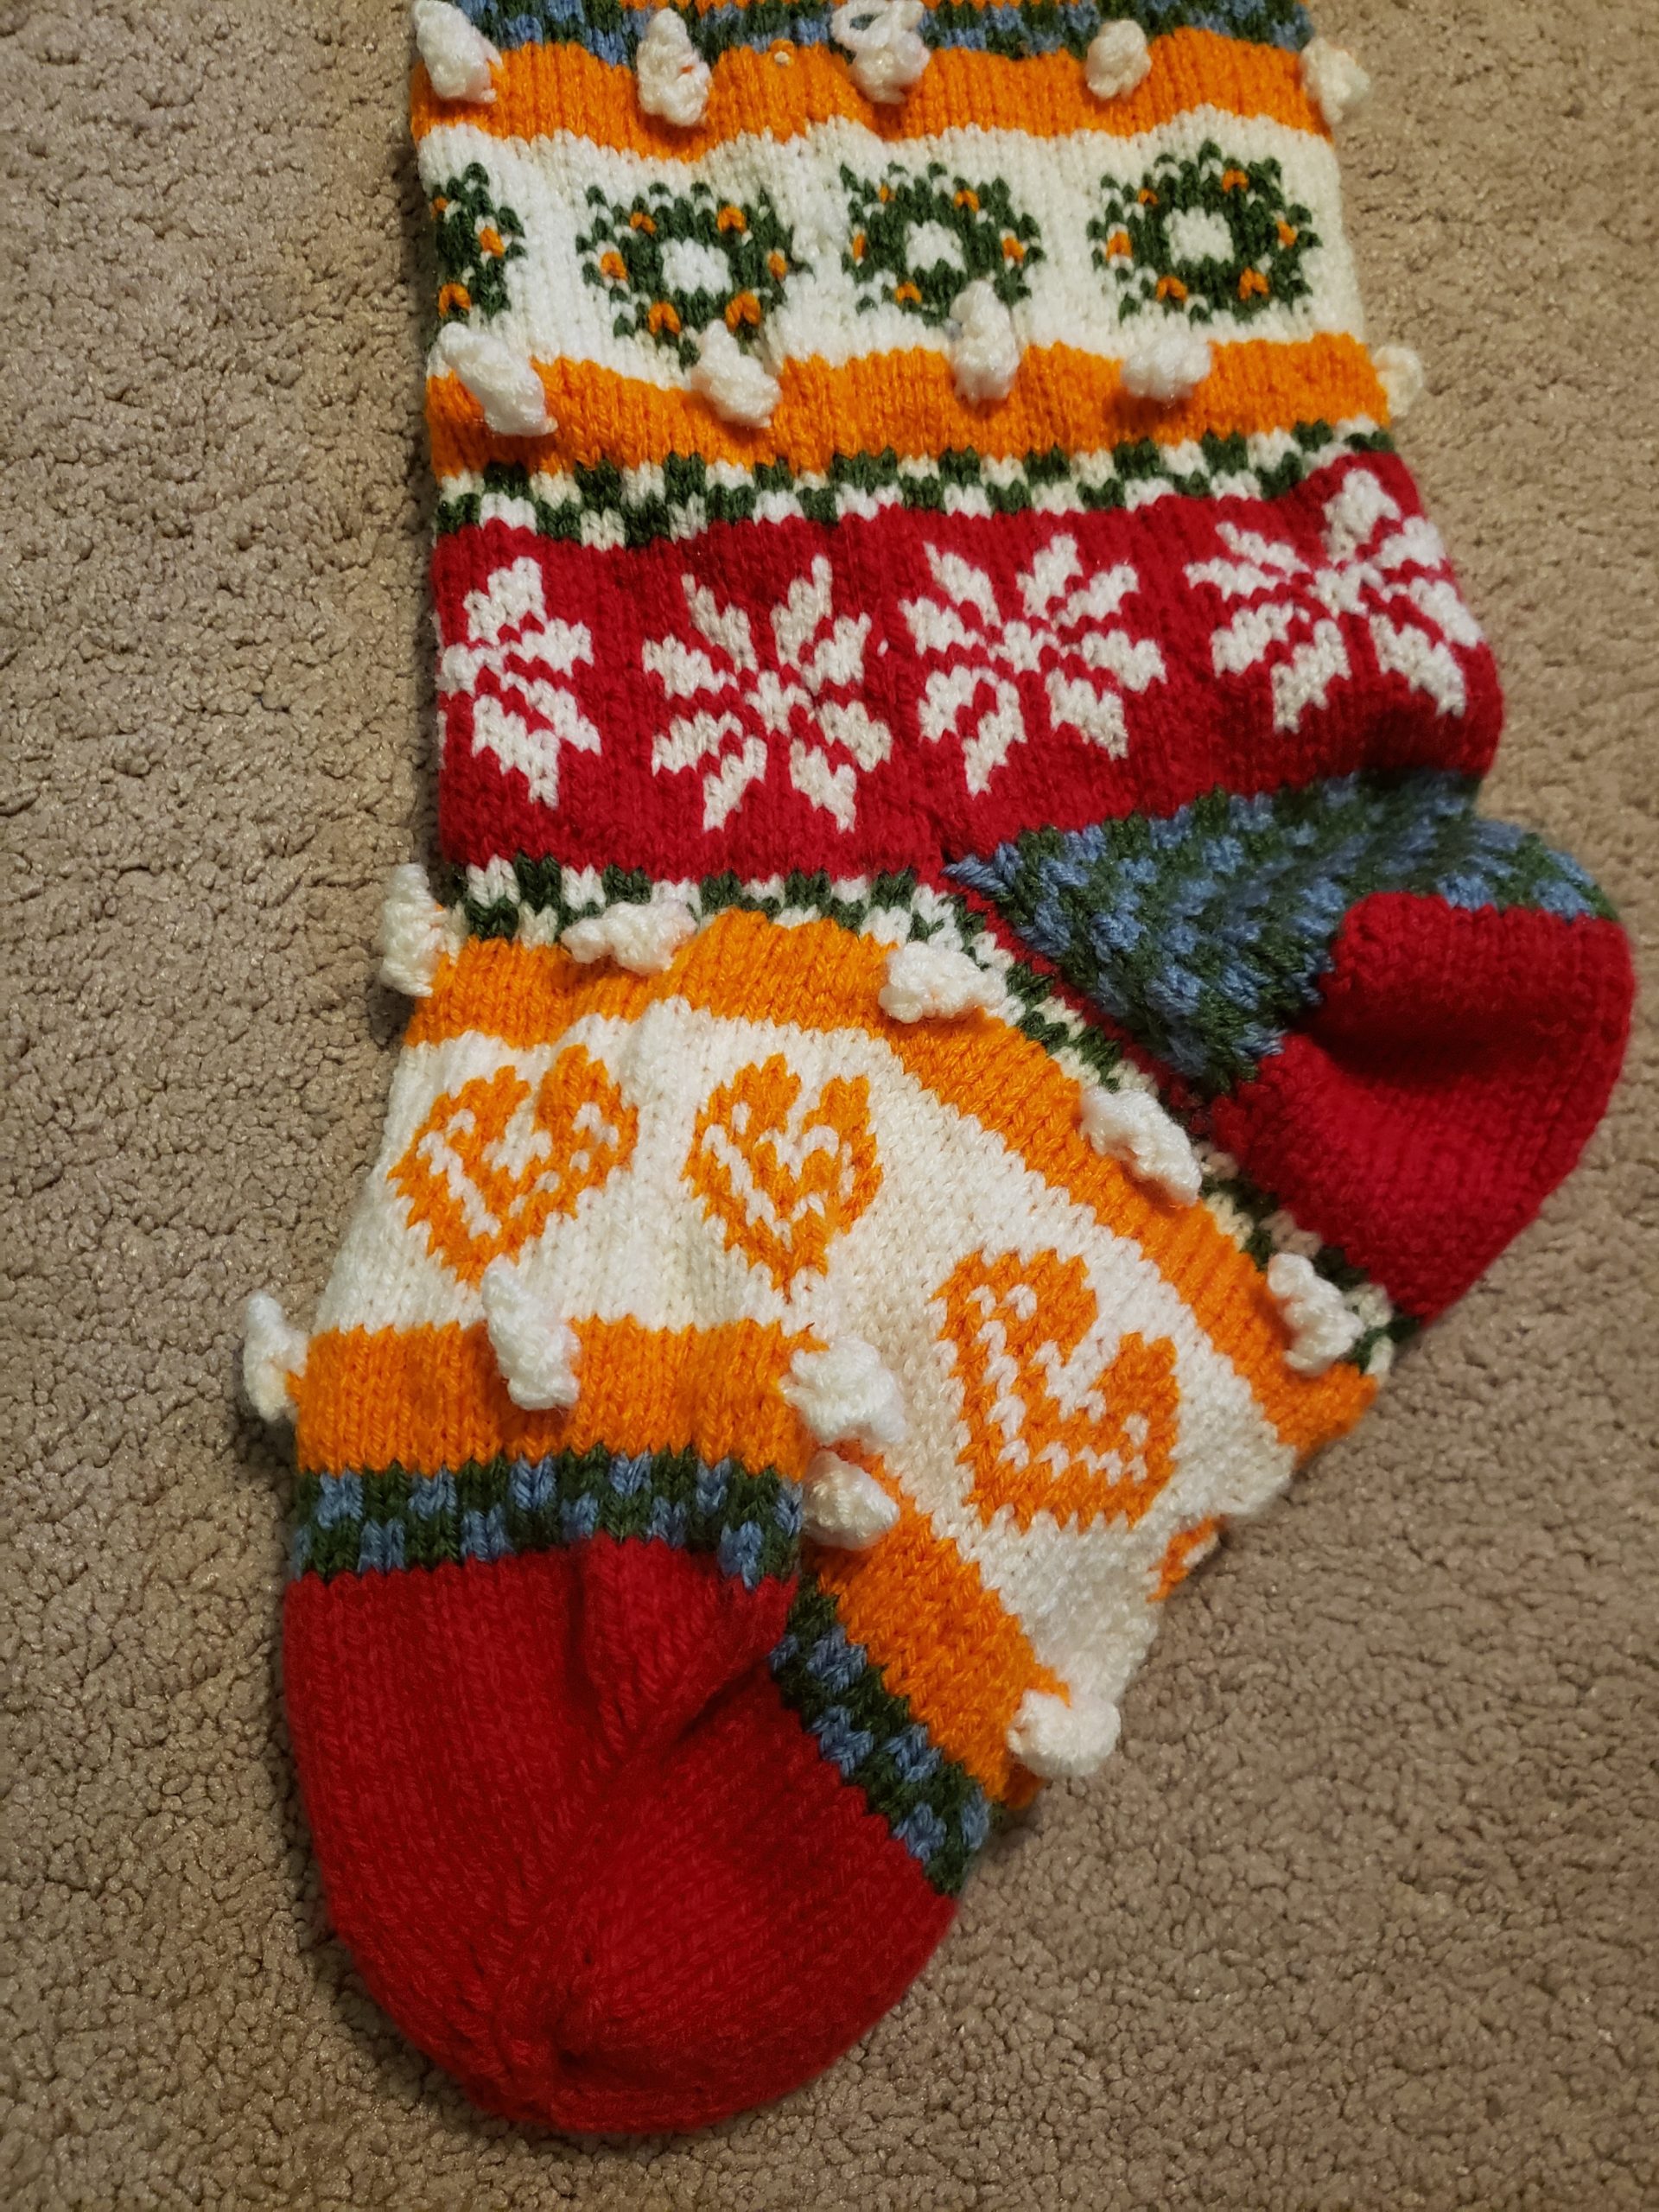
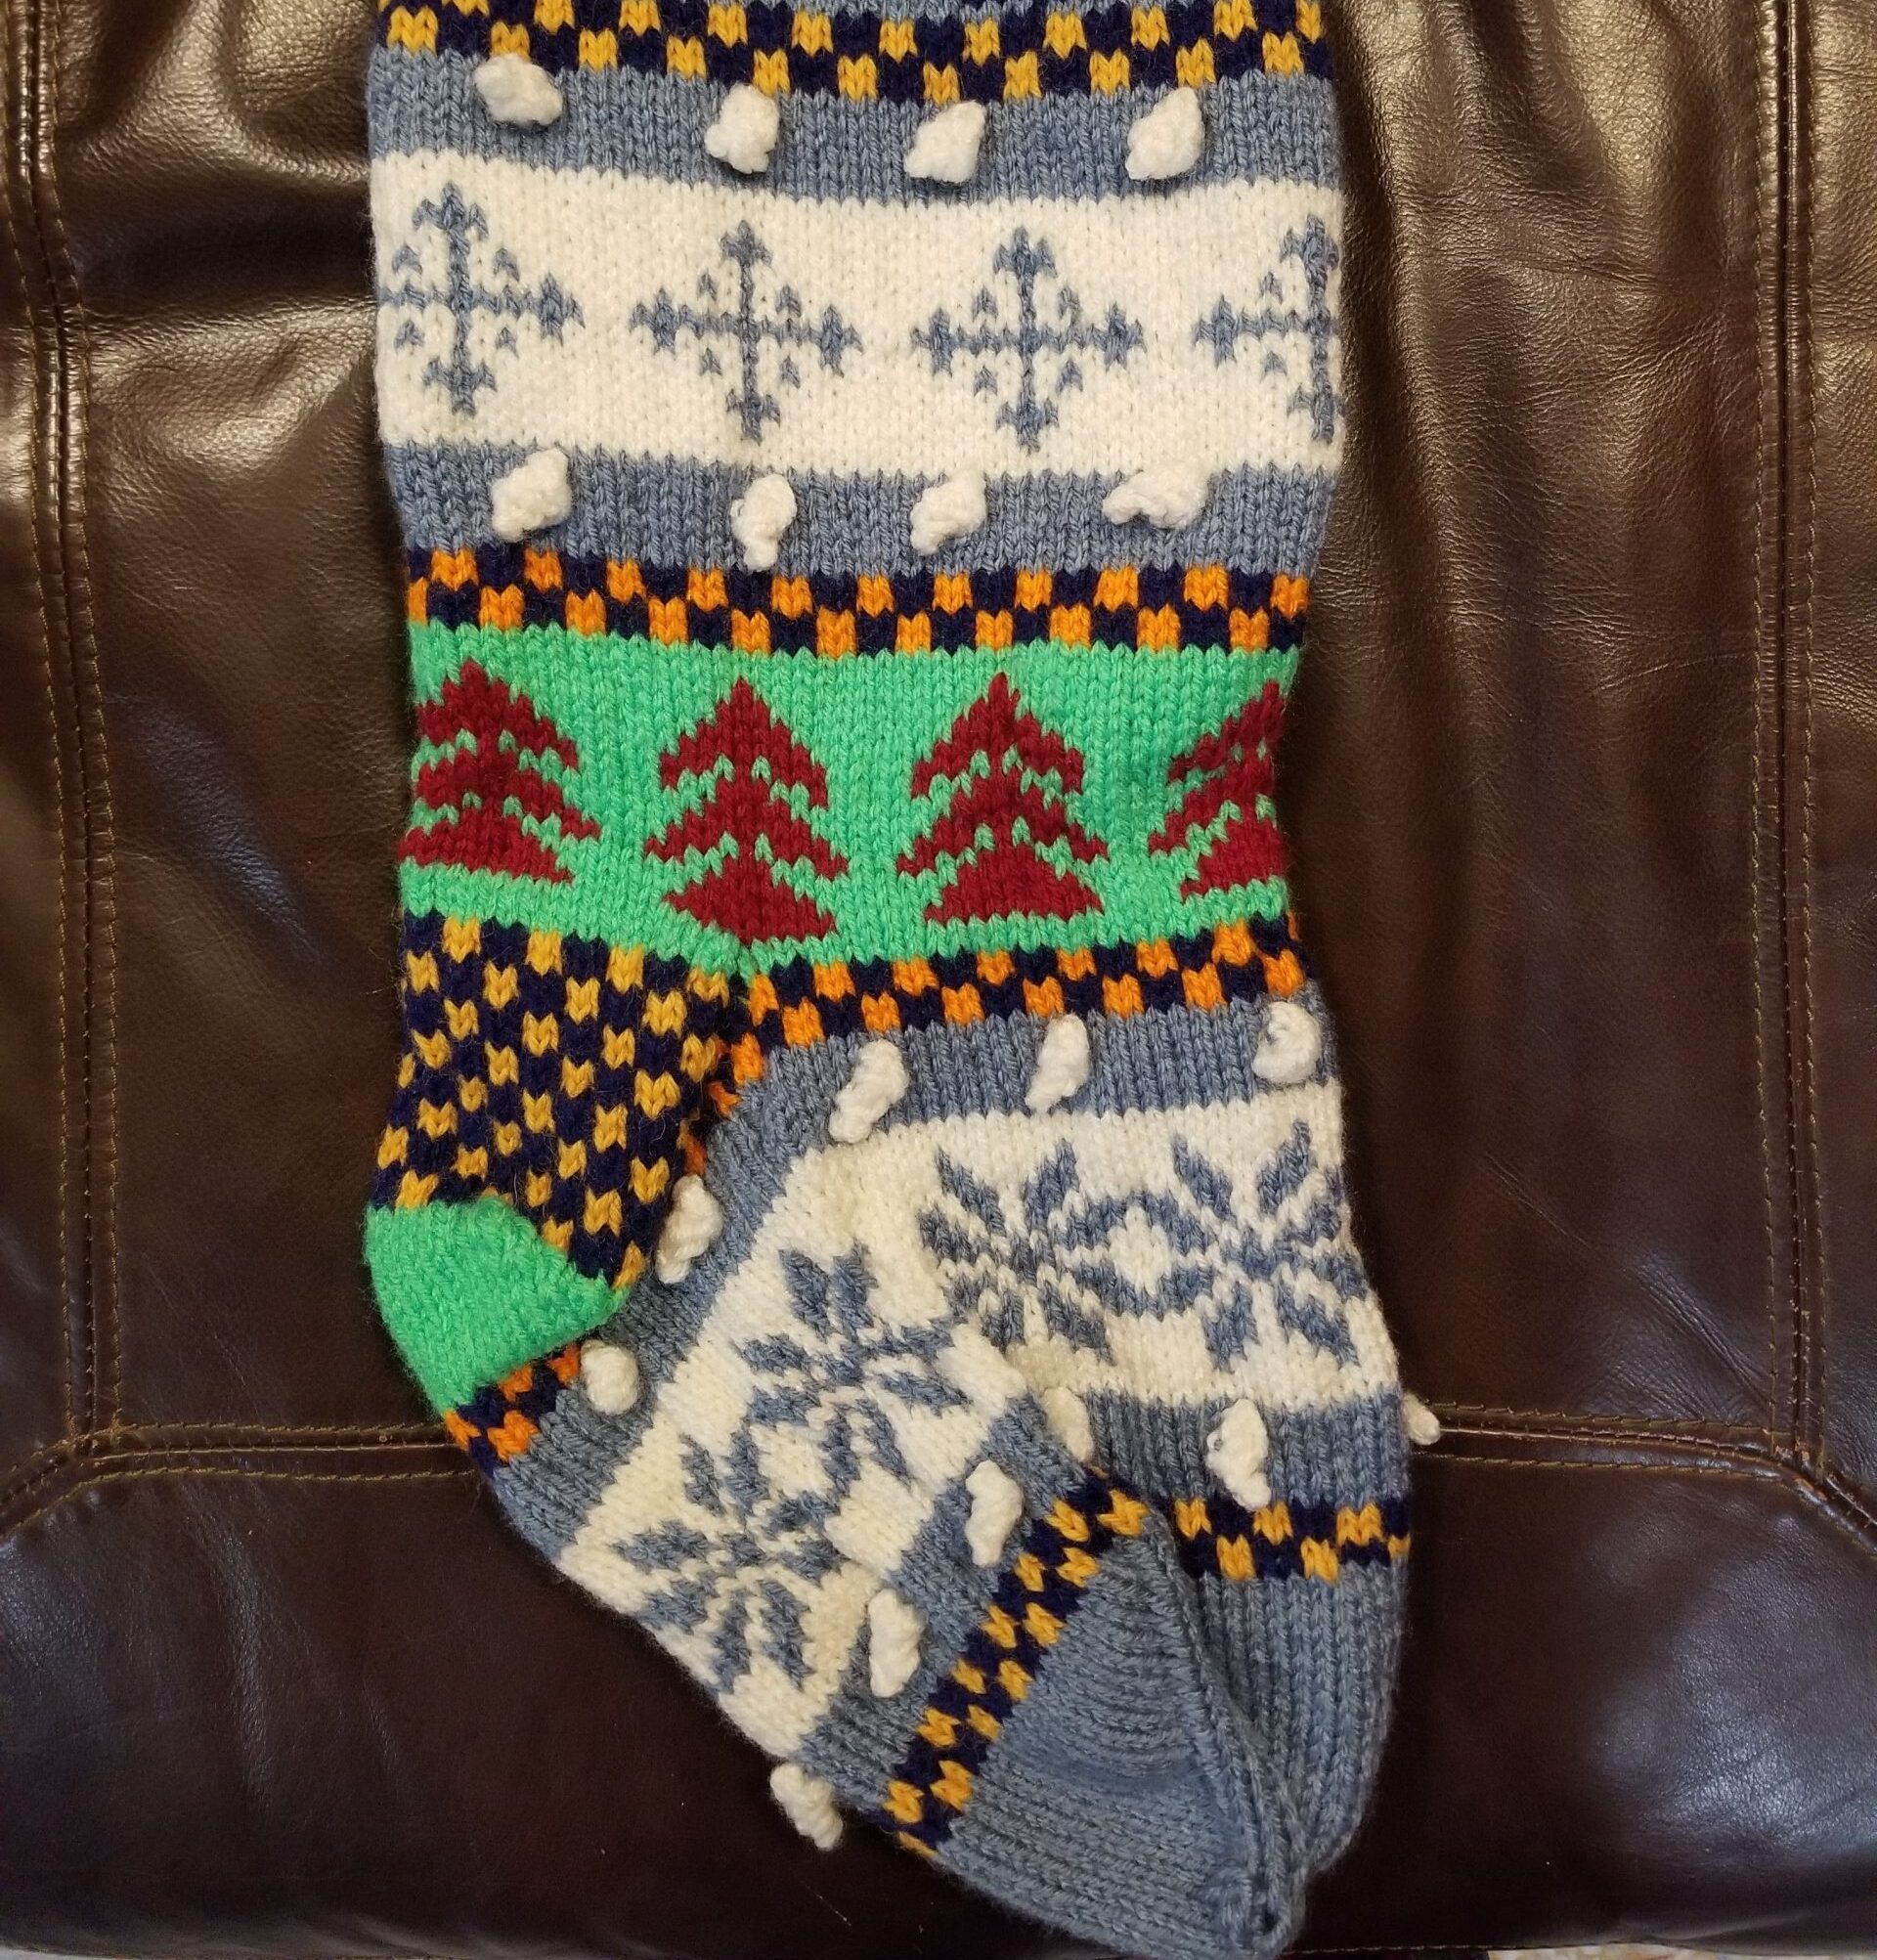
Here is how to make knitted Christmas stockings like the one shown here (scroll to the bottom of this page to see many other examples of stockings I’ve made – the possibilities are endless – it’s such a joy to see the delight this simple gift brings to each one). I’ve developed this pattern over the years and customize each Christmas stocking according to a number of factors (e.g. favorite colors, incorporate elements they might enjoy, suggestions from someone in the family, their national flag colors, etc.) Aditi started helping me design stockings in 2022 – the newer ones look awesome because of that 🙂 Creative collaboration is one of my favorite things! If you are not confident that you can do this, please find a more experienced knitter who can encourage you in person, and give it a try! There are many knitting groups around – someone will be sure to want to help you out!
Karen’s Knitted Christmas Stockings
(Please let me know if you use this and send a photo!)
Materials
You will need approximately 6-8 colors of yarn, depending on how many you choose in your design, as well as how complicated you’d like your pattern to be! I prefer using Red Heart yarn (medium #4), which is available from here in 110 colors (and available from many other suppliers). Thrift stores and yard sales are great sources of inexpensive yarn, along with crafters clubs (who even give away materials at times). You can use any yarn you are comfortable working with 🙂
I use five (5) double-pointed needles, size 4mm (US #6). I know they are sold in packs of four – you can technically do it with four needles, but for this size of stocking, it’s better to have five, and my pattern is written for five needles. You use four needles to hold the stitches and work with the “spare” needle for each “row” of stitches on the current needle. When you knit in the round like this, the stocking will be seamless.
The gauge is (approximately) 20 stitches / 28 rows to 10cm (4 inches).
Design
Before I begin gathering or purchasing yarn, I design the stocking by first deciding on which three designs I want to incorporate into the stocking. You can use any charted design or design your own using this program (coming soon). Scroll down for some of the charted designs I have used. After choosing three designs, I then decide on the colors and other details by filling in this template:
Main color (MC): __________
Name of person: ___________
- Color: (N)__________ on MC
Colors of Upper Checkers / Heel Checkers / Lower Checkers: (UC1)__________ and (UC2)__________
Color of Snowballs (SB): __________
Design A: __________ The stocking is 90 stitches wide at this point, so choose a repeating pattern that is 30, 15, 10, or 9 stitches wide. Ideally your design will be 10 to 20 rows high.
- Colors: (DA1)__________ on (DA2)__________
Design B: __________ The stocking is 90 stitches wide at this point, so choose a repeating pattern that is 30, 15, 10, or 9 stitches wide. Ideally your design will be 10 to 20 rows high.
- Colors: (DB1)__________ on (DB2)__________
Colors of Middle Checkers: (MC1)__________ and (MC2)__________
Color of Heel and Toe (HT): __________
Design C: __________ The stocking is 96 stitches wide at this point, so choose a repeating pattern that is 32, 24, 16, or 12 stitches wide. Ideally your design will be 10 to 20 rows high.
- Colors: (DC1)__________ on (DC2)__________
Once you’ve decided on all of these things, you’re ready to begin!
Instructions
The pattern is worked from the top down to the toe of the stocking.
Using MC, cast on 90 stitches (child-sized: 60 stitches), distributing them evenly on four needles (you will begin working with the fifth needle).
Cuff:
- K1, P1; repeat to end of round. Continue working in K1, P1 ribbing until work measures 2.5cm (1 inch).
- Knit one round.
Eyelets (through which you can thread ribbon later on):
- K4, slip 1, K1, psso, *K9 (child-sized: K8), slip 1, K1, psso; repeat from * to last 7 (child-sized: 5) stitches, K7 (child-sized: K5).
- K4, yo, *K10 (child-sized: K9), yo; repeat from * to last 8 (child-sized: 6) stitches, K8 (child-sized: K6).
- Knit one round.
Upper Checkers:
- K2 in UC1, K2 in UC2; repeat until end of round.
- K2 in UC1, K2 in UC2; repeat until end of round.
- K2 in UC2, K2 in UC1; repeat until end of round.
- K2 in UC2, K2 in UC1; repeat until end of round.
Name:
- Let’s use some simple mathematics here to get the placement the way you’d like it, or you can begin wherever you feel comfortable – it’s all good! Count the number of letters in the name and call that “x”. You will need 6x-1 stitches in which to work the name. Keep in mind that you have 90 stitches (child-sized: 60 stitches) total in one round, so calculate where you would like the name to begin (I begin with the exact center of the name, unless it’s a long name – in my most recent designs, I make it visible on both sides when the stocking is flat, unless the name is 8 or more letters long).
- Using MC, knit 1 row.
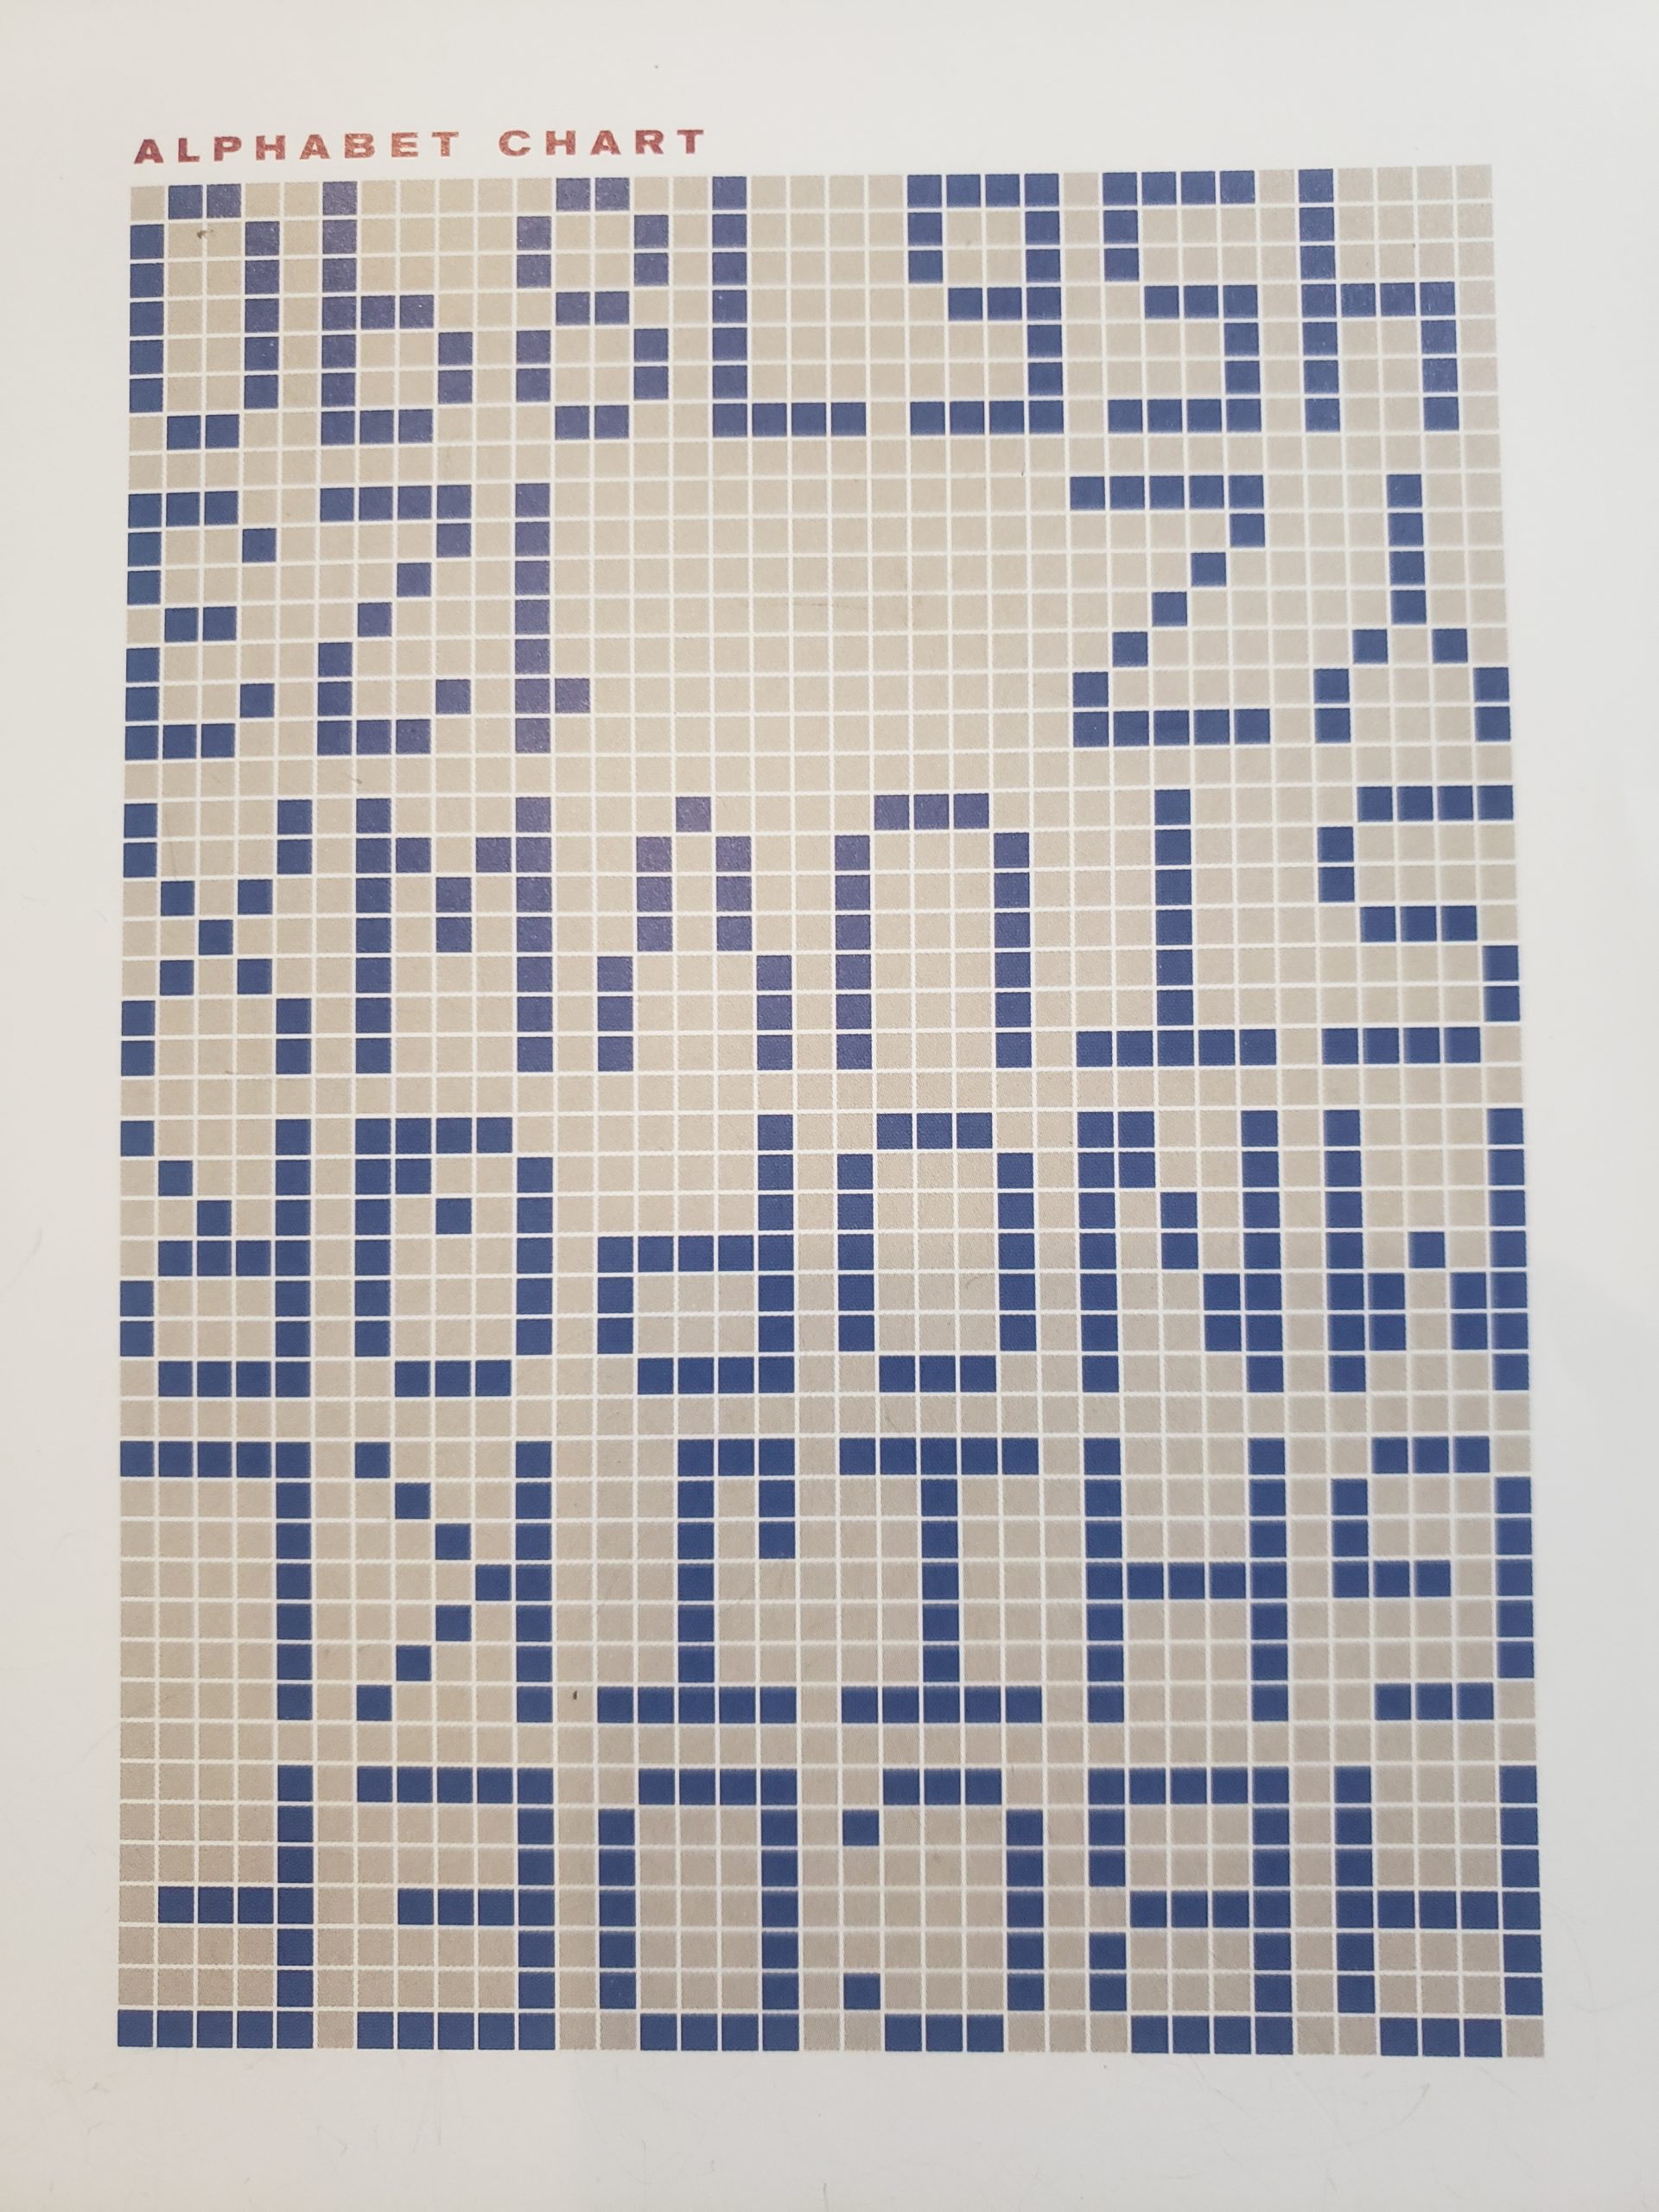
- Using N and MC, work a name in 7 rounds using the alphabet chart provided here (or choose an alphabet chart you like), working each letter from right to left and bottom to top. Each letter is 5 stitches wide, and you will knit the row primarily in MC, knitting the letters in N (and leaving one MC “space” between letters).
- Using MC, knit 1 row.
Work another Upper Checkers section.
Snowball:
- Rounds 1, 2, 3: Using MC, knit entire round.
- Round 4: Using MC, K5, then using SB make 1 snowball bobble, then K4; repeat from * to end.
- Rounds 5, 6: Using MC, knit entire round.
- (How to make snowball bobble – knit 4 stitches into a single stitch by knitting into the front, back, front, back before dropping it off the needle. Then turn and P4 those 4 stitches. Turn and K4. Turn and P4. Turn, then use a small crochet hook to pull the yarn through all 4 stitches and place on the right needle. Use the left needle to pick up a stitch from behind the bobble and place on the left needle. Knit that stitch, then pass the bobble stitch over it and pull snugly.)
Work Design A.
Work another Snowball section.
Middle Checkers:
- K2 in MC1, K2 in MC2; repeat until end of round.
- K2 in MC1, K2 in MC2; repeat until end of round.
- K2 in MC2, K2 in MC1; repeat until end of round.
- K2 in MC2, K2 in MC1; repeat until end of round.
Work Design B.
Heel Checkers:
- Using HT, K45 (child-sized: K30) (carrying along UC1 and UC2, if applicable). Slide the remaining stitches to a stitch holder. (As you do the heel checkers, be sure to carry HT along.)
- Turn. P1 with UC1, * P2 with UC2, P2 with UC1; repeat from * to end.
- Turn. * K2 with UC1, K2 with UC2; repeat from * to last stitch, K1 with UC1.
- Turn. P1 with UC2, * P2 with UC1, P2 with UC2; repeat from * to end.
- Turn. * K2 with UC2, K2 with UC1; repeat from * to last stitch, K1 with UC2.
- Repeat those last 4 rows three more times.
Heel:
- Using HT, P29 (child-sized: P19), P2tog, P1. Turn (13 stitches remain unworked on needle).
- slip 1, K14 (child-sized: K9), ssk, K1. Turn (13 stitches remain unworked on needle).
- slip 1, P14 (child-sized: P9), P2tog, P1. Turn (12 stitches remain unworked on needle).
- Repeat those last two rows, continuing until you have worked all of the stitches, ending with a knit row. You should have 17 stitches (child-sized: 12 stitches) now.
Begin the Foot:
- As you do the following steps, distribute your stitches so you don’t have too many on any one needle (or else they will fall off). You will redistribute them shortly, so don’t worry too much about the initial distribution.
- Using HT, pick up and knit 20 stitches (child-sized: 13 stitches) from the side of the heel flap.
- Knit the 45 stitches (child-sized: 30 stitches) from the stitch holder.
- Pick up and knit 20 stitches (child-sized: 13 stitches) from the other side of the heel flap.
Now distribute your stitches as follows, with Needle 1 beginning with the 8 leftmost stitches (child-sized: 6 leftmost stitches) of the heel (as you are facing them):
- Needle 1: 28 stitches (child-sized: 19 stitches)
- Needle 2: 23 stitches (child-sized: 15 stitches)
- Needle 3: 23 stitches (child-sized: 15 stitches)
- Needle 4: 28 stitches (child-sized: 19 stitches)
You now have a total of 102 stitches (child-sized: 68 stitches).
Work another Middle Checkers section, doing a simultaneous decrease on the 2nd and 4th rows as follows:
- Needle 1: knit all stitches
- Needle 2: K1, K2tog, knit to end of needle
- Needle 3: knit to last 3 stitches, ssk, K1
- Needle 4: knit all stitches
Work another Snowball section, doing a simultaneous decrease on the 2nd row as follows (do not do this decrease for child-sized), and do round 4 as given below:
- Needle 1: knit all stitches
- Needle 2: K1, K2tog, knit to end of needle
- Needle 3: knit to last 3 stitches, ssk, K1
- Needle 4: knit all stitches
- Round 4: Using MC, K3, *K5, then using SB make 1 snowball bobble, then K4; repeat from * to end, K3.
You now have a total of 96 stitches (child-sized: 64 stitches), distributed as follows:
- Needle 1: 28 stitches
- Needle 2: 20 stitches
- Needle 3: 20 stitches
- Needle 4: 28 stitches
Work Design C.
Work another Snowball section, except do round 4 as follows:
- Round 4: Using MC, K3, *K5, then using SB make 1 snowball bobble, then K4; repeat from * to end, K3.
Work another Upper Checkers section.
Toe:
- Using HT, knit two rounds.
- Repeat this until 20 stitches (child-sized: 12 stitches) remain:
- Needle 1: K1, K2tog, knit to last 3 stitches, ssk, K1
- Needle 2: K1, K2tog, knit to end of needle
- Needle 3: knit to last 3 stitches, ssk, K1
- Needle 4: K1, K2tog, knit to last 3 stitches, ssk, K1
- Slide the stitches onto 2 needles, with 10 stitches (child-sized: 6 stitches) on each, such that the ensuing seam will sit flat and look right when the stocking lays flat.
- Graft the toe seam using Kitchener Stitch (shown below).
- Turn the stocking inside out and sew in / tie off all the ends.
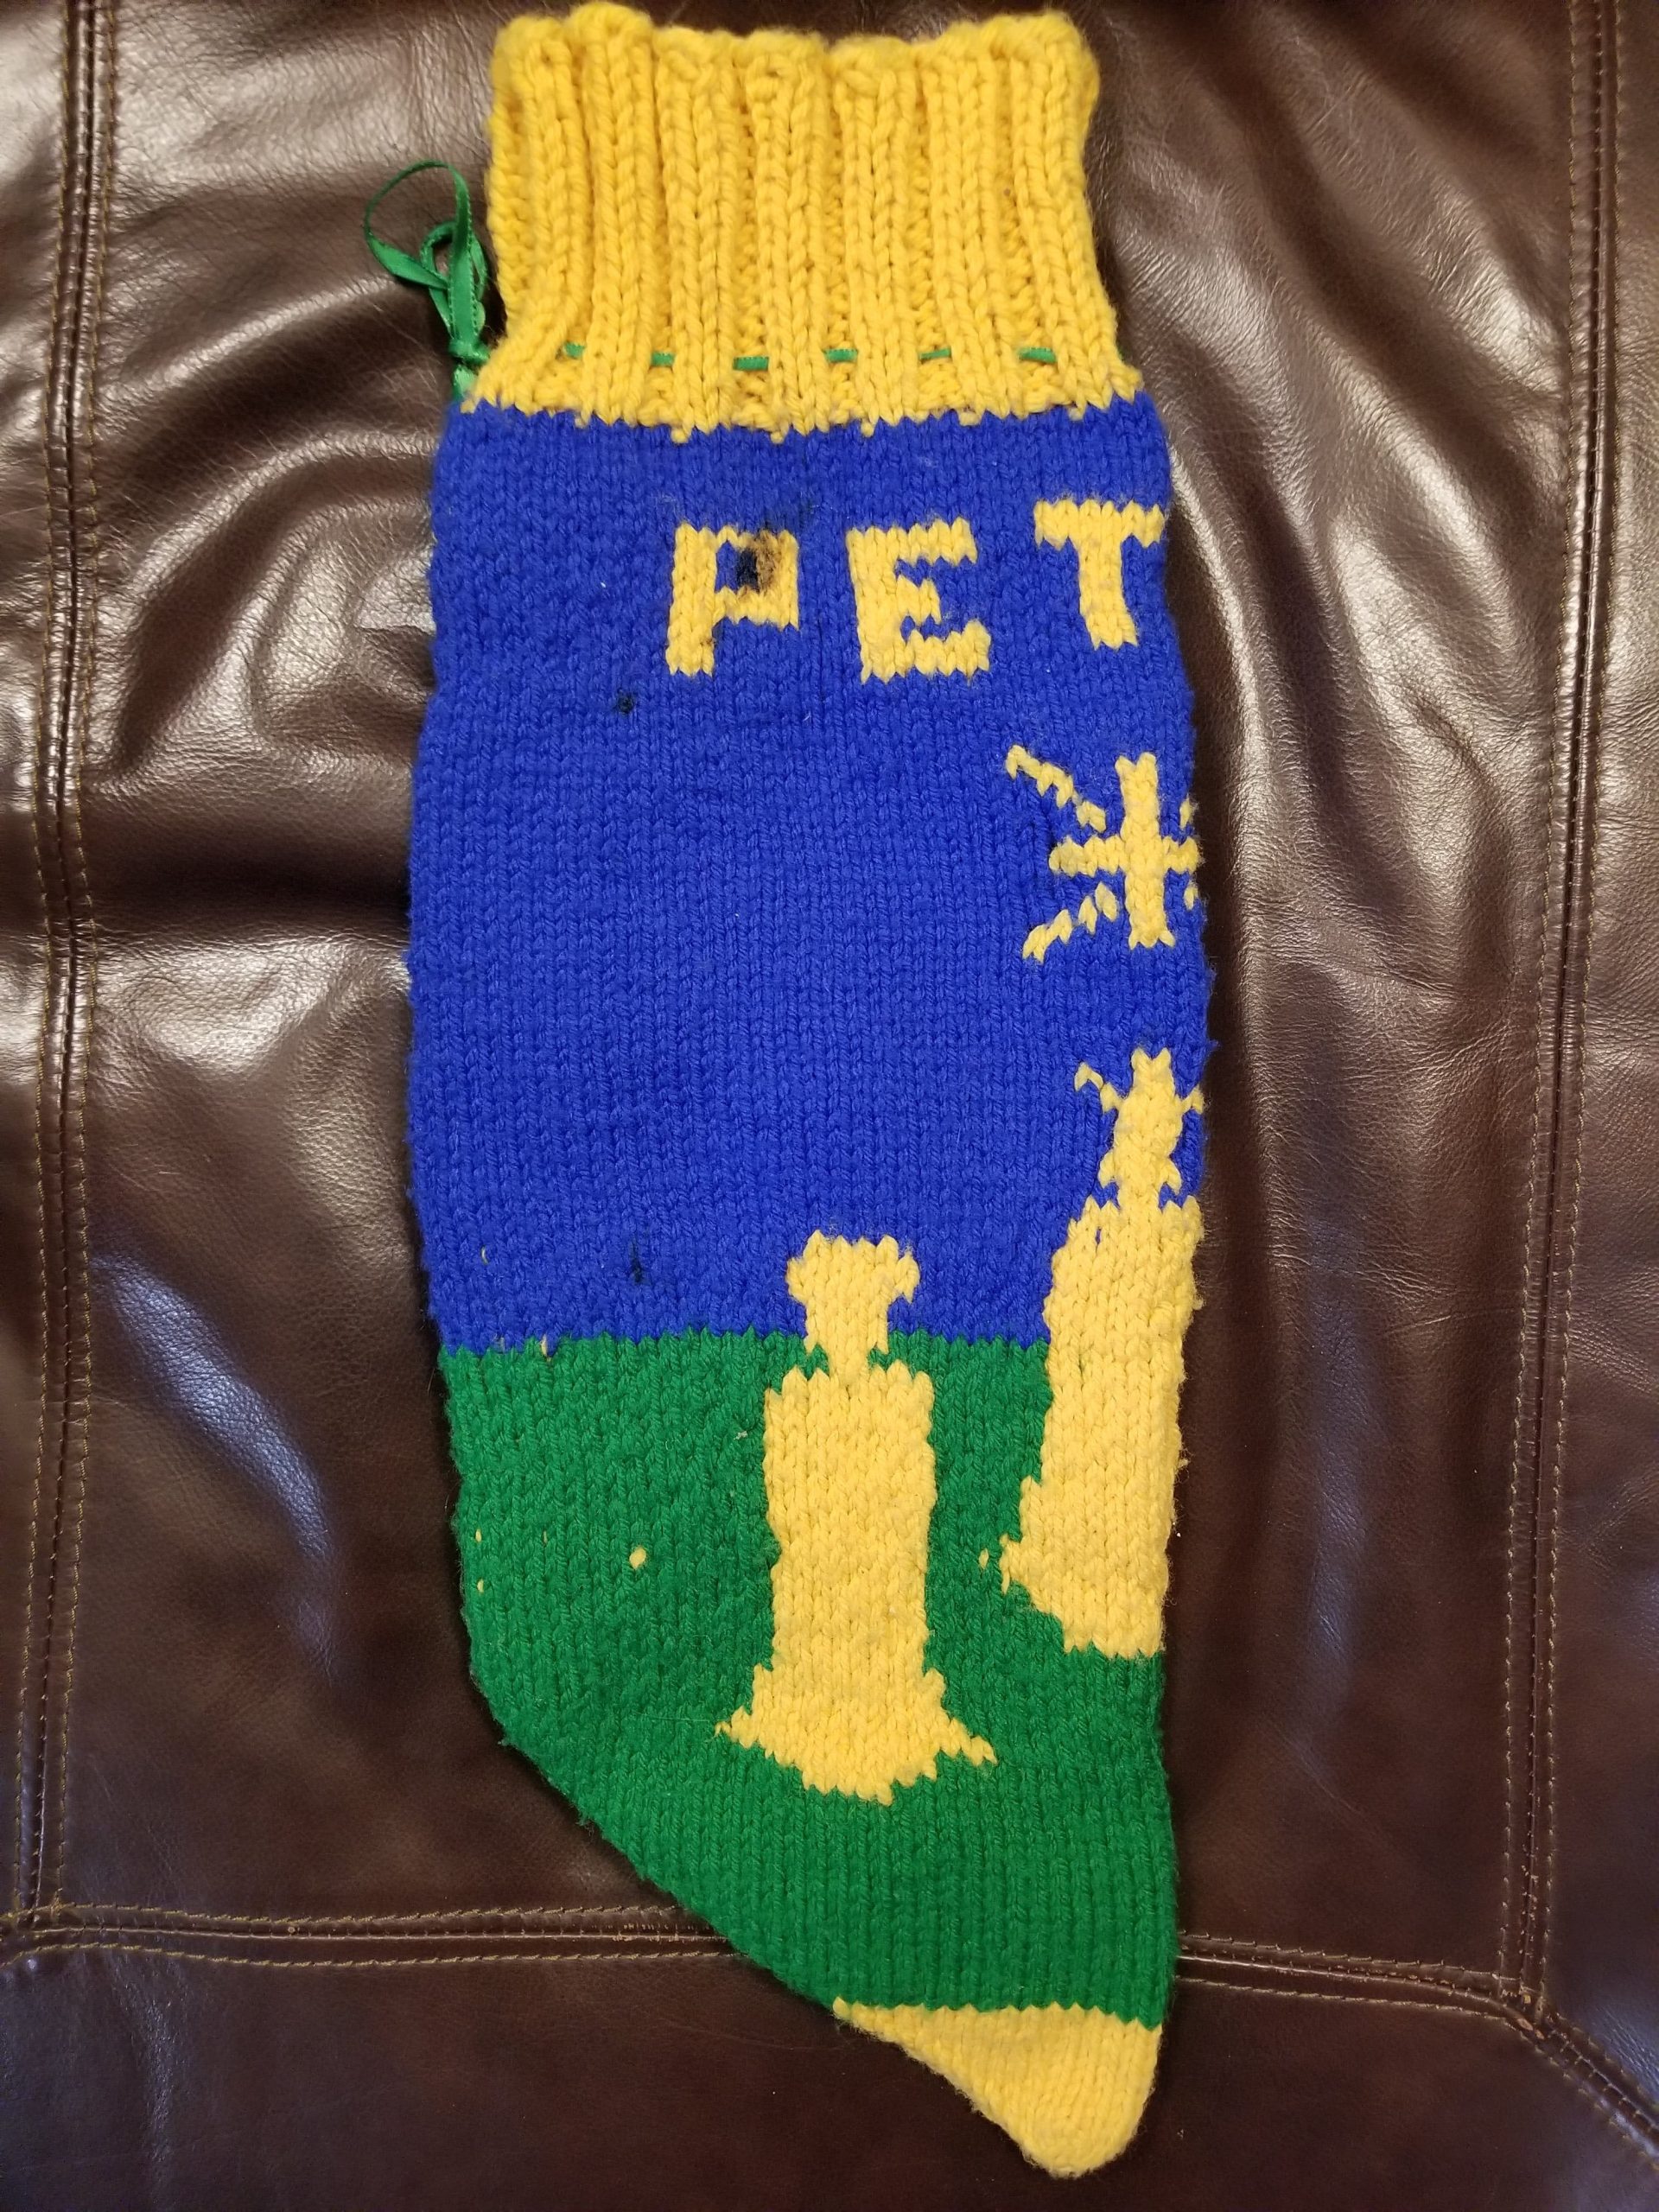
- Don’t forget to put a Christmas Orange in the bottom of each stocking, if desired (that’s our Sculley family tradition!)


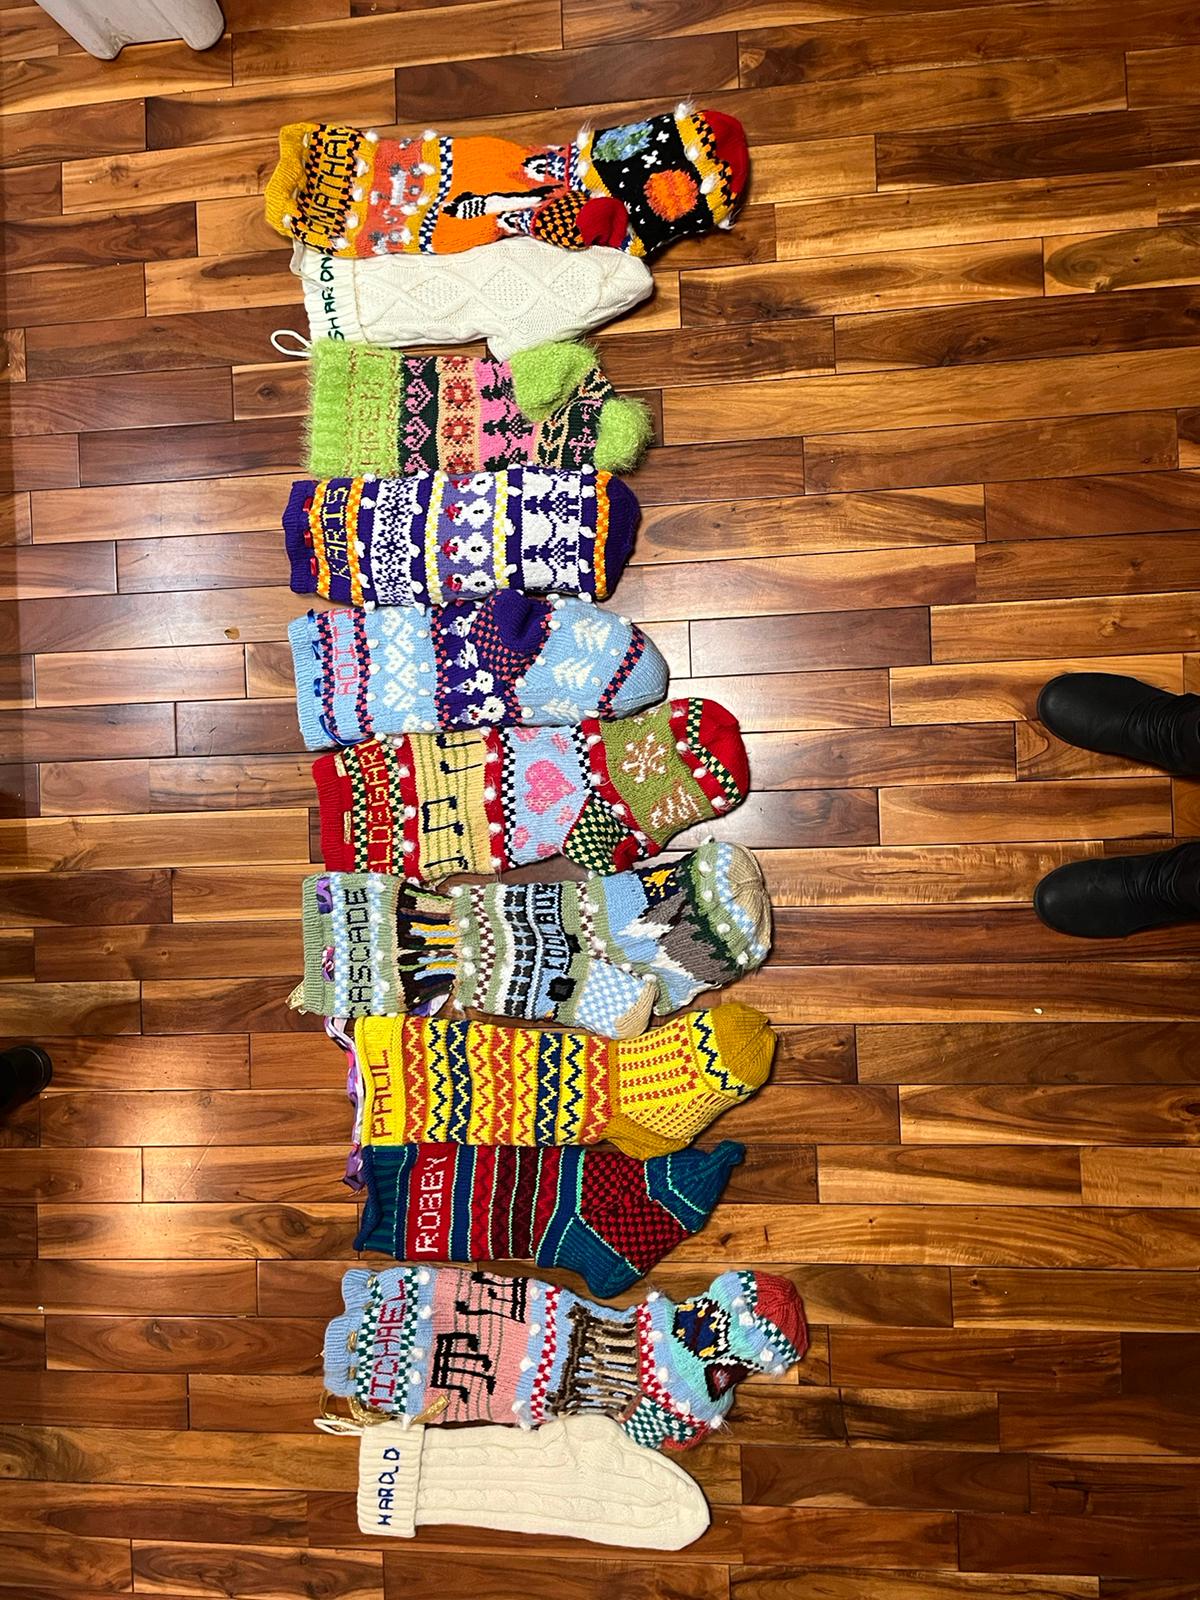
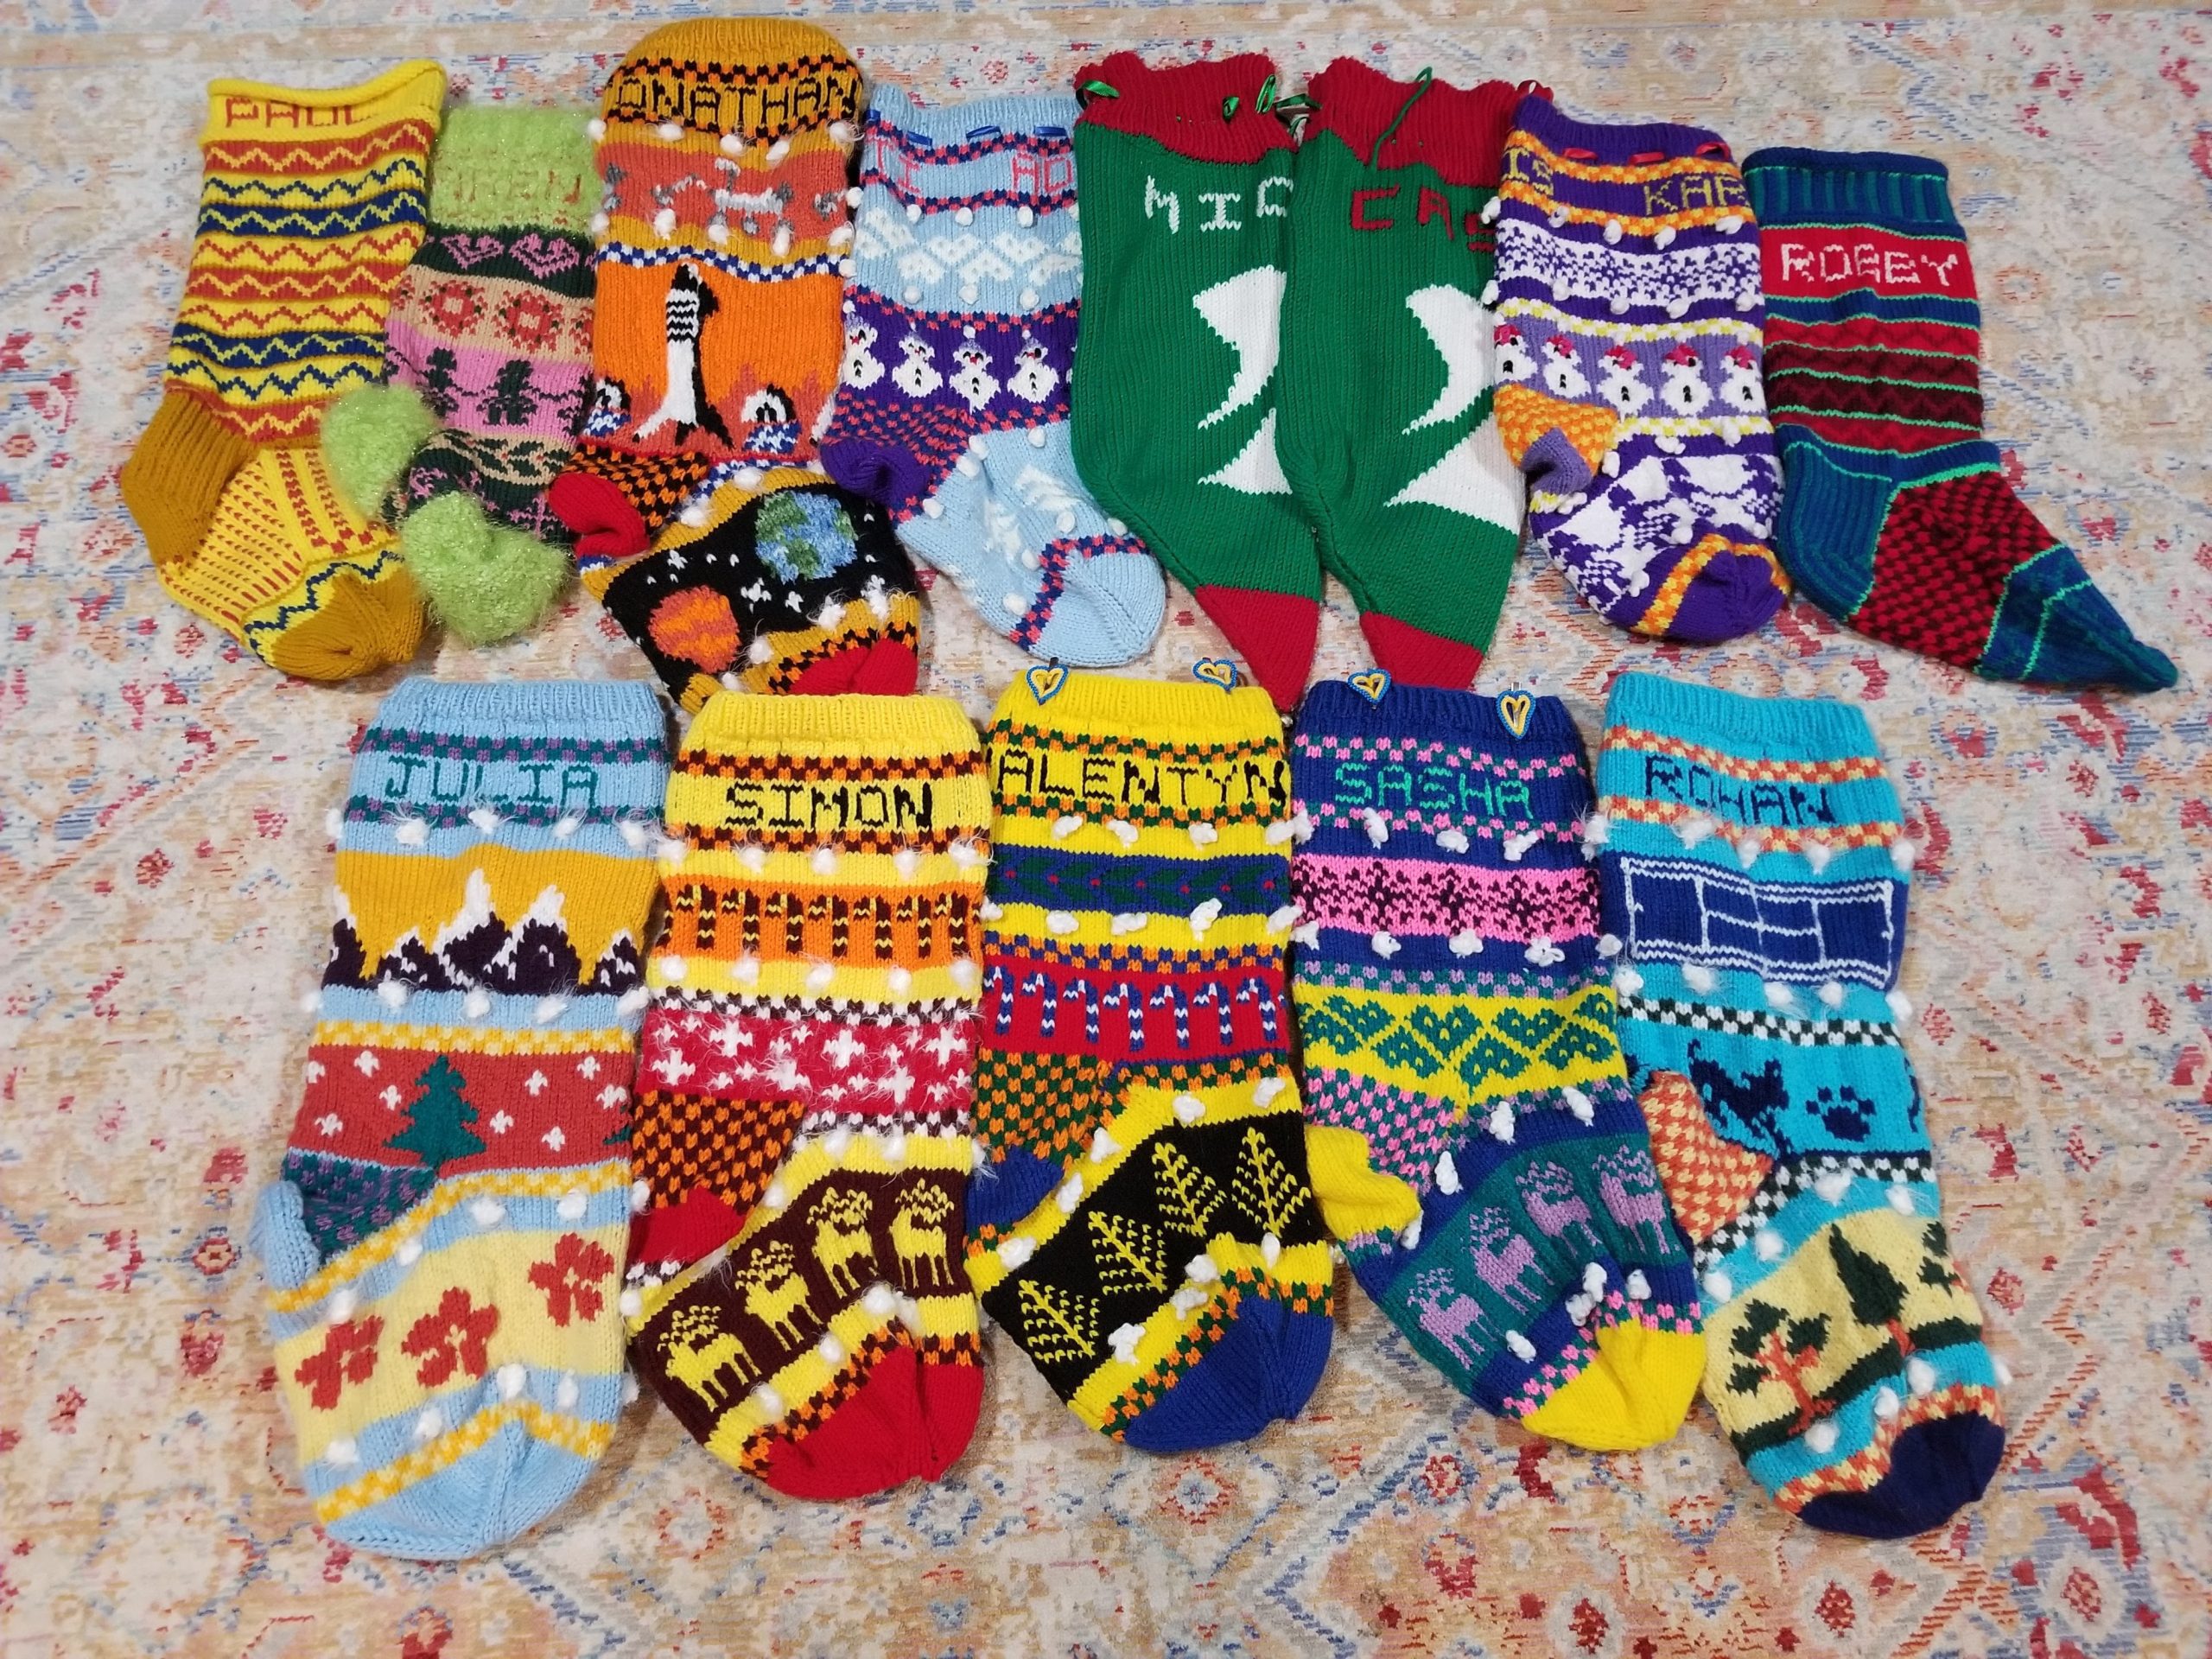
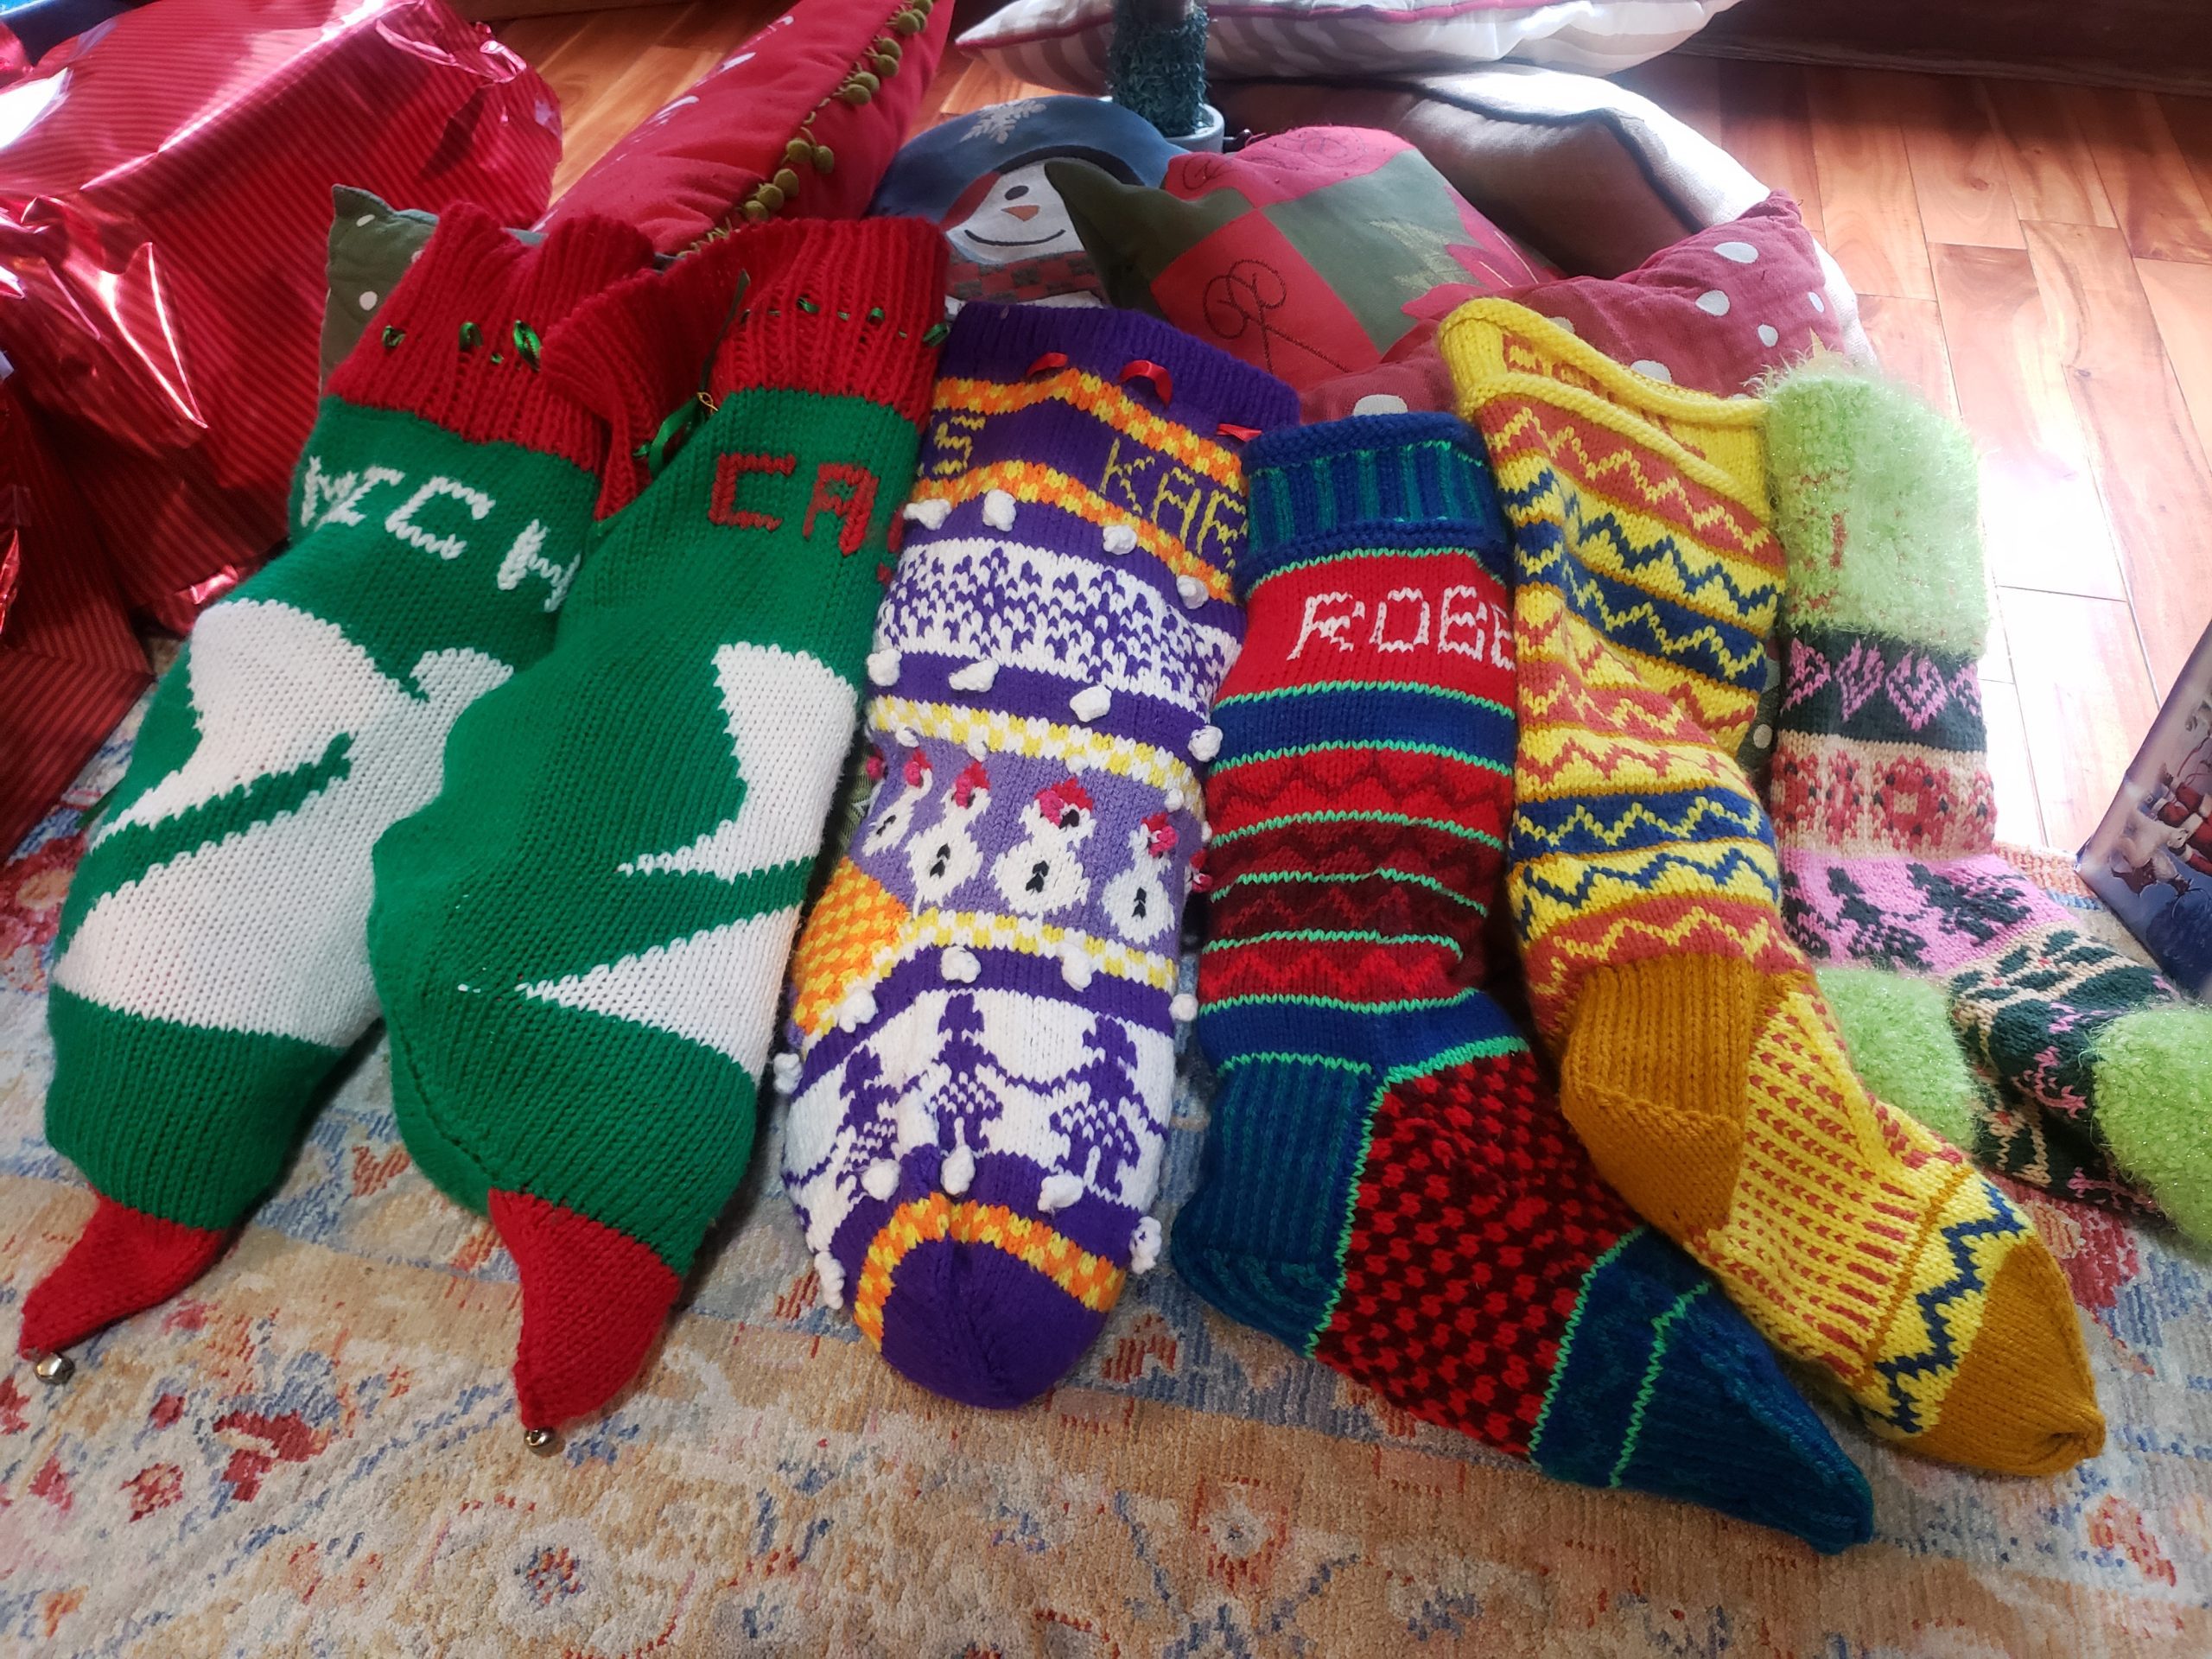
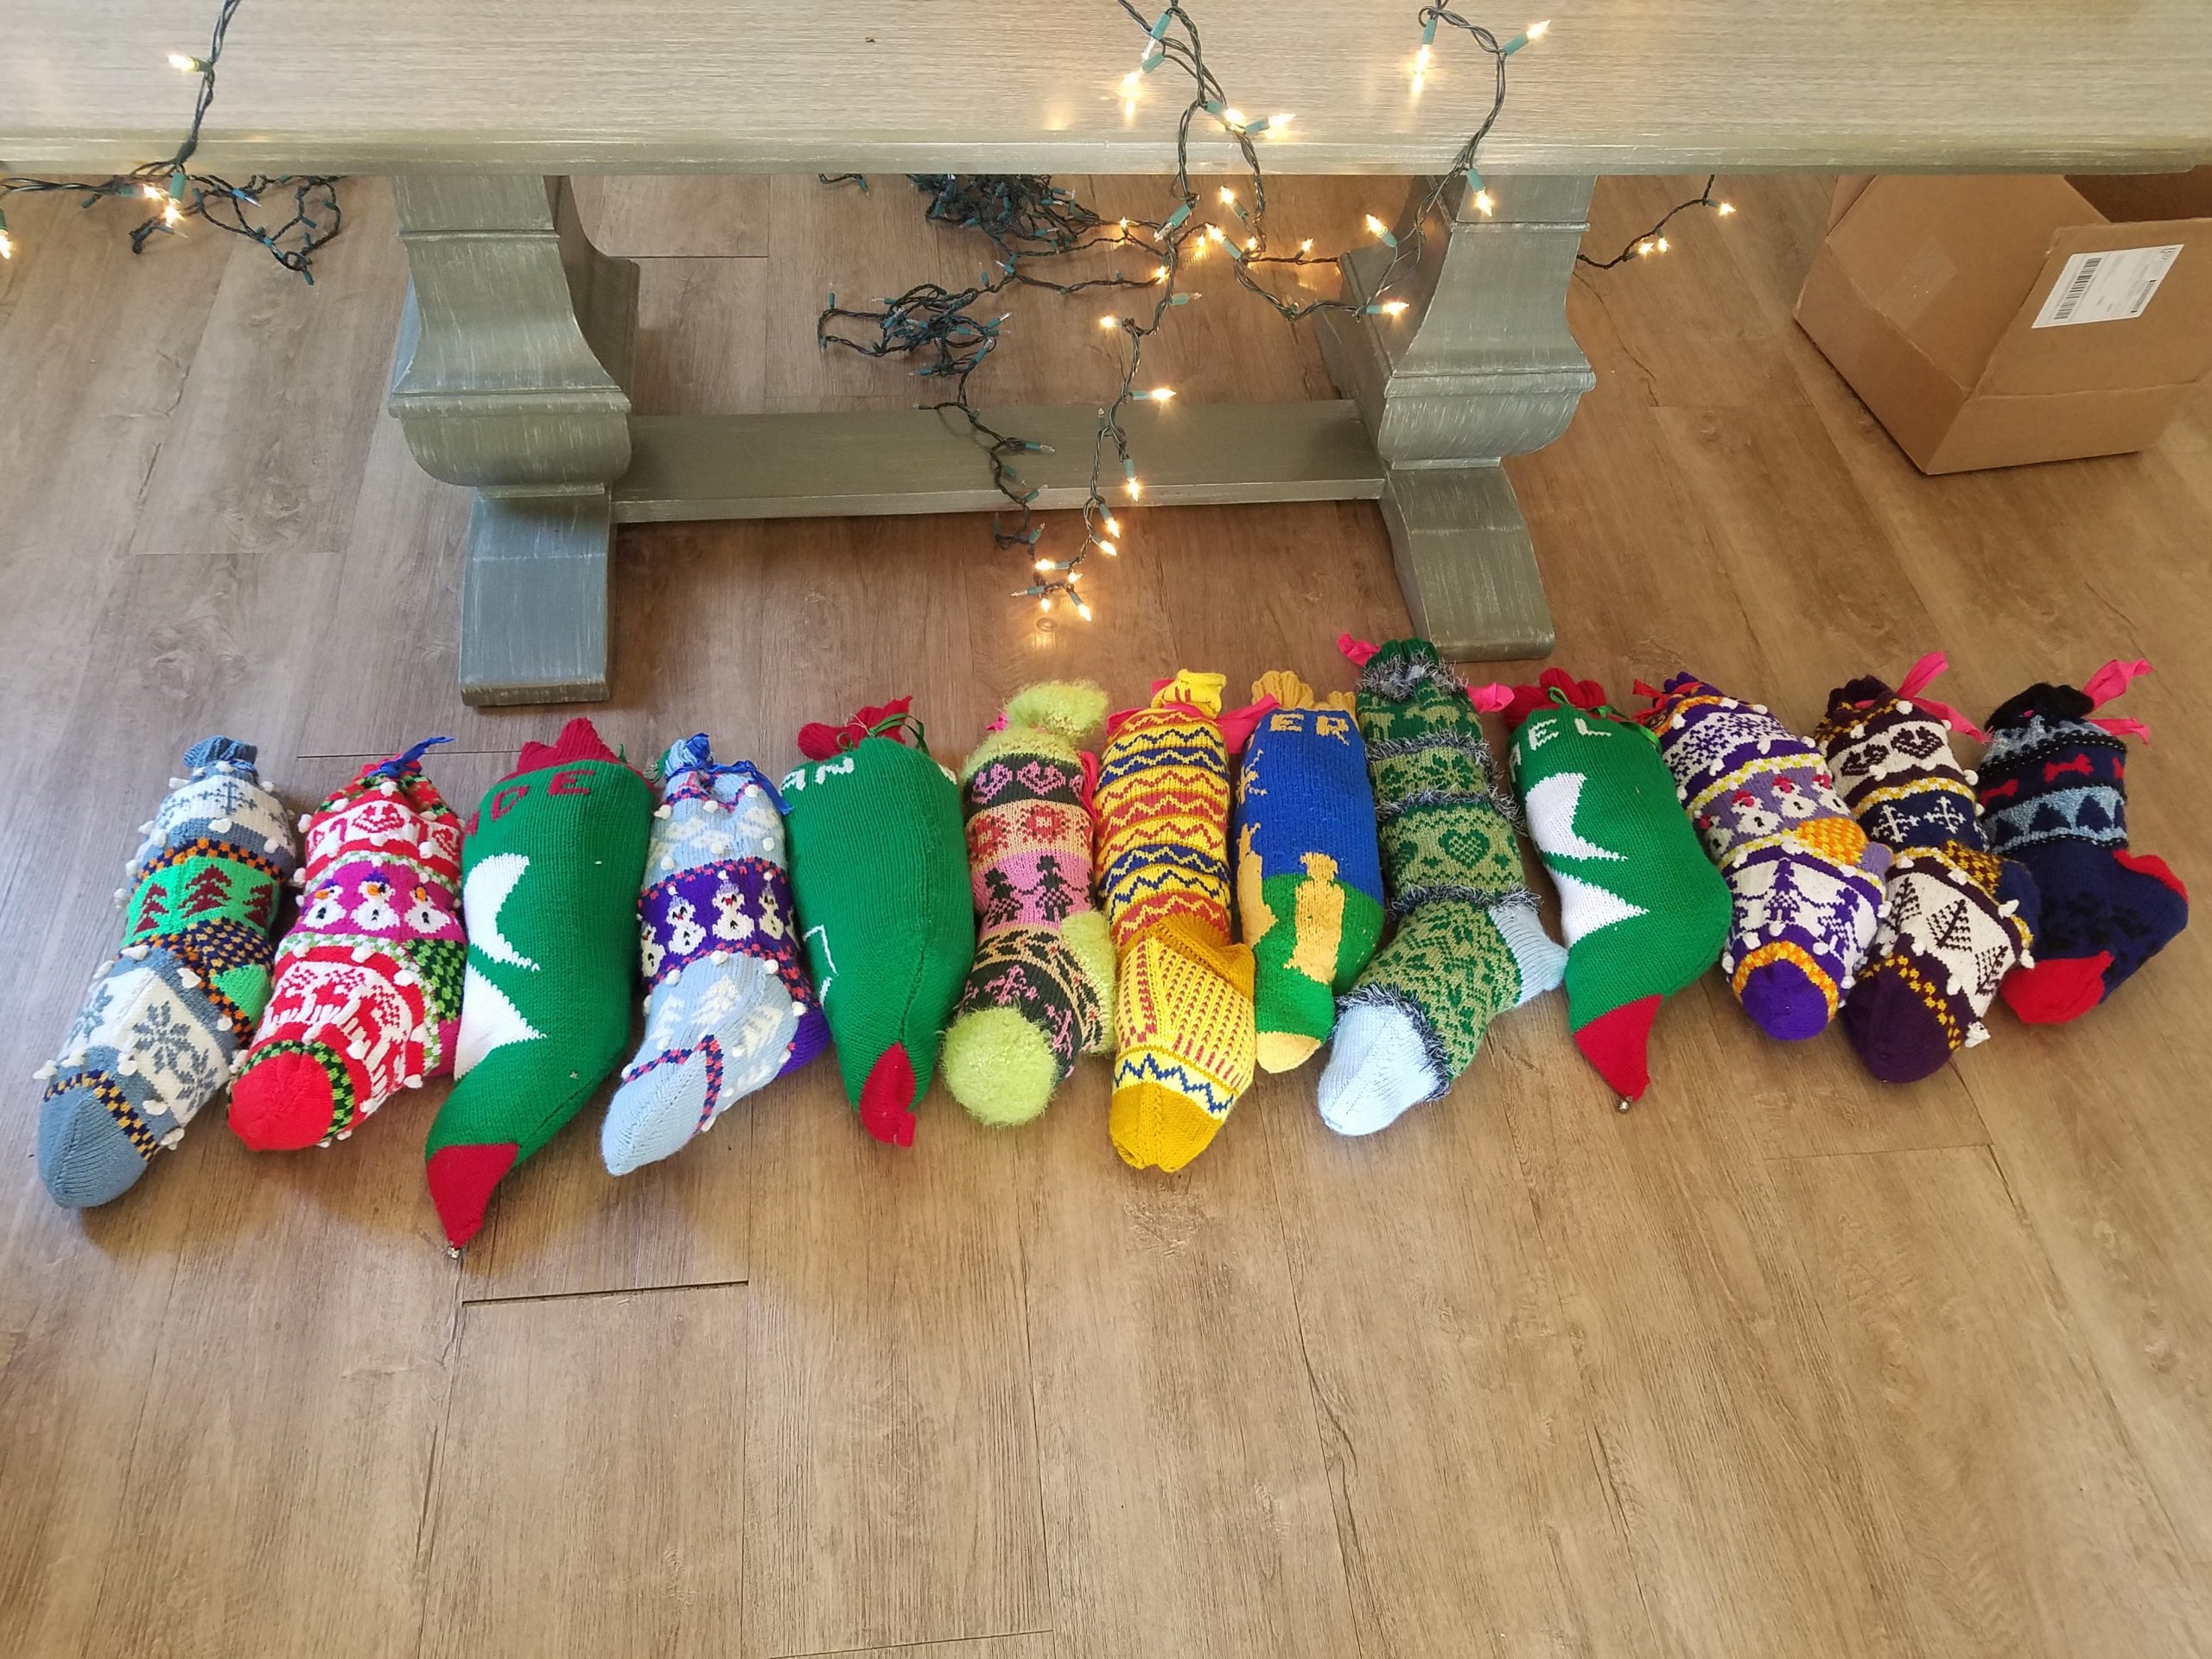
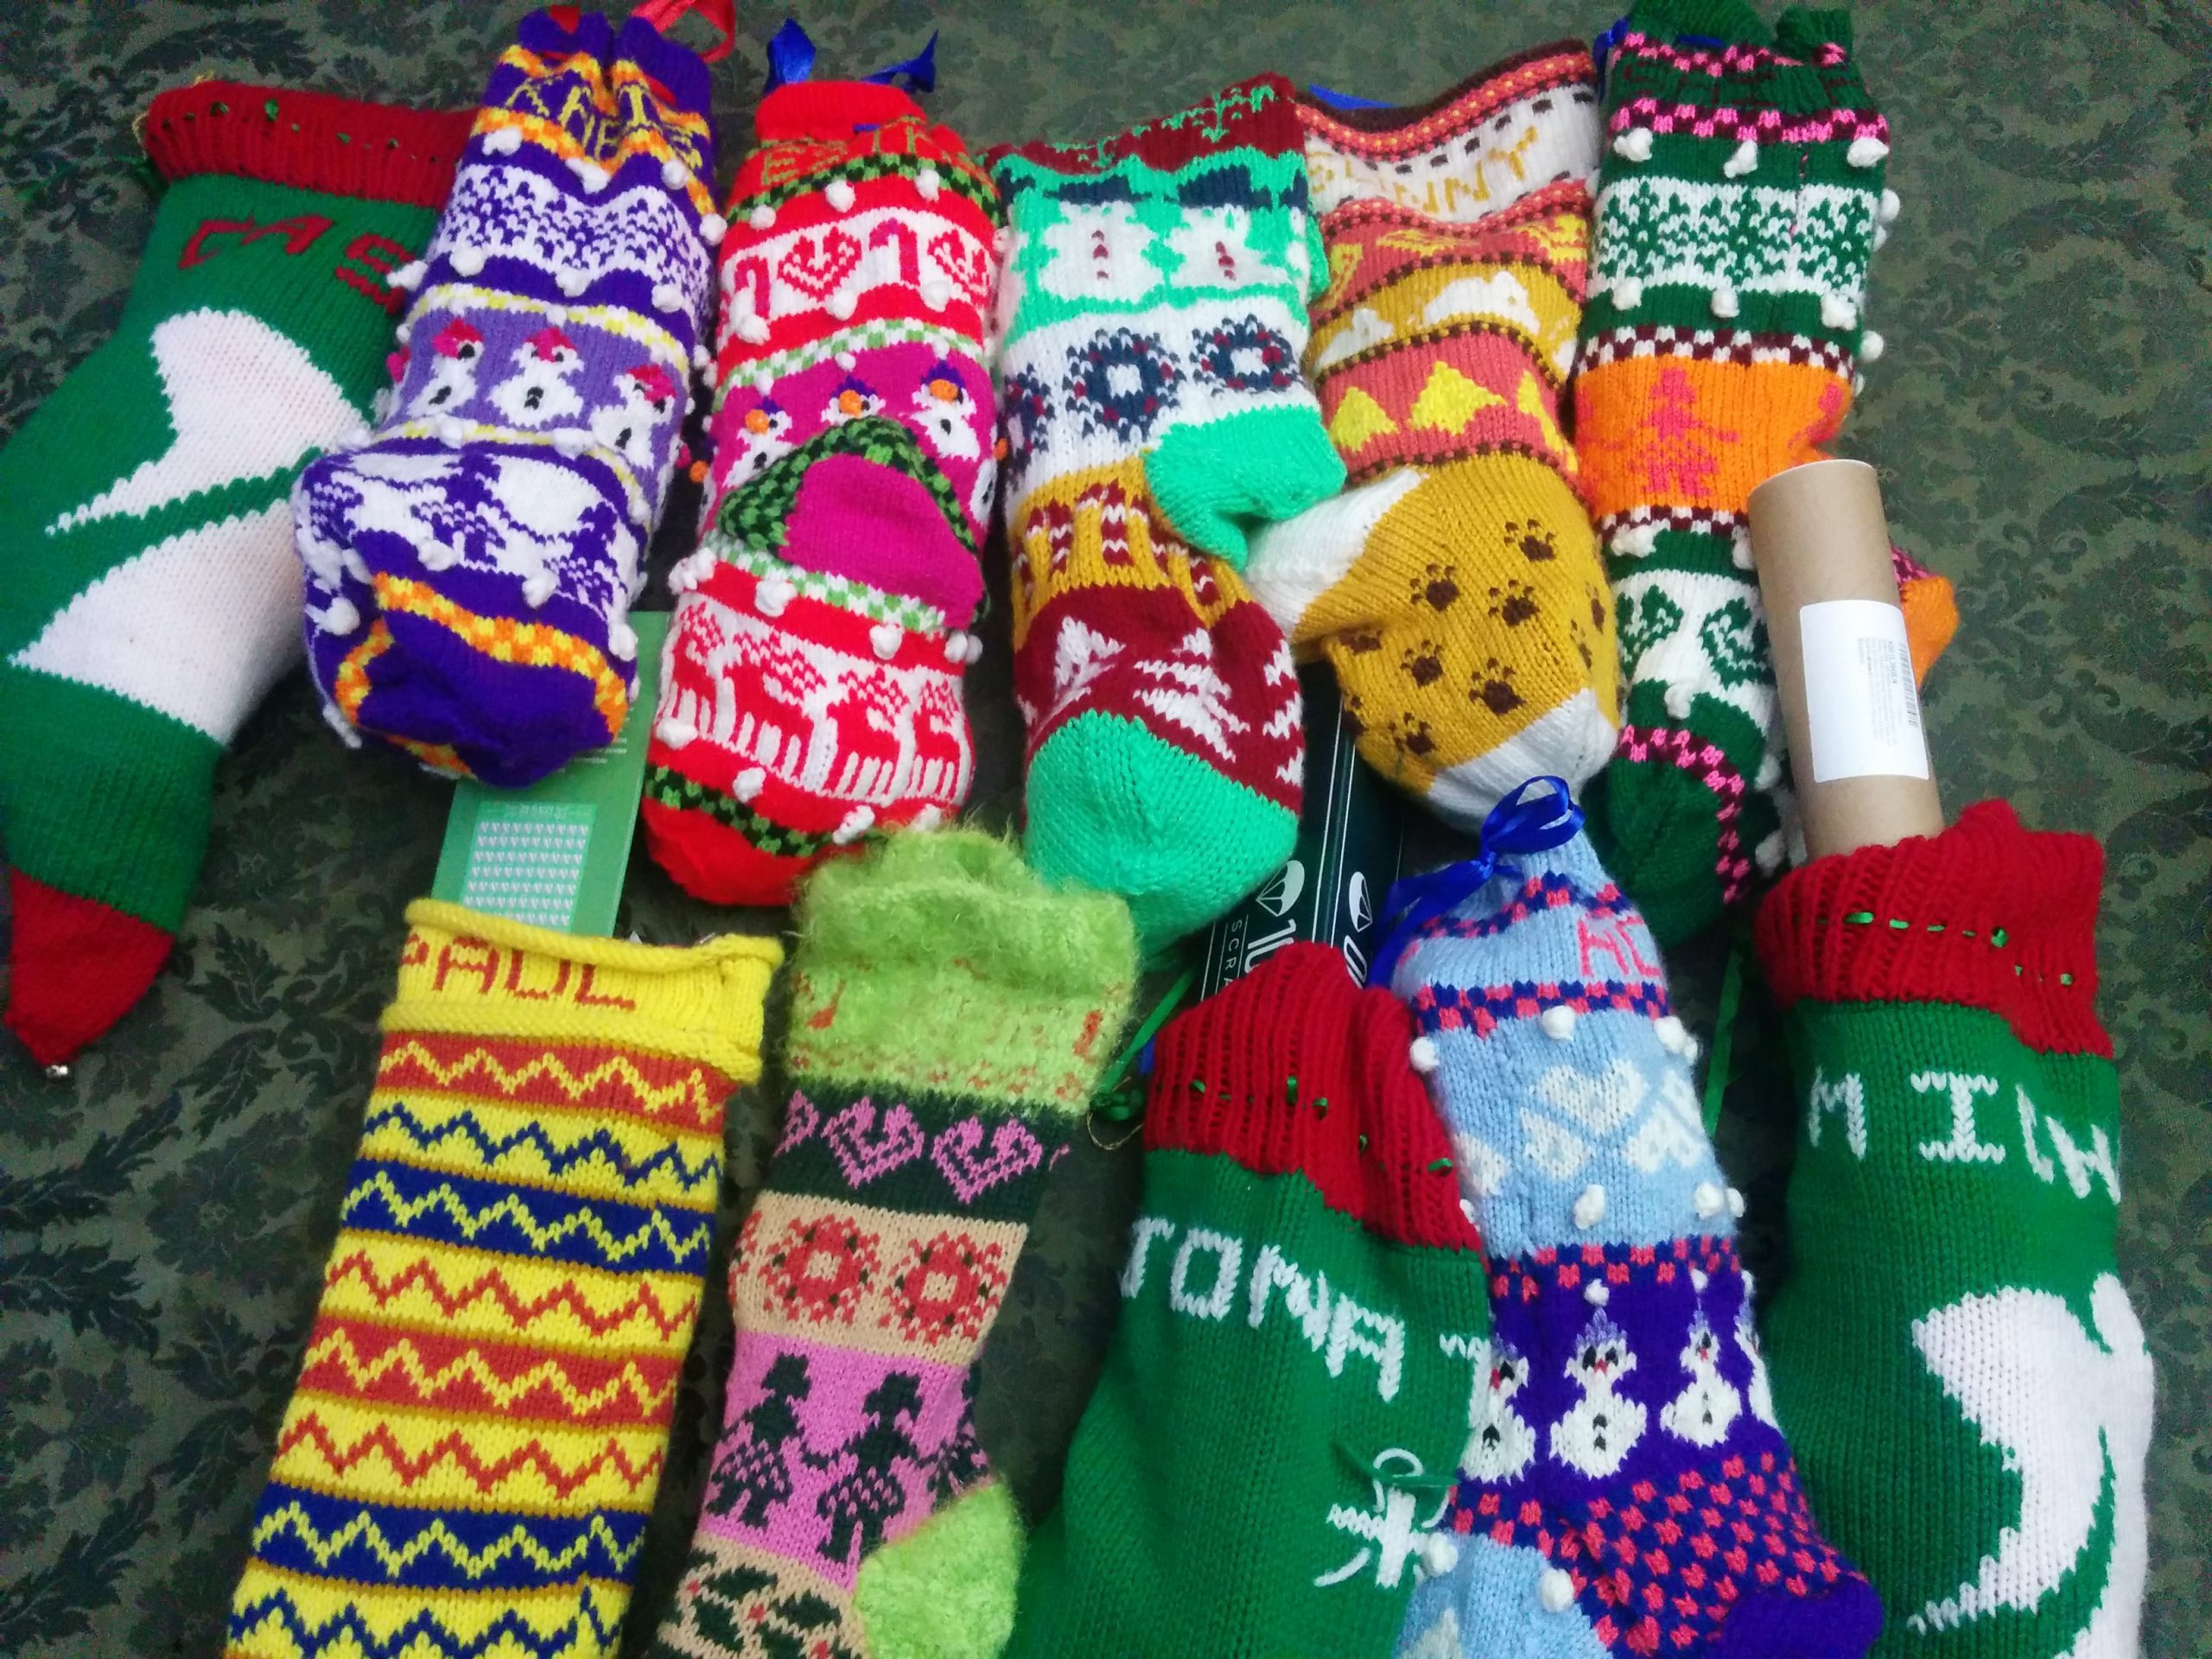
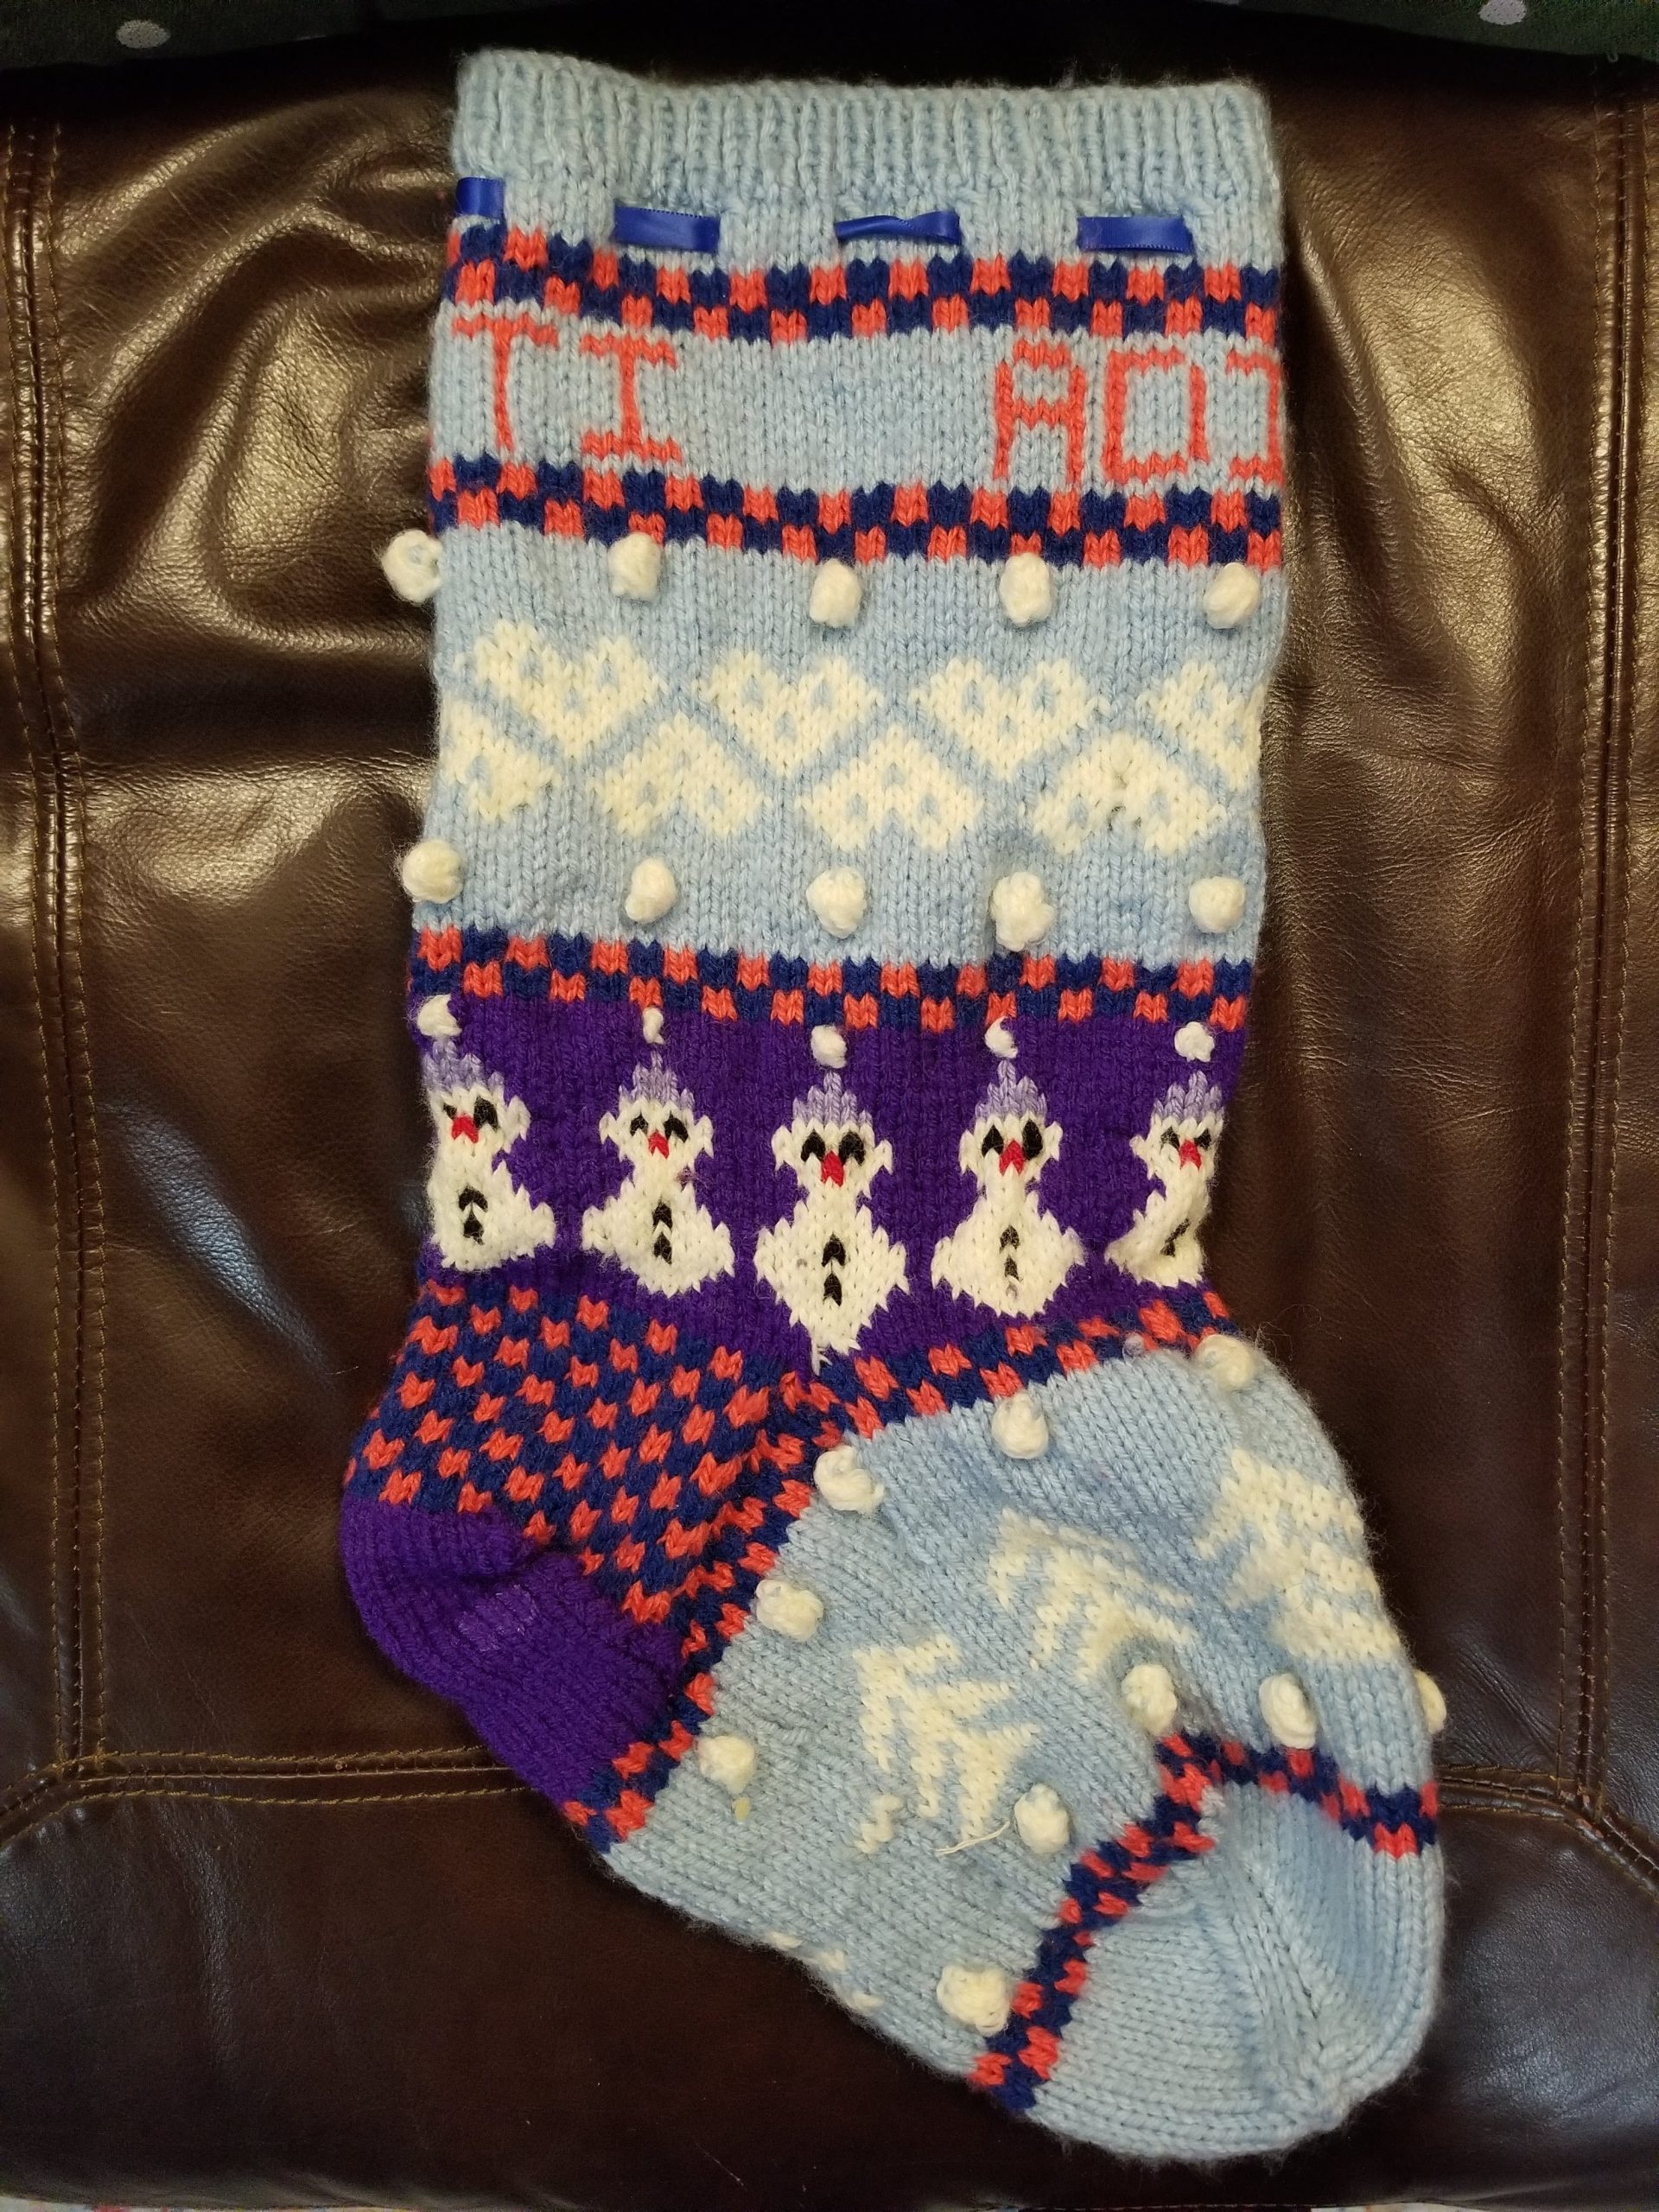
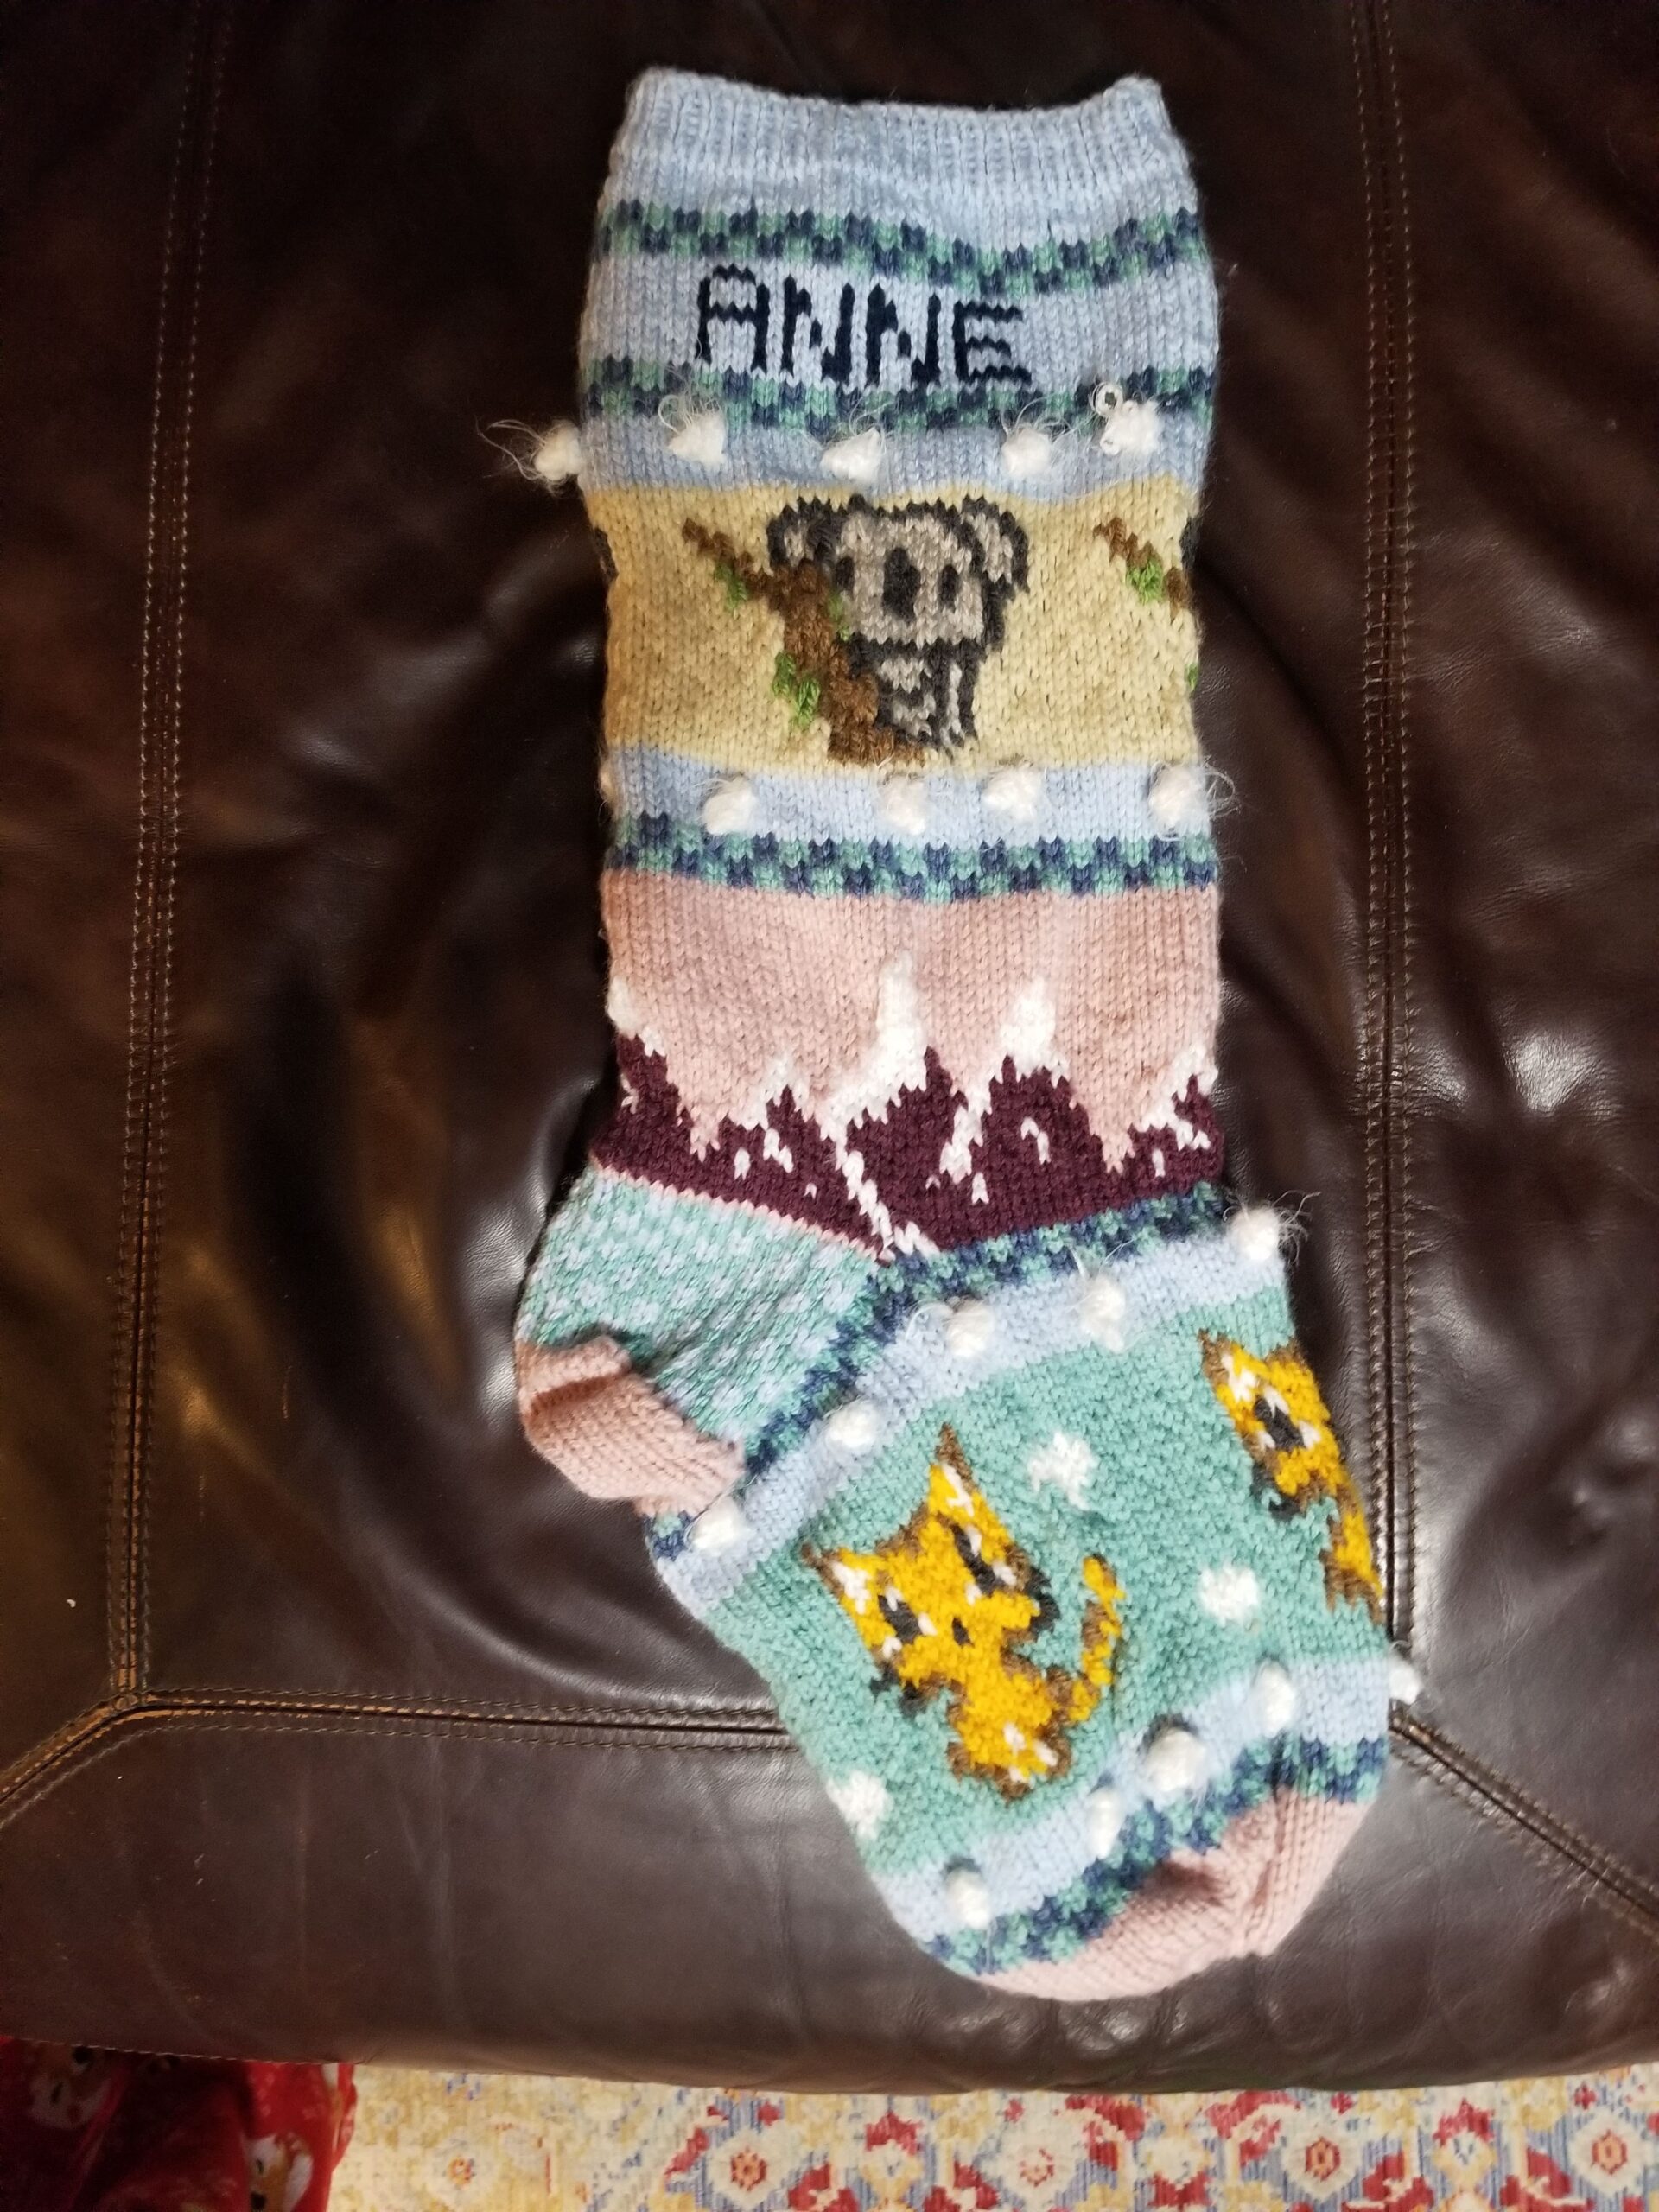
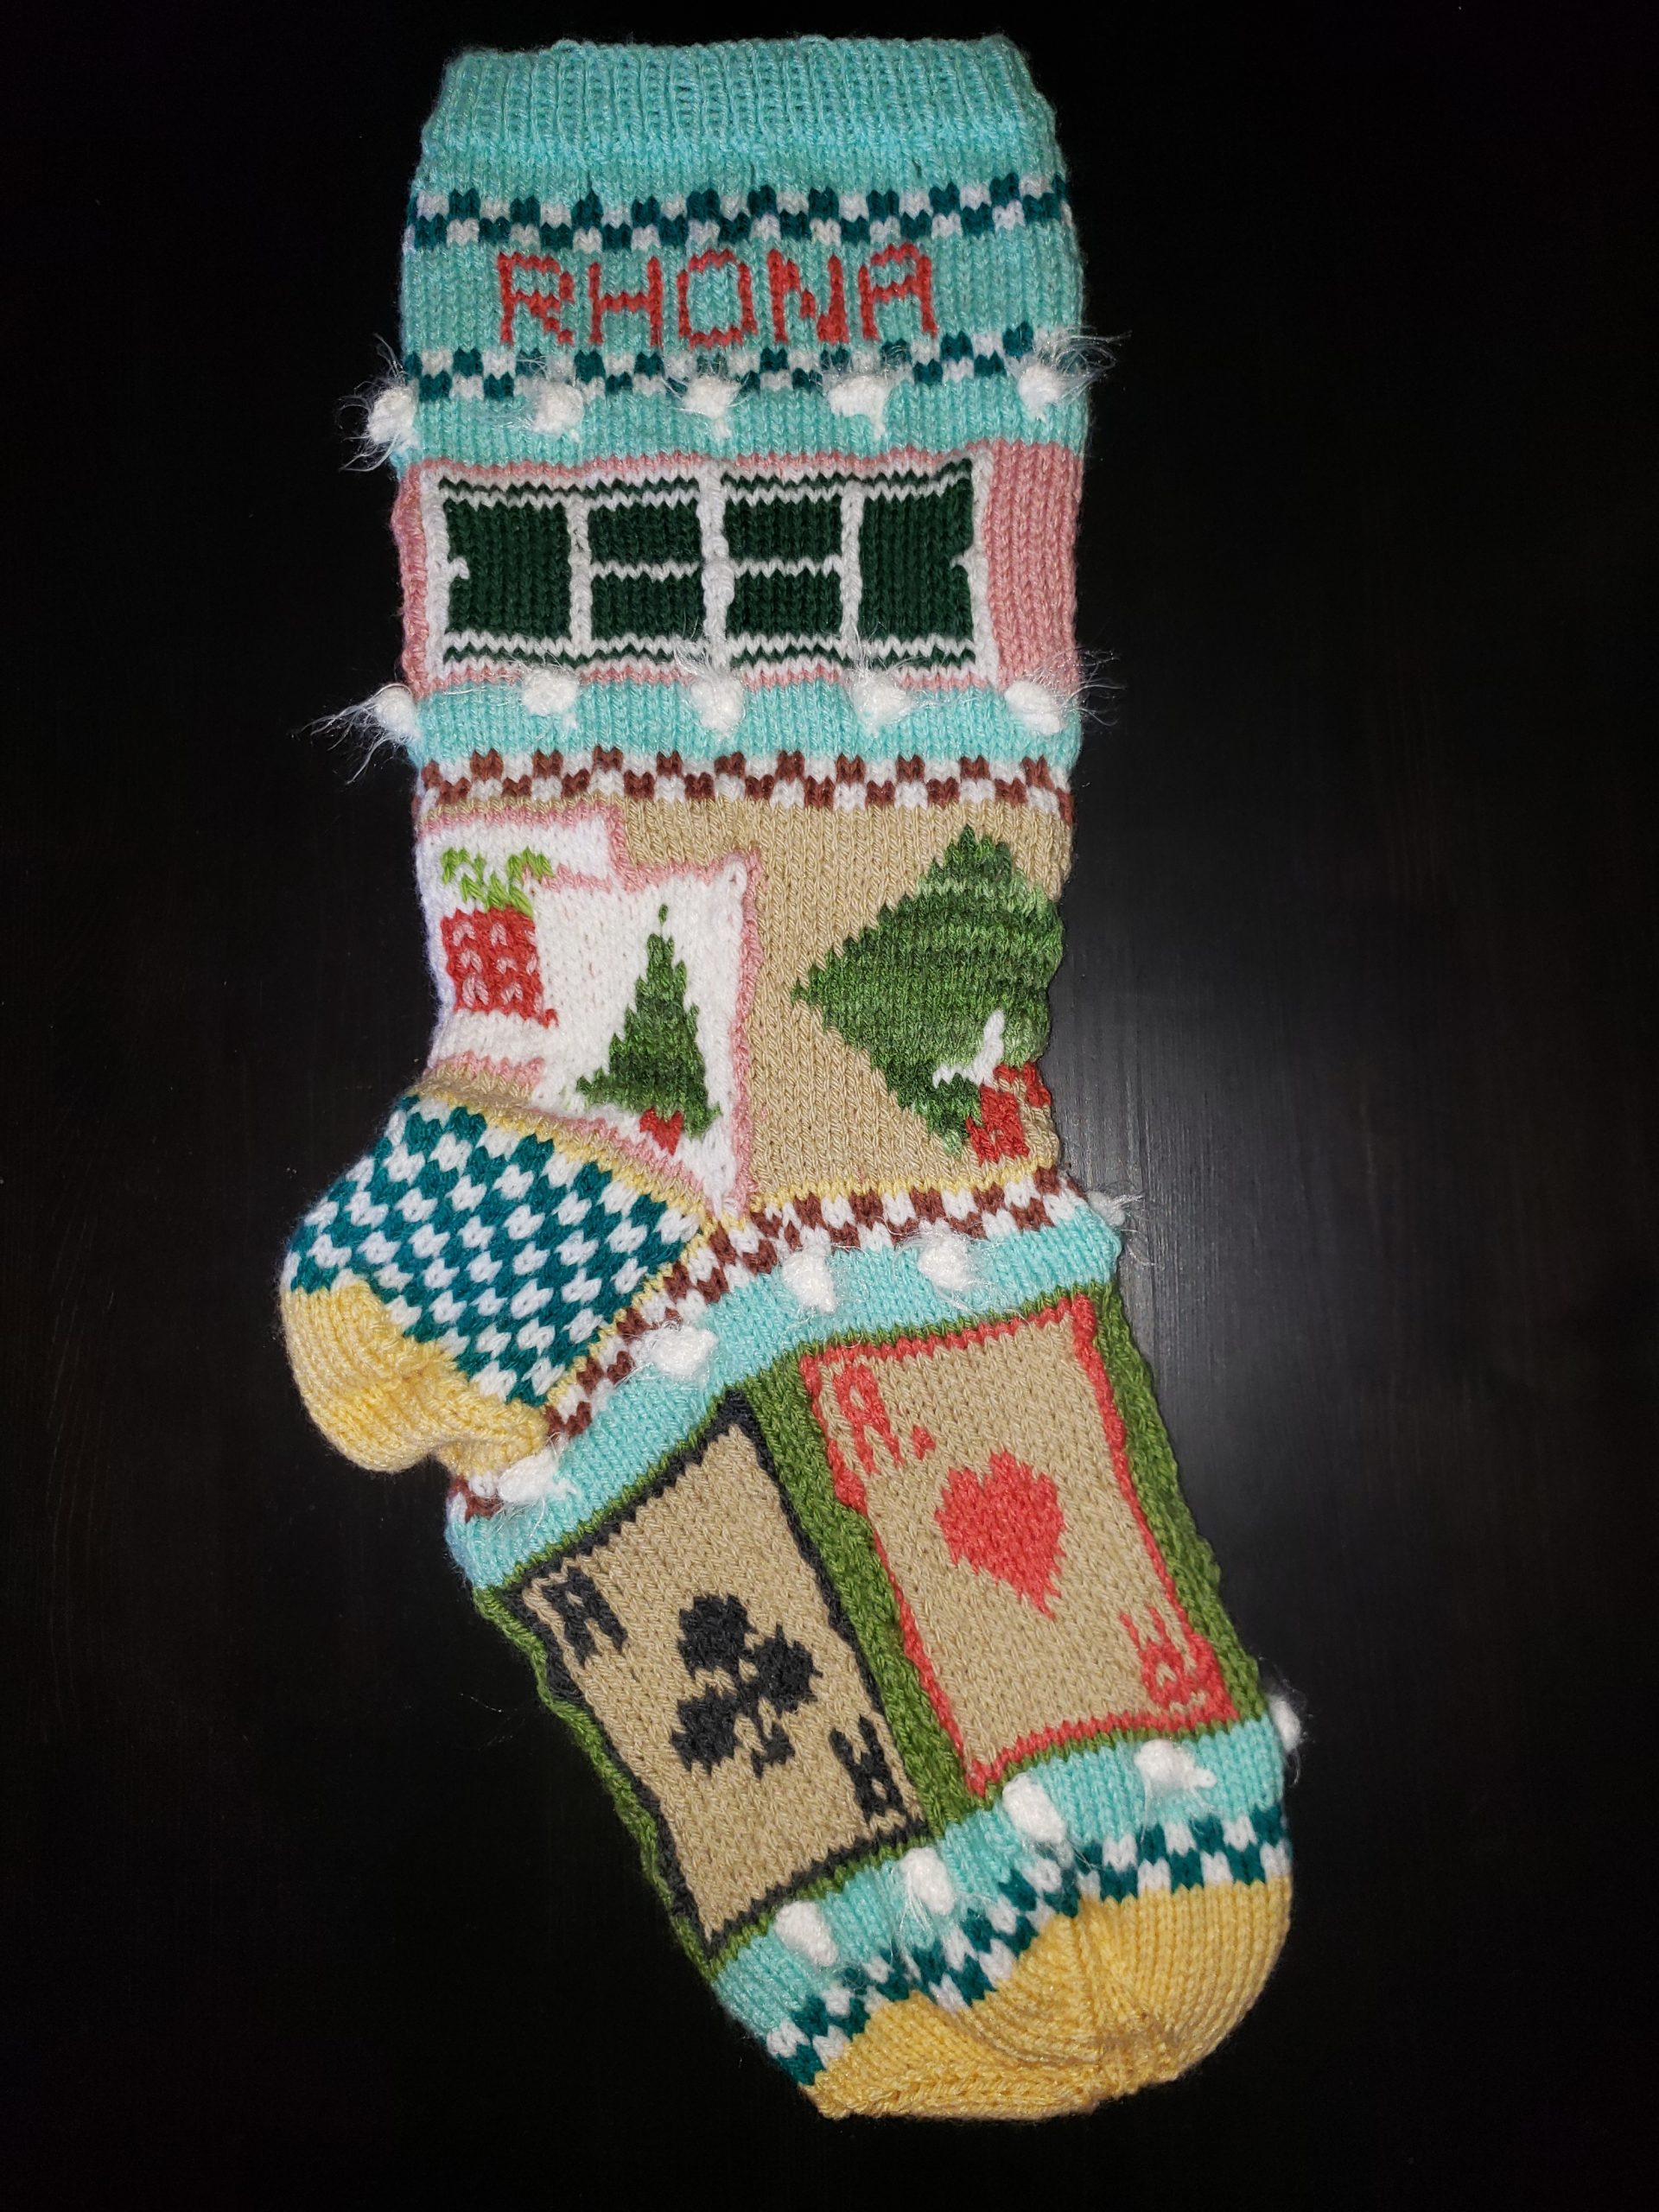
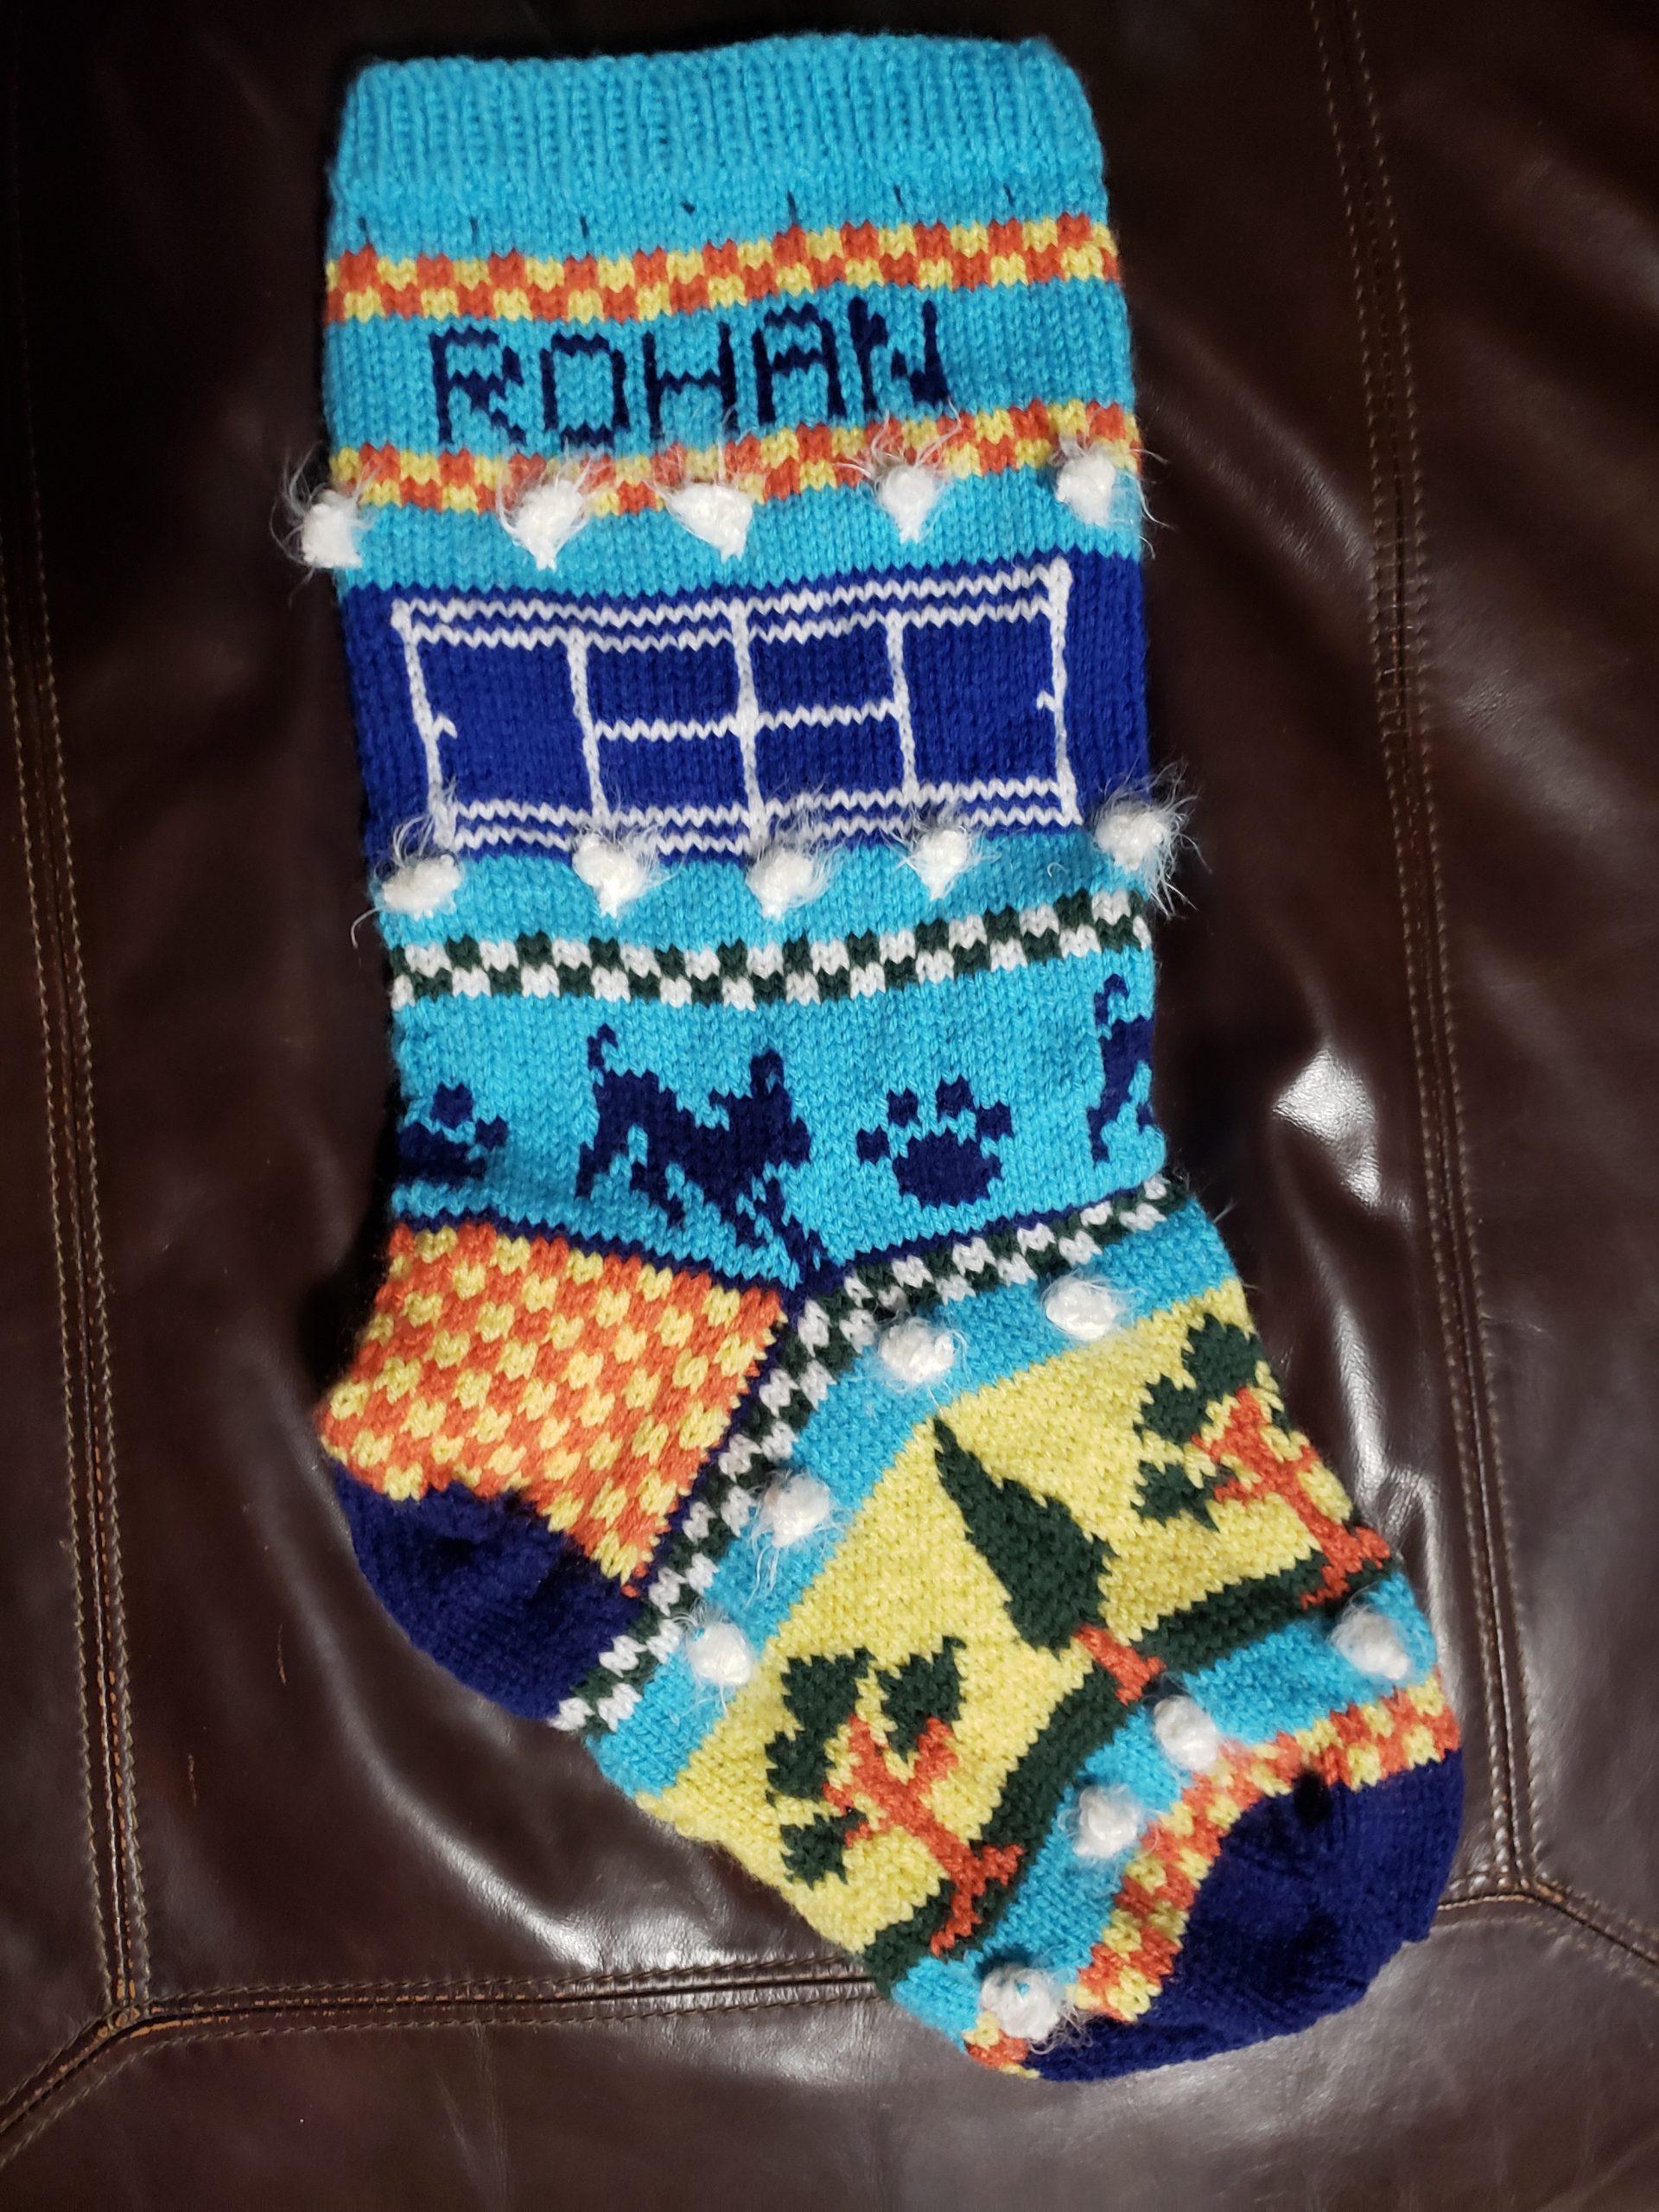
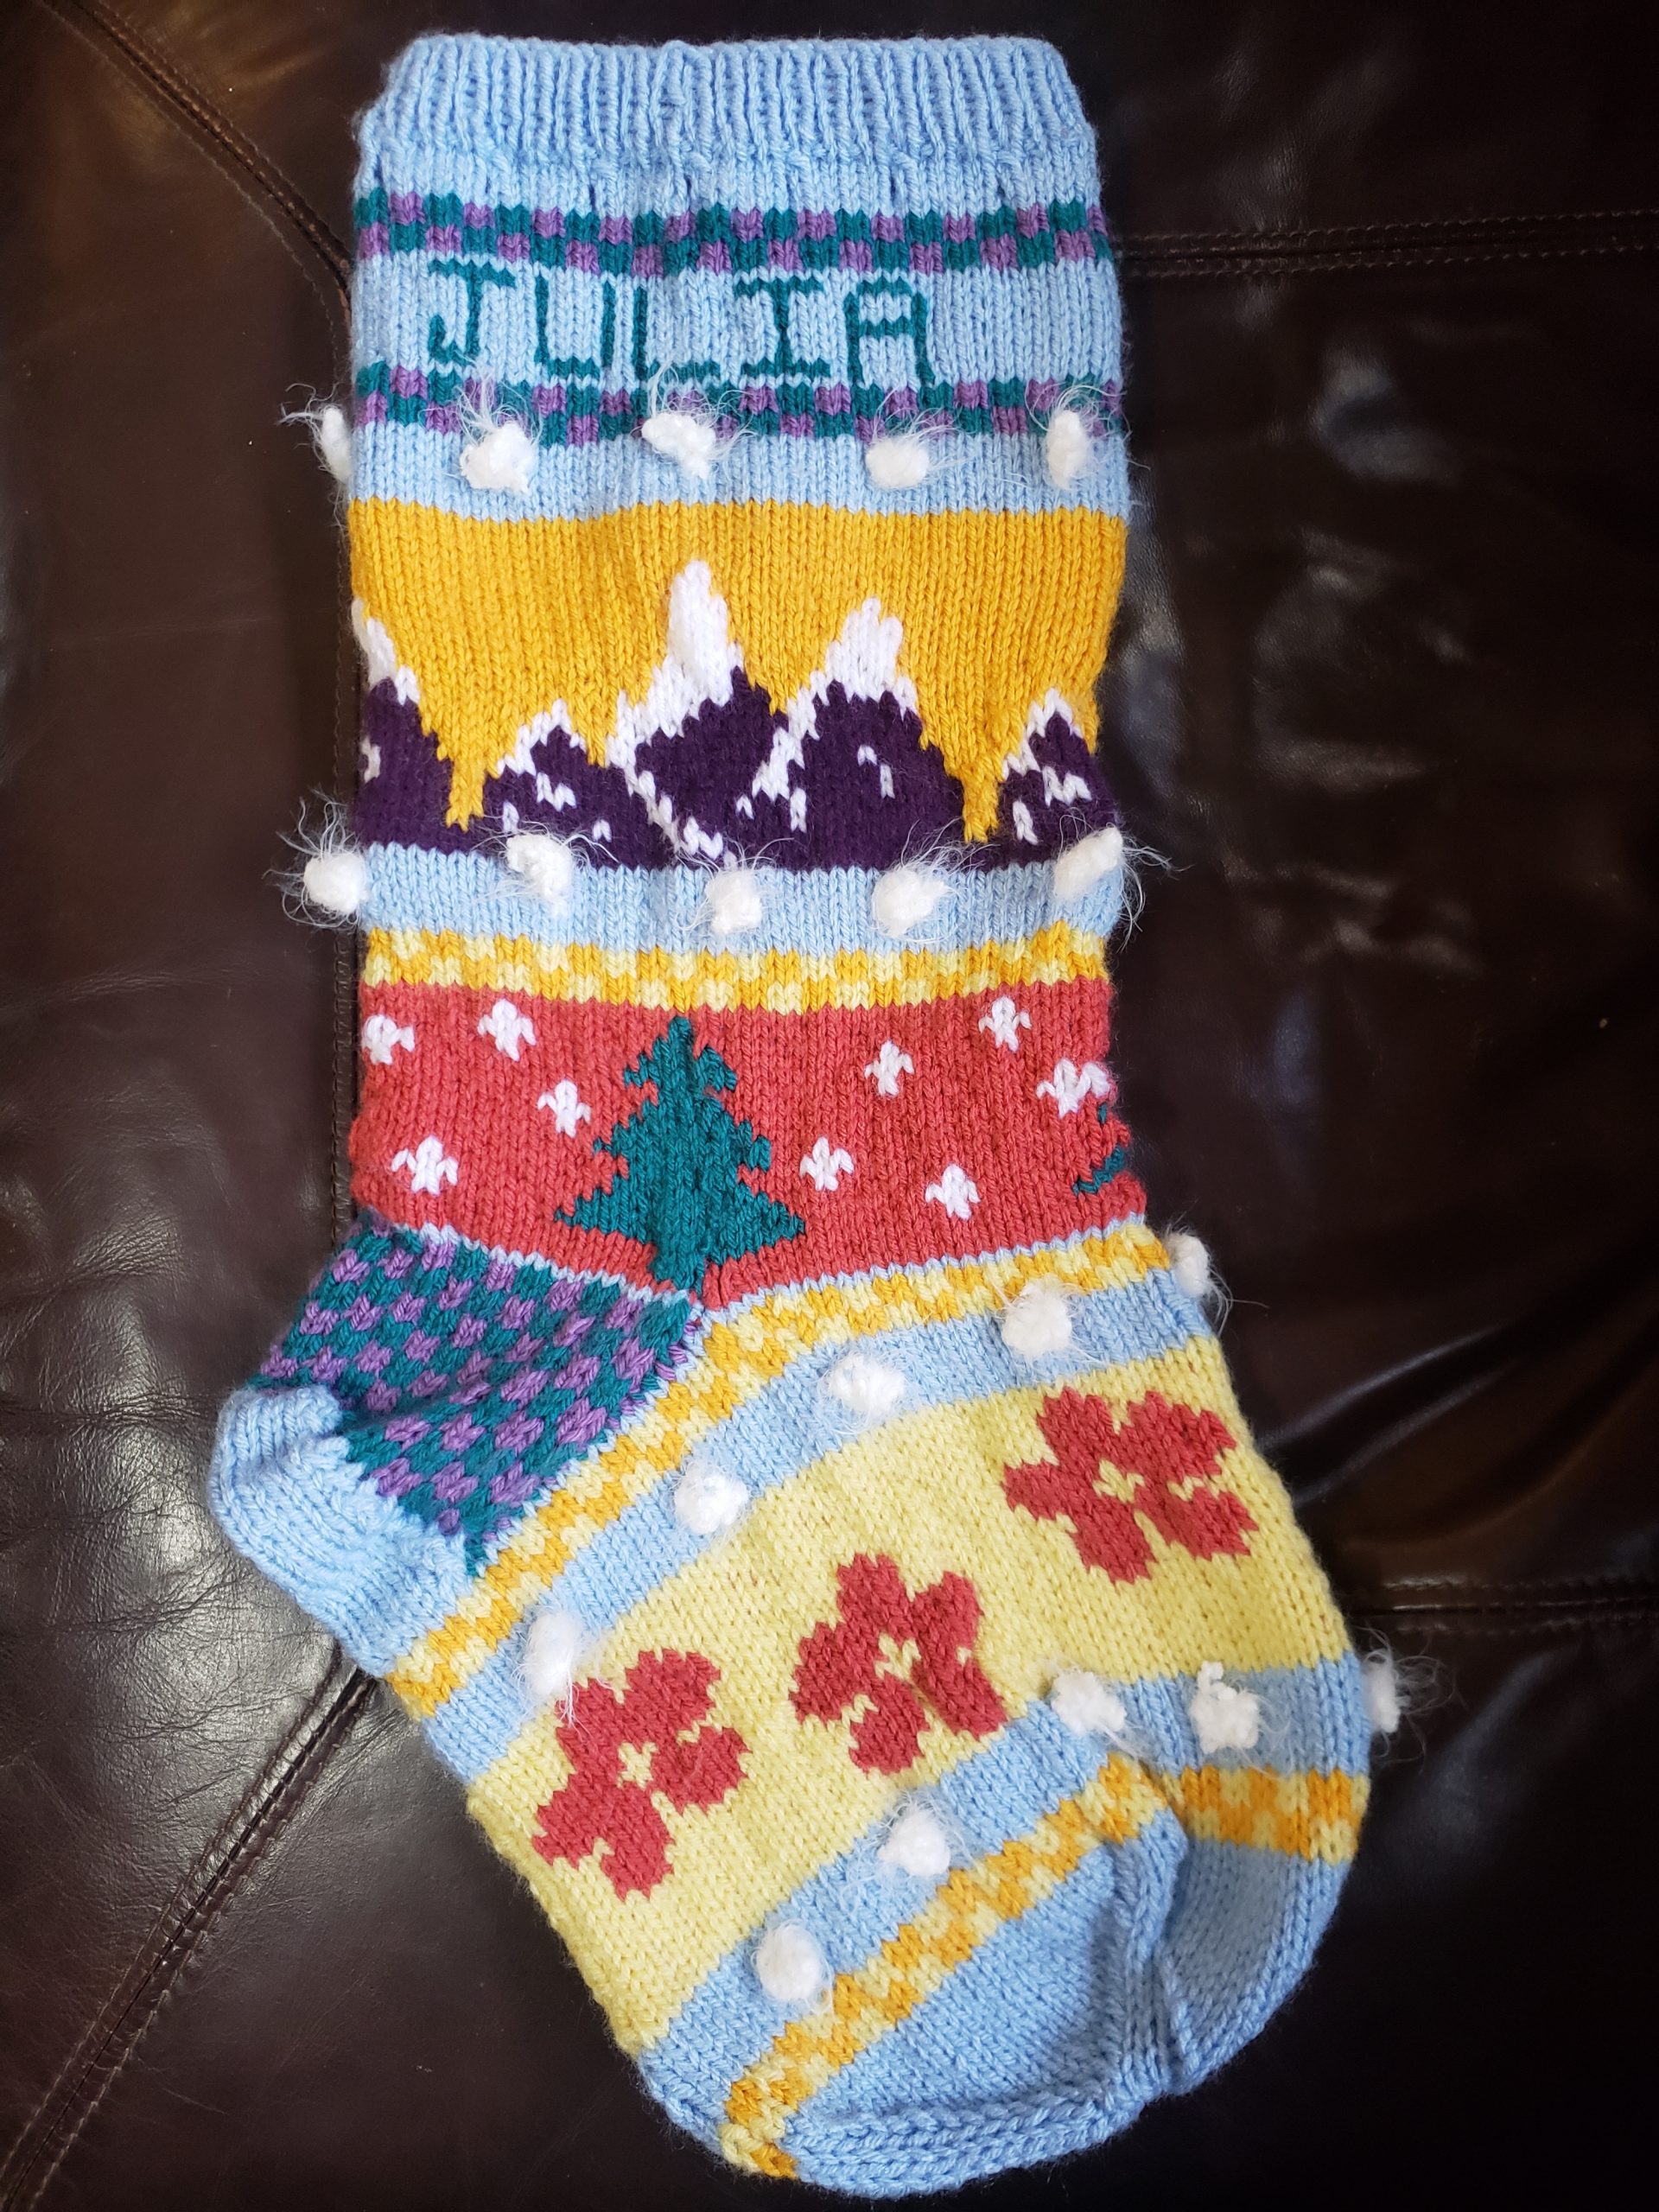
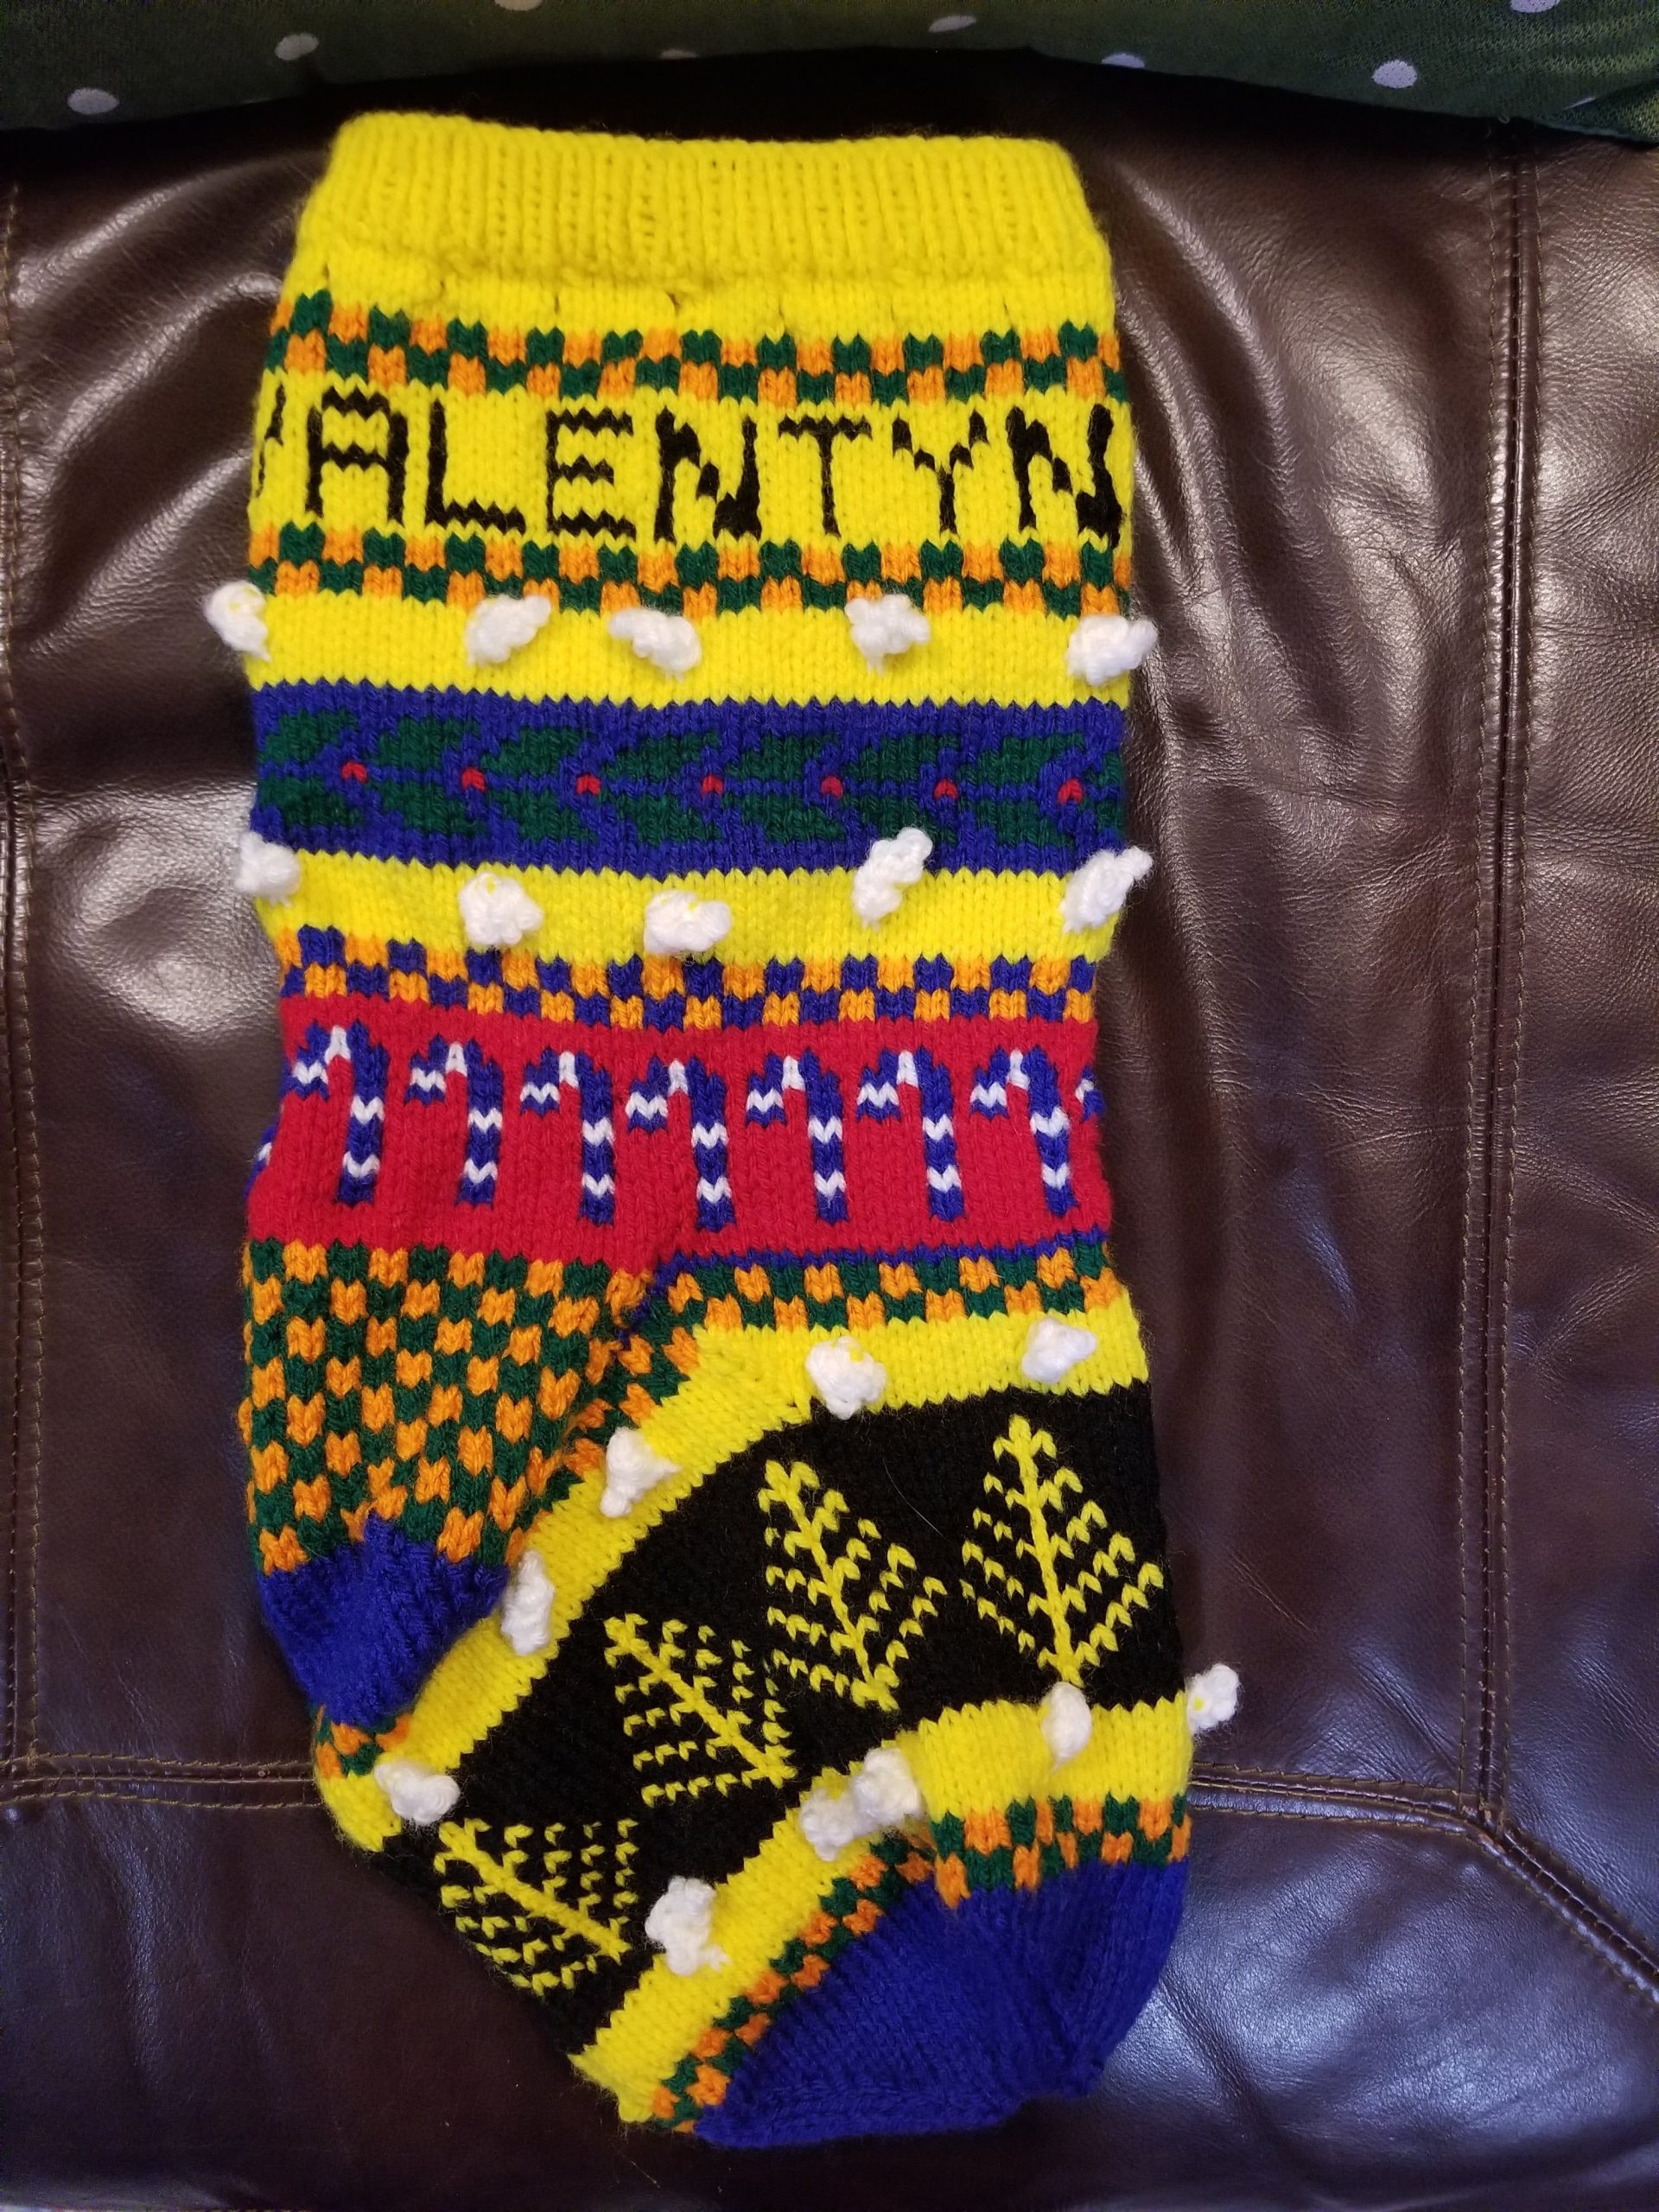
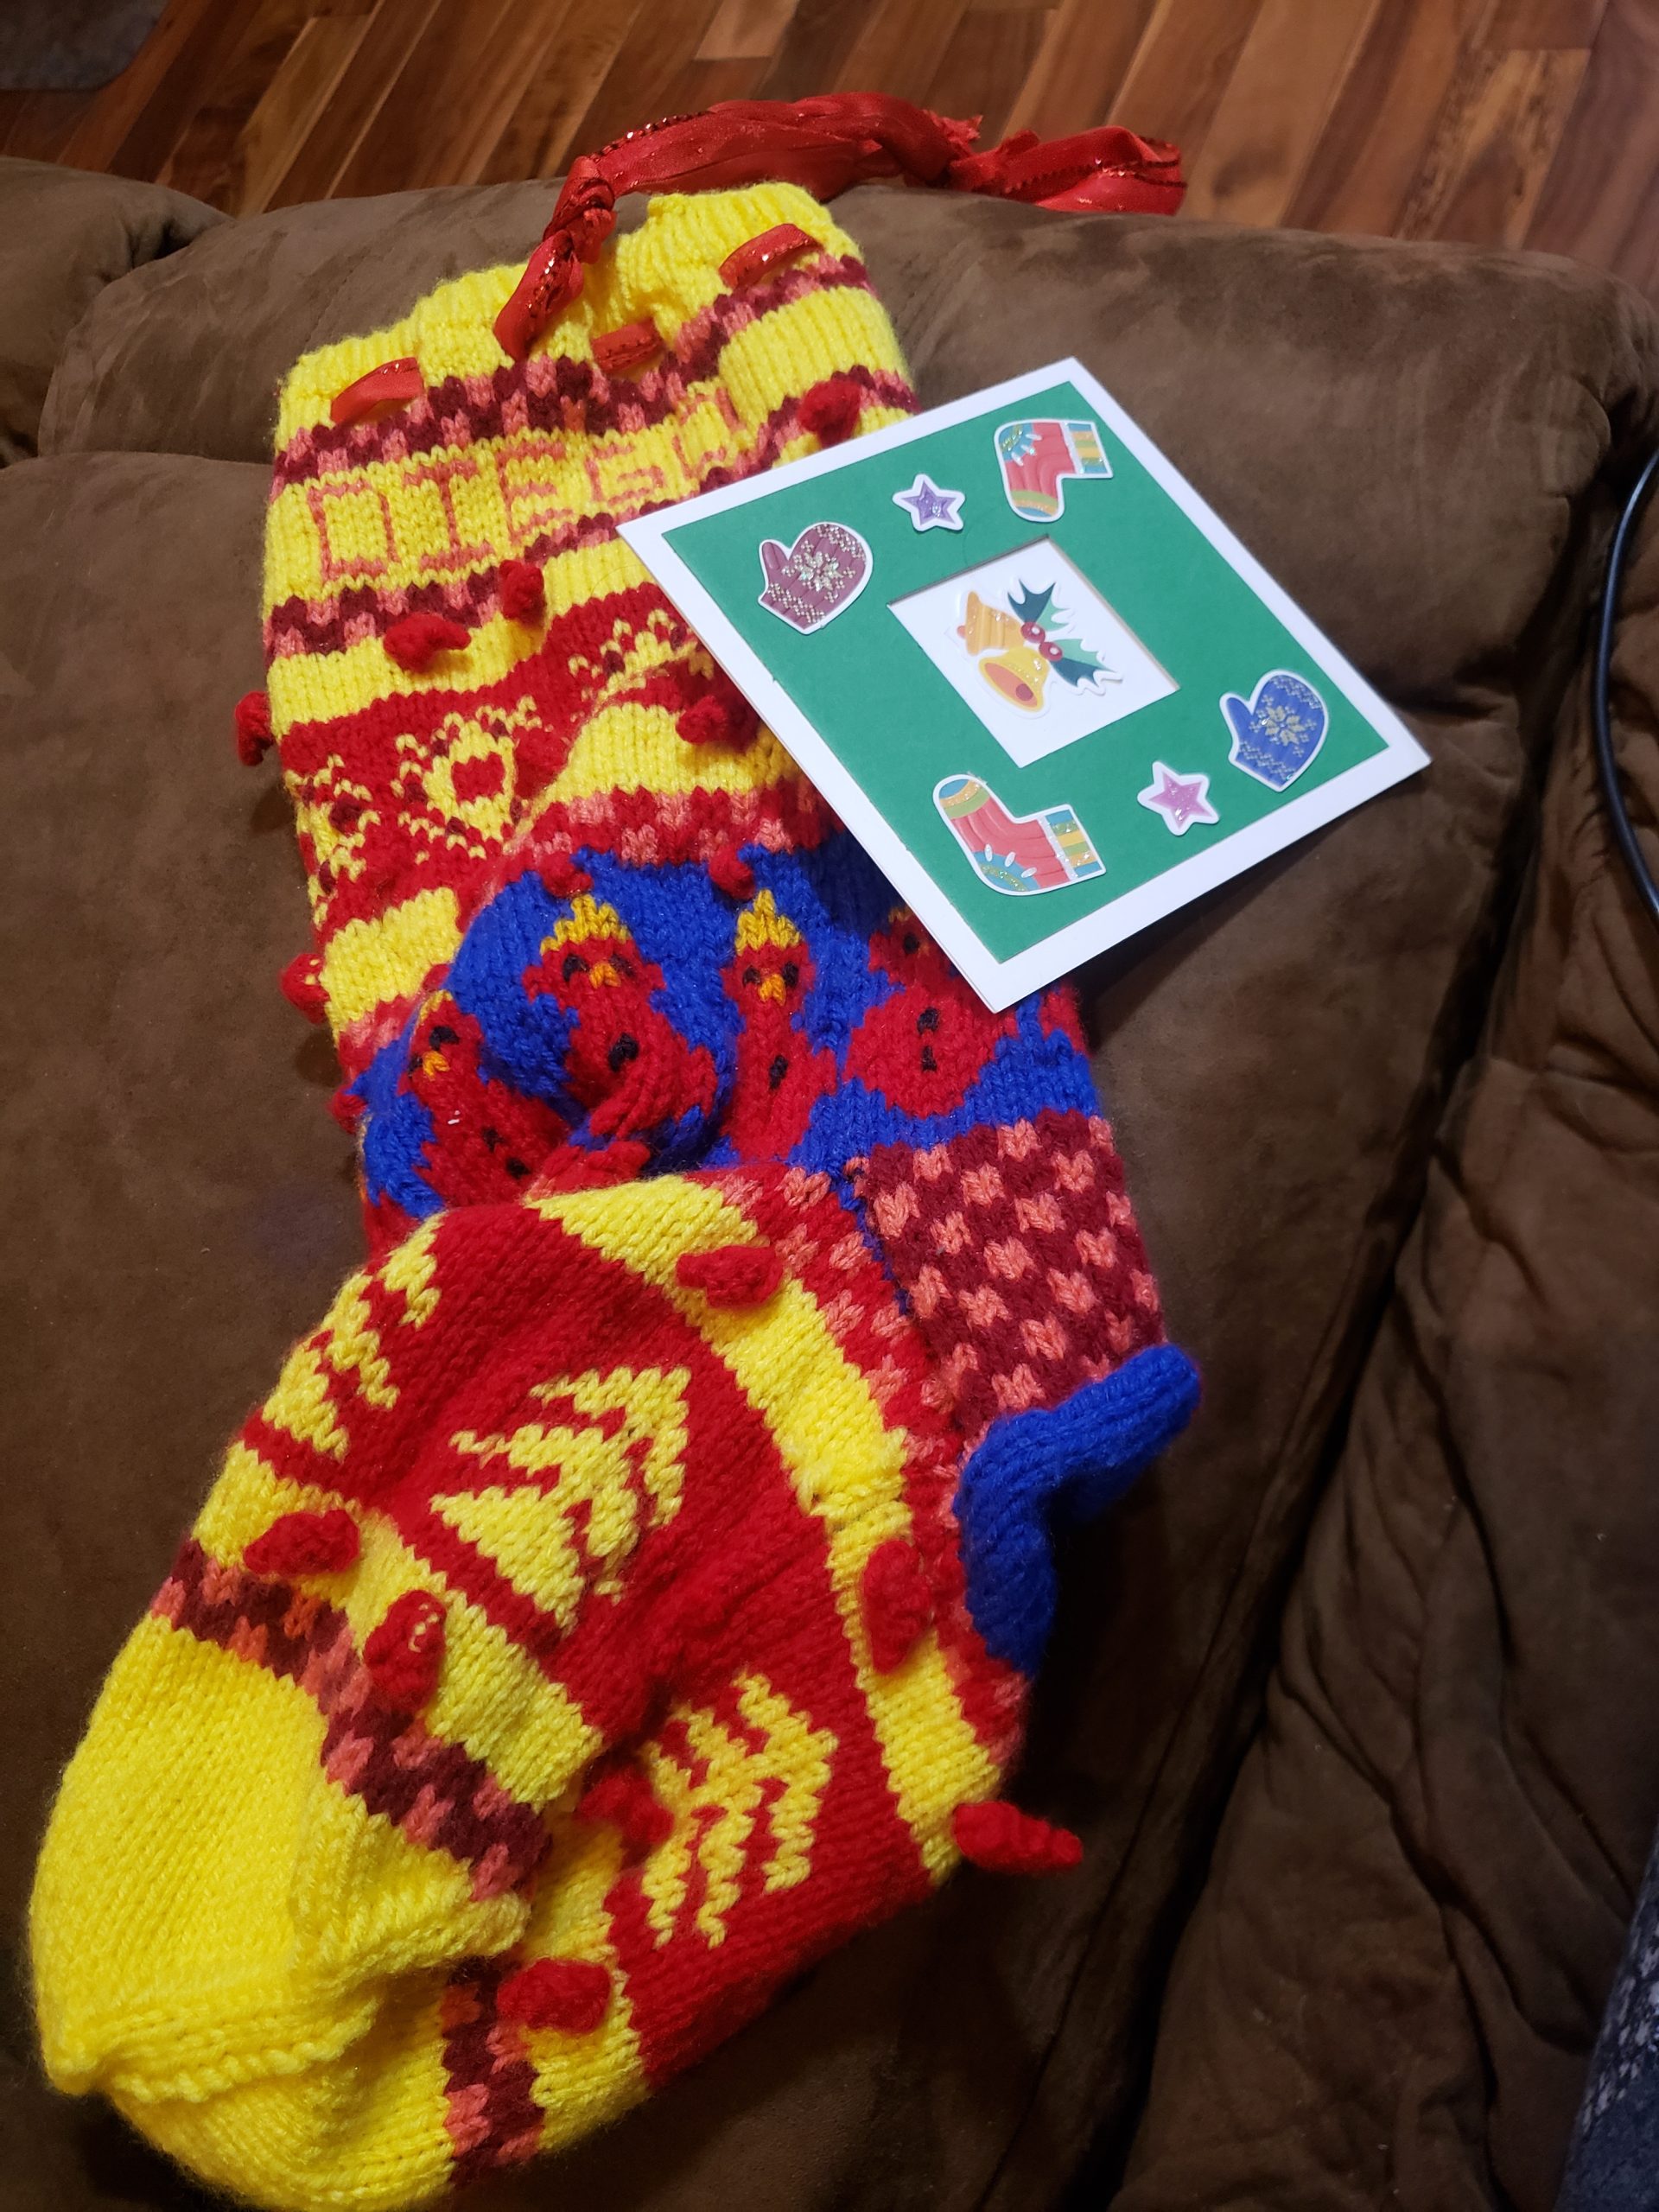
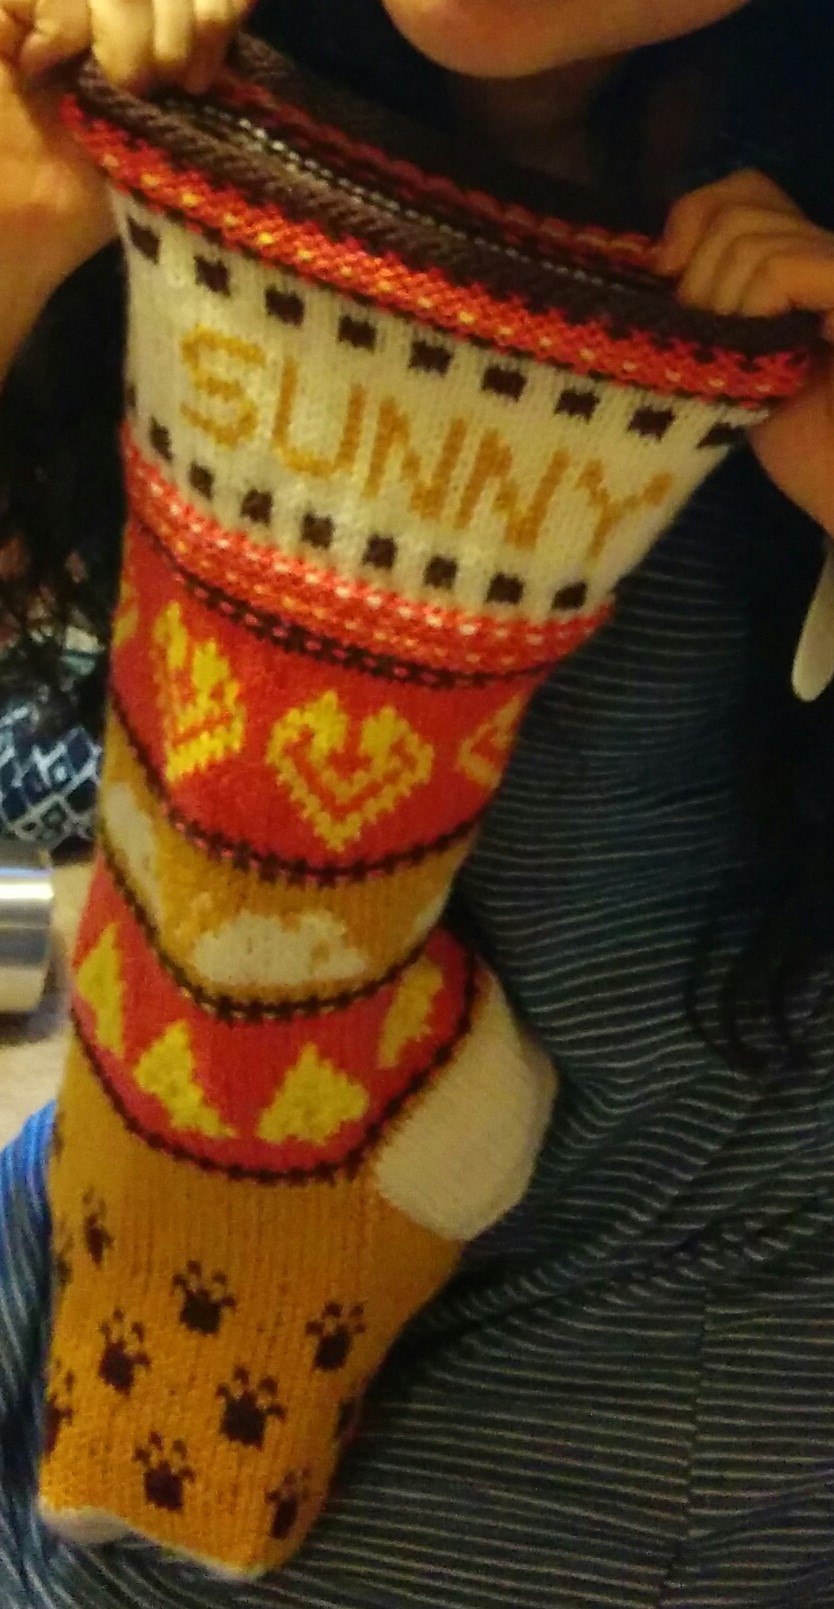
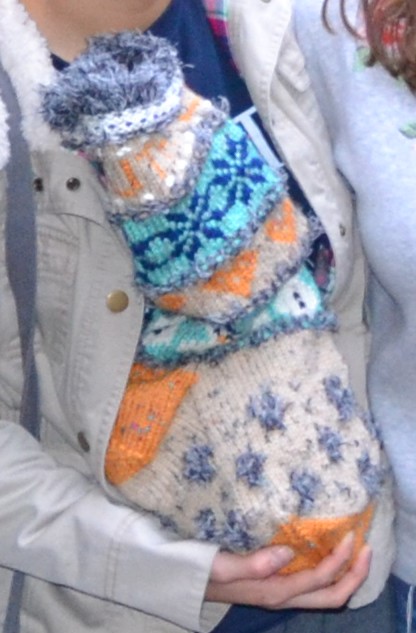
Family stockings


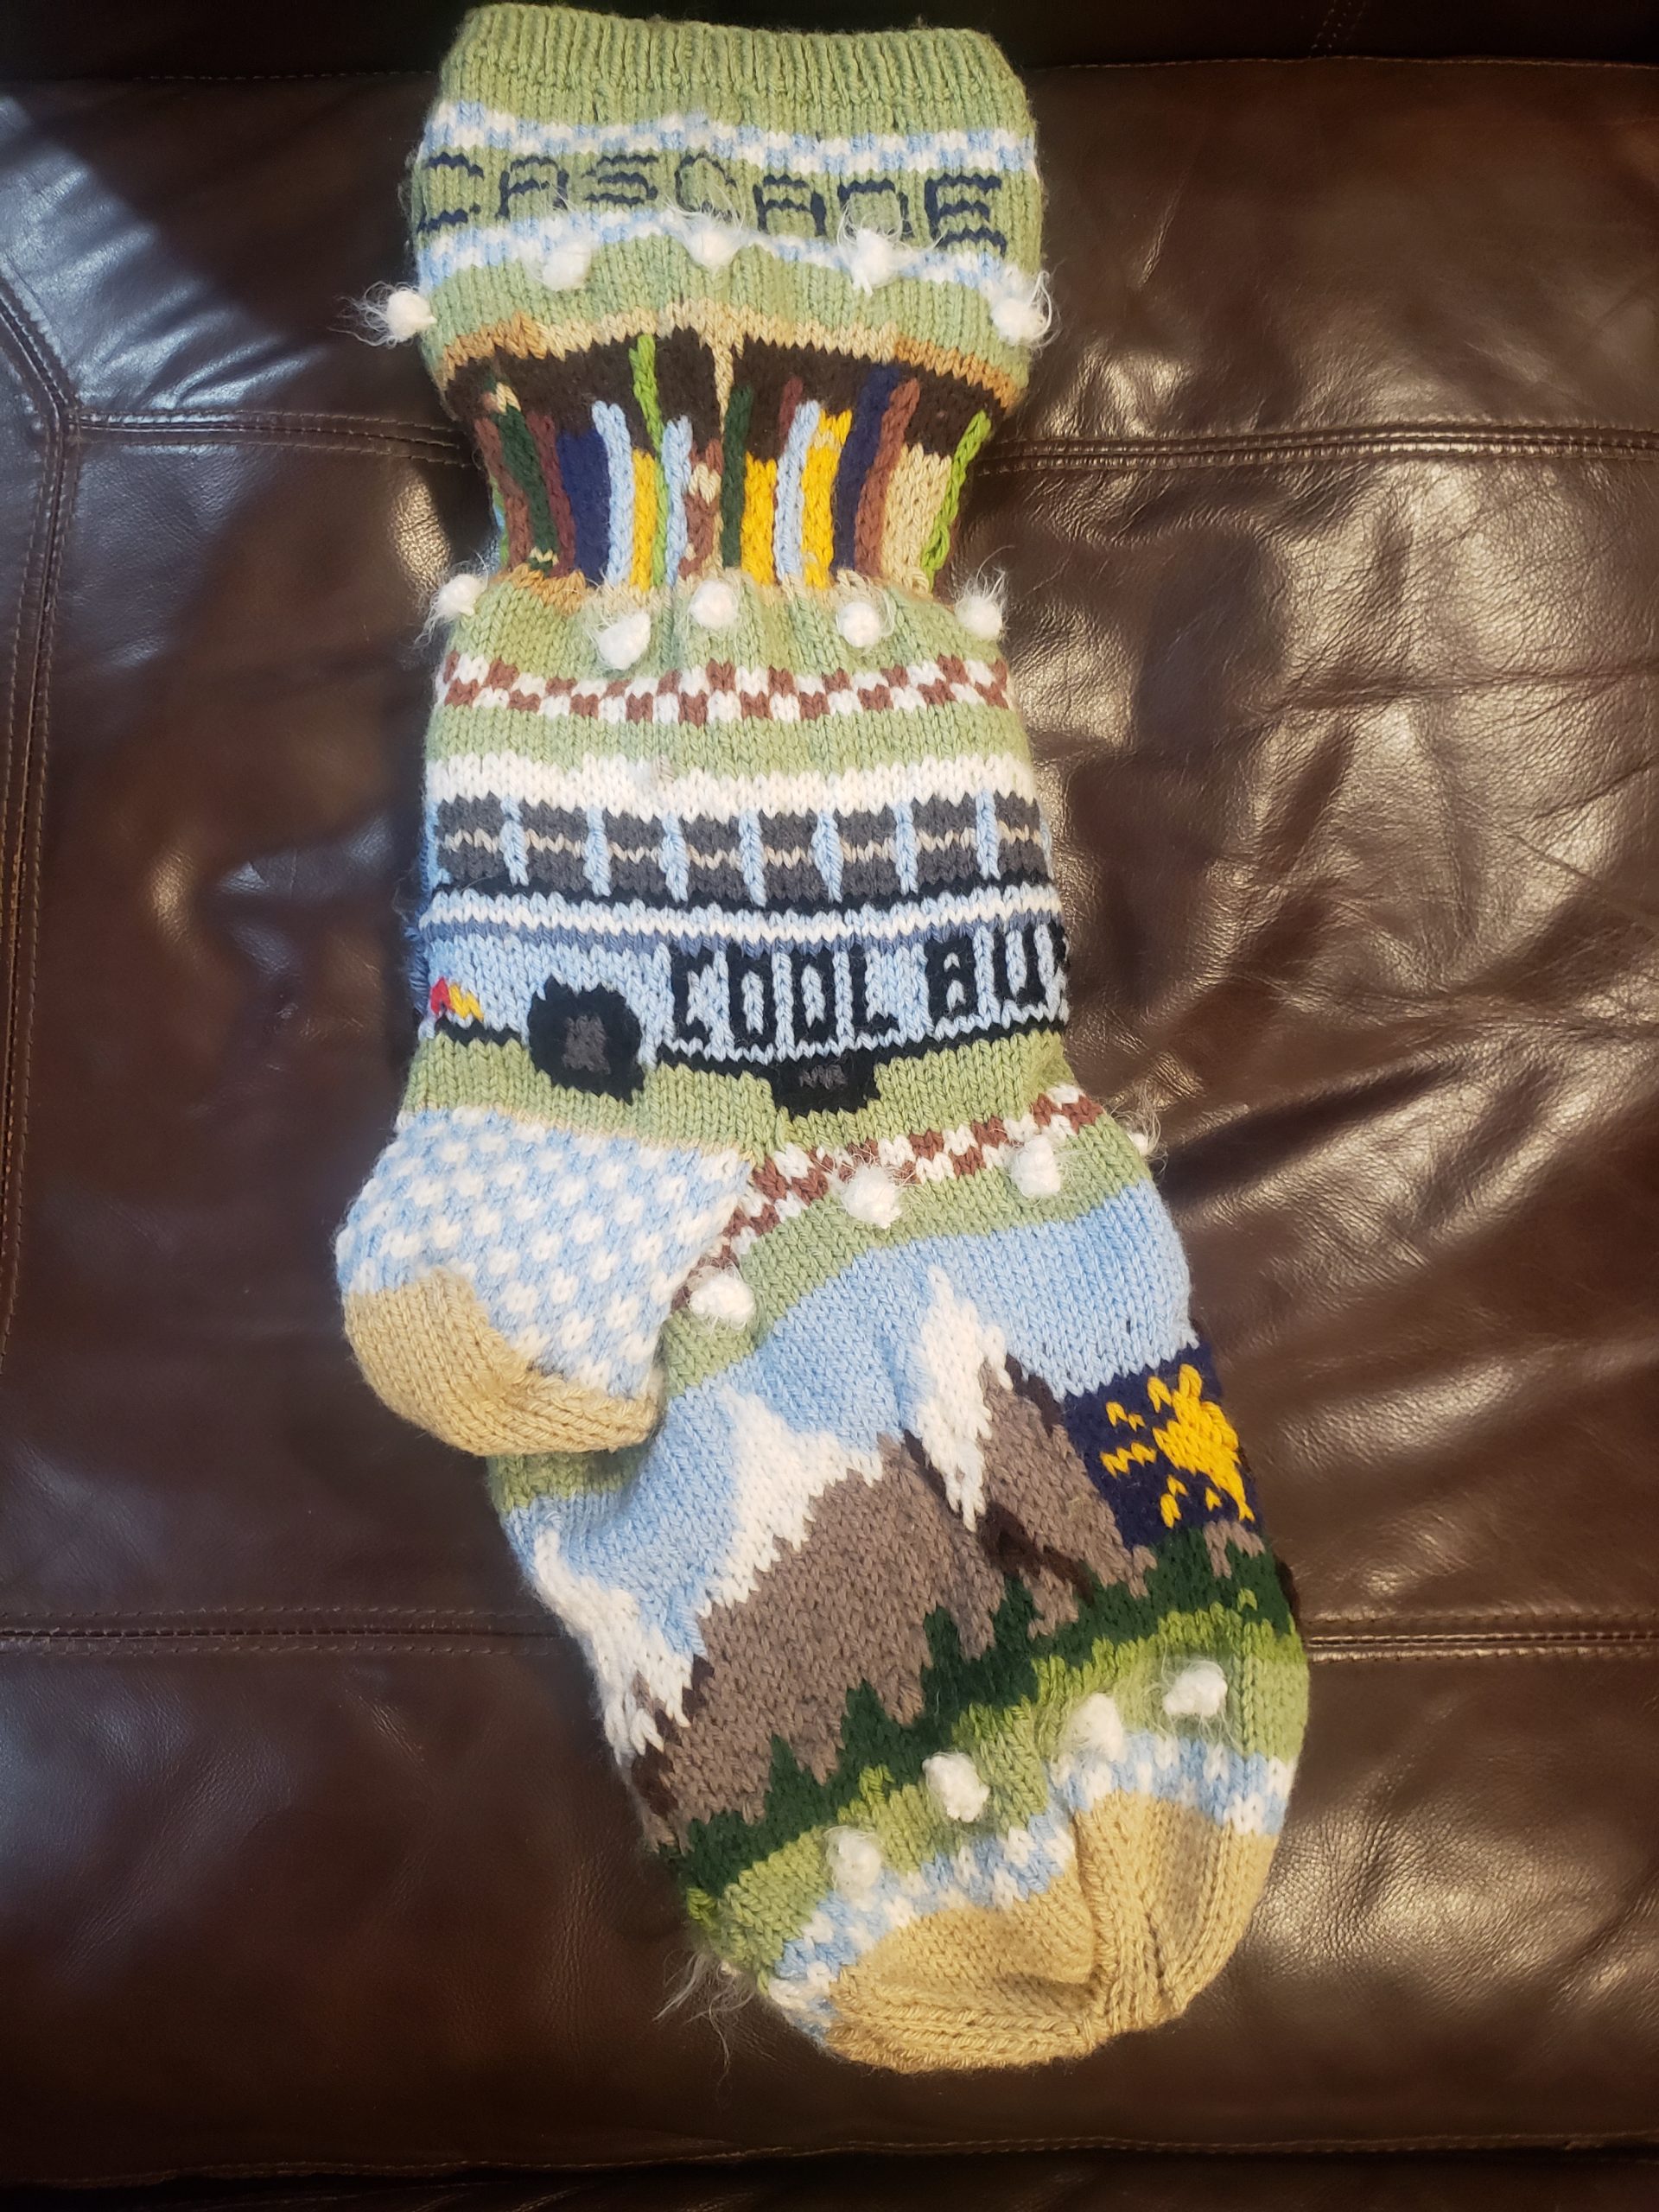
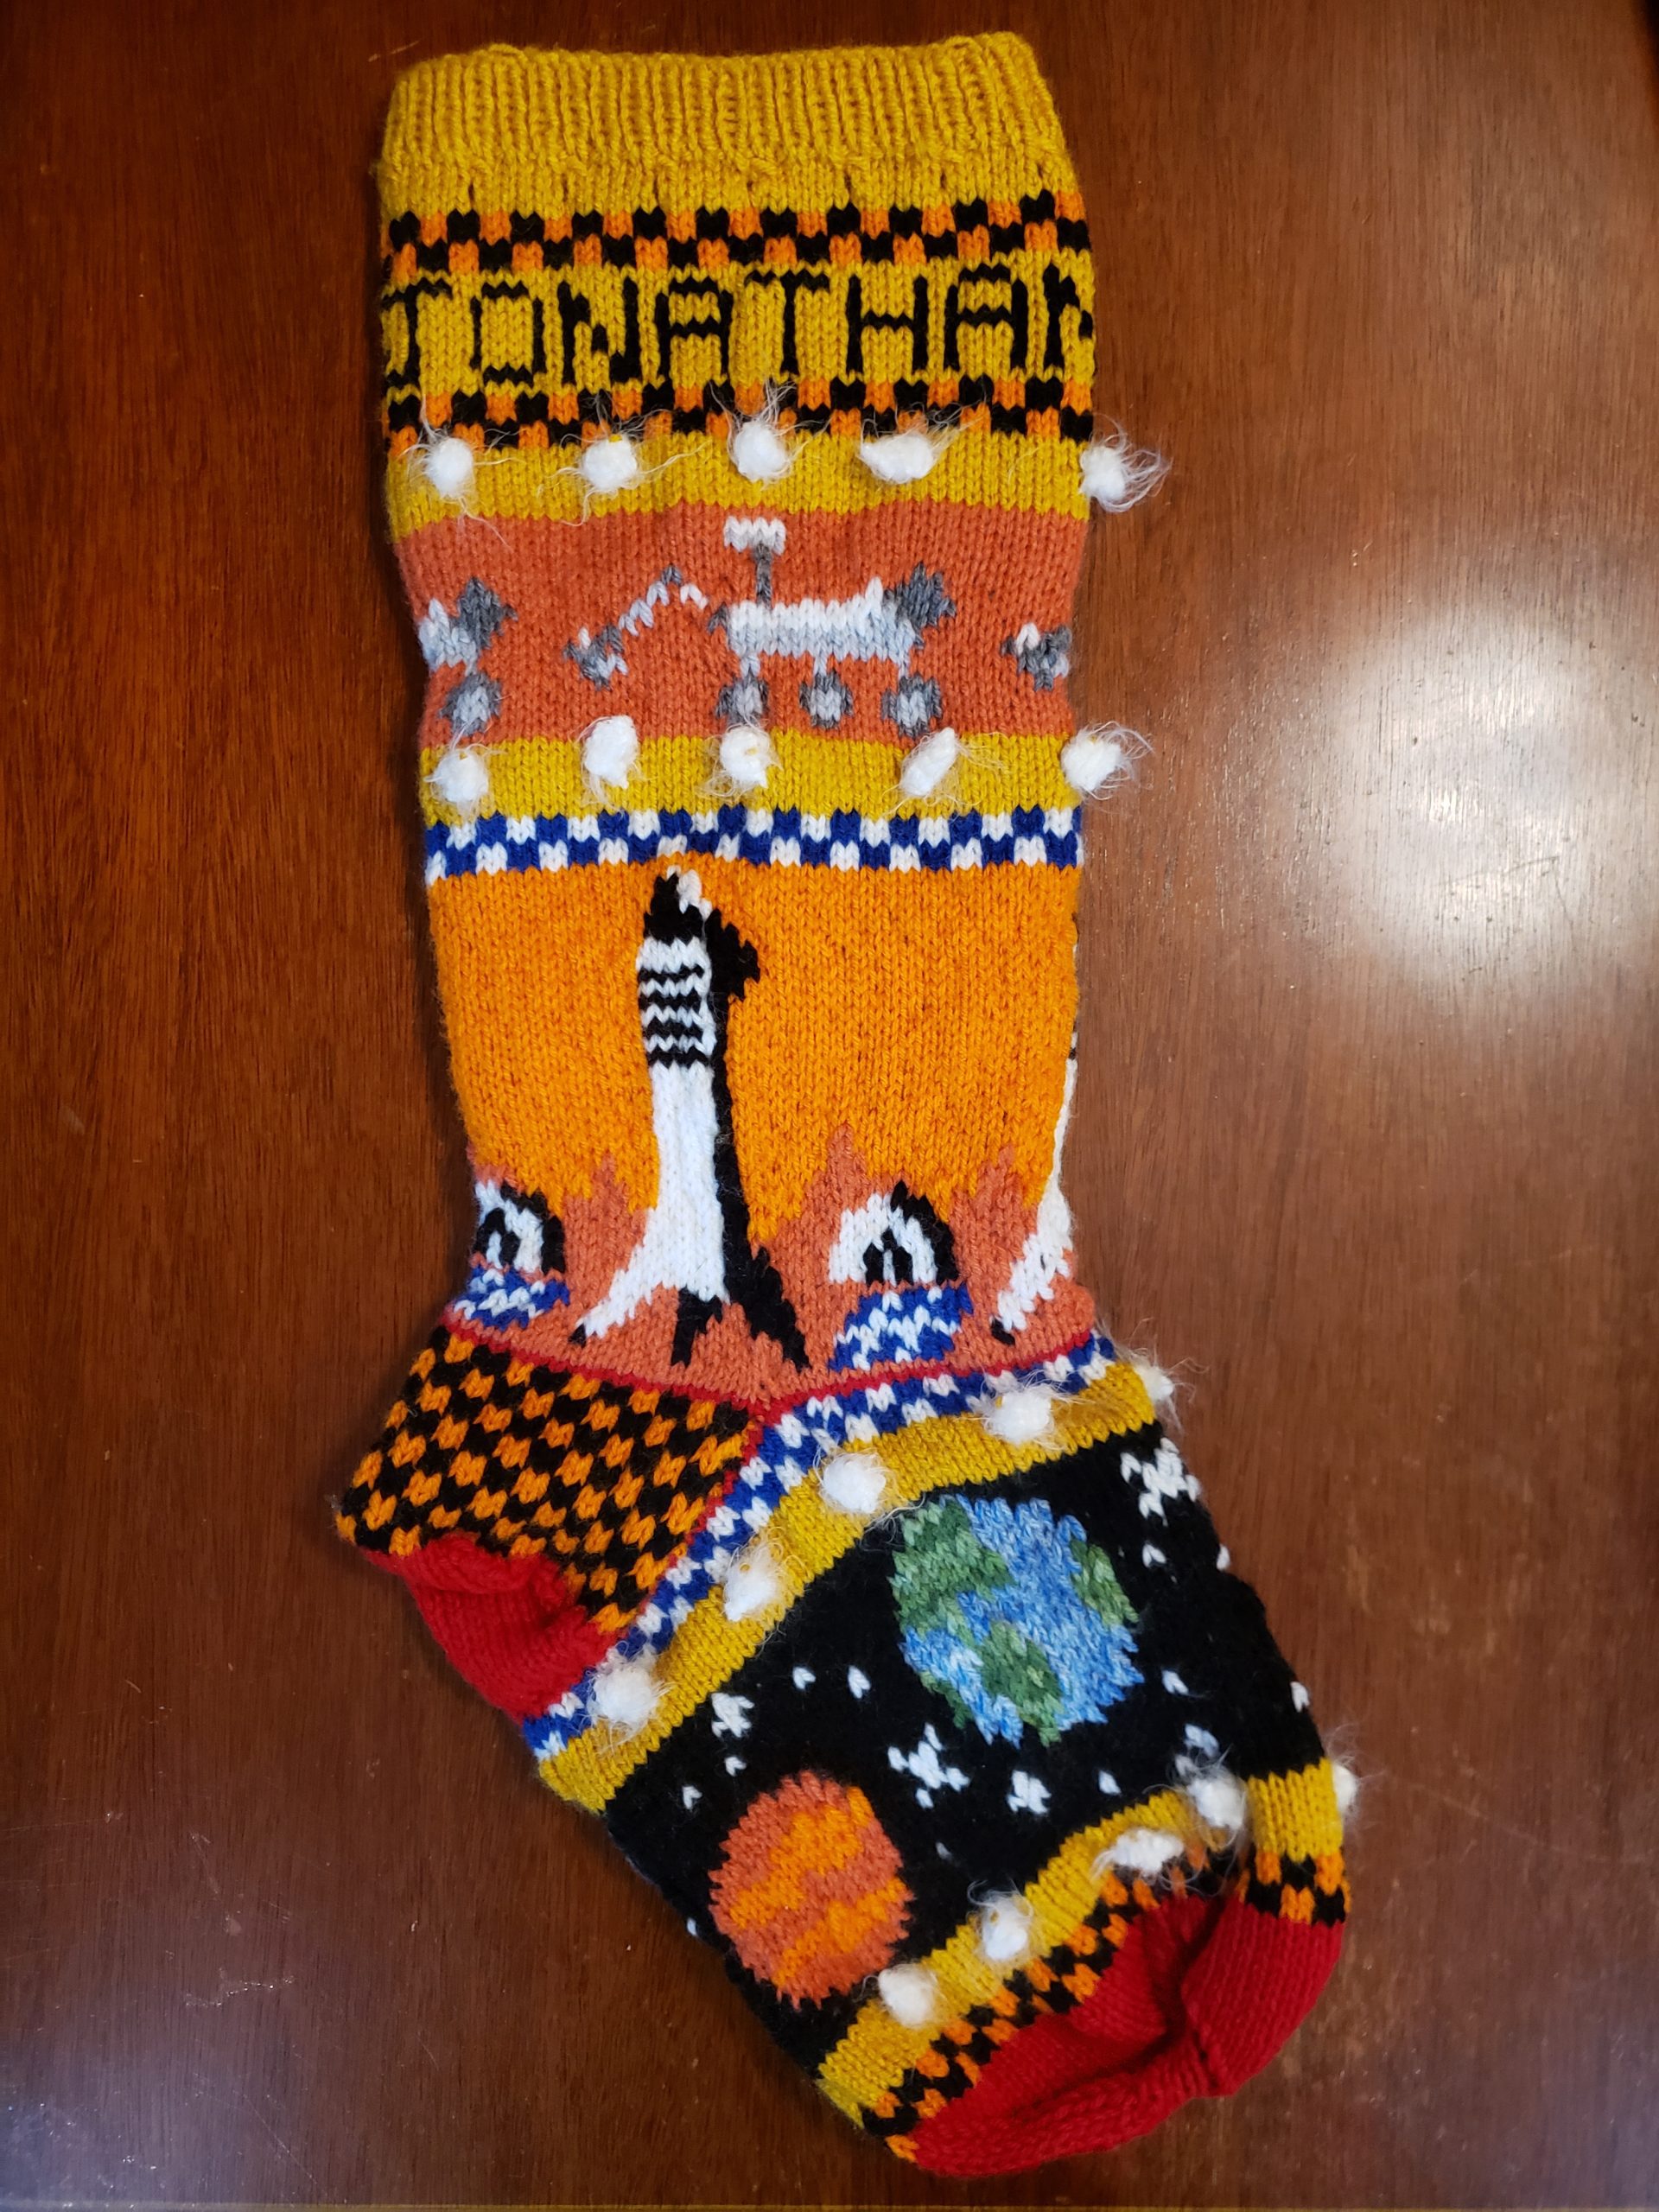
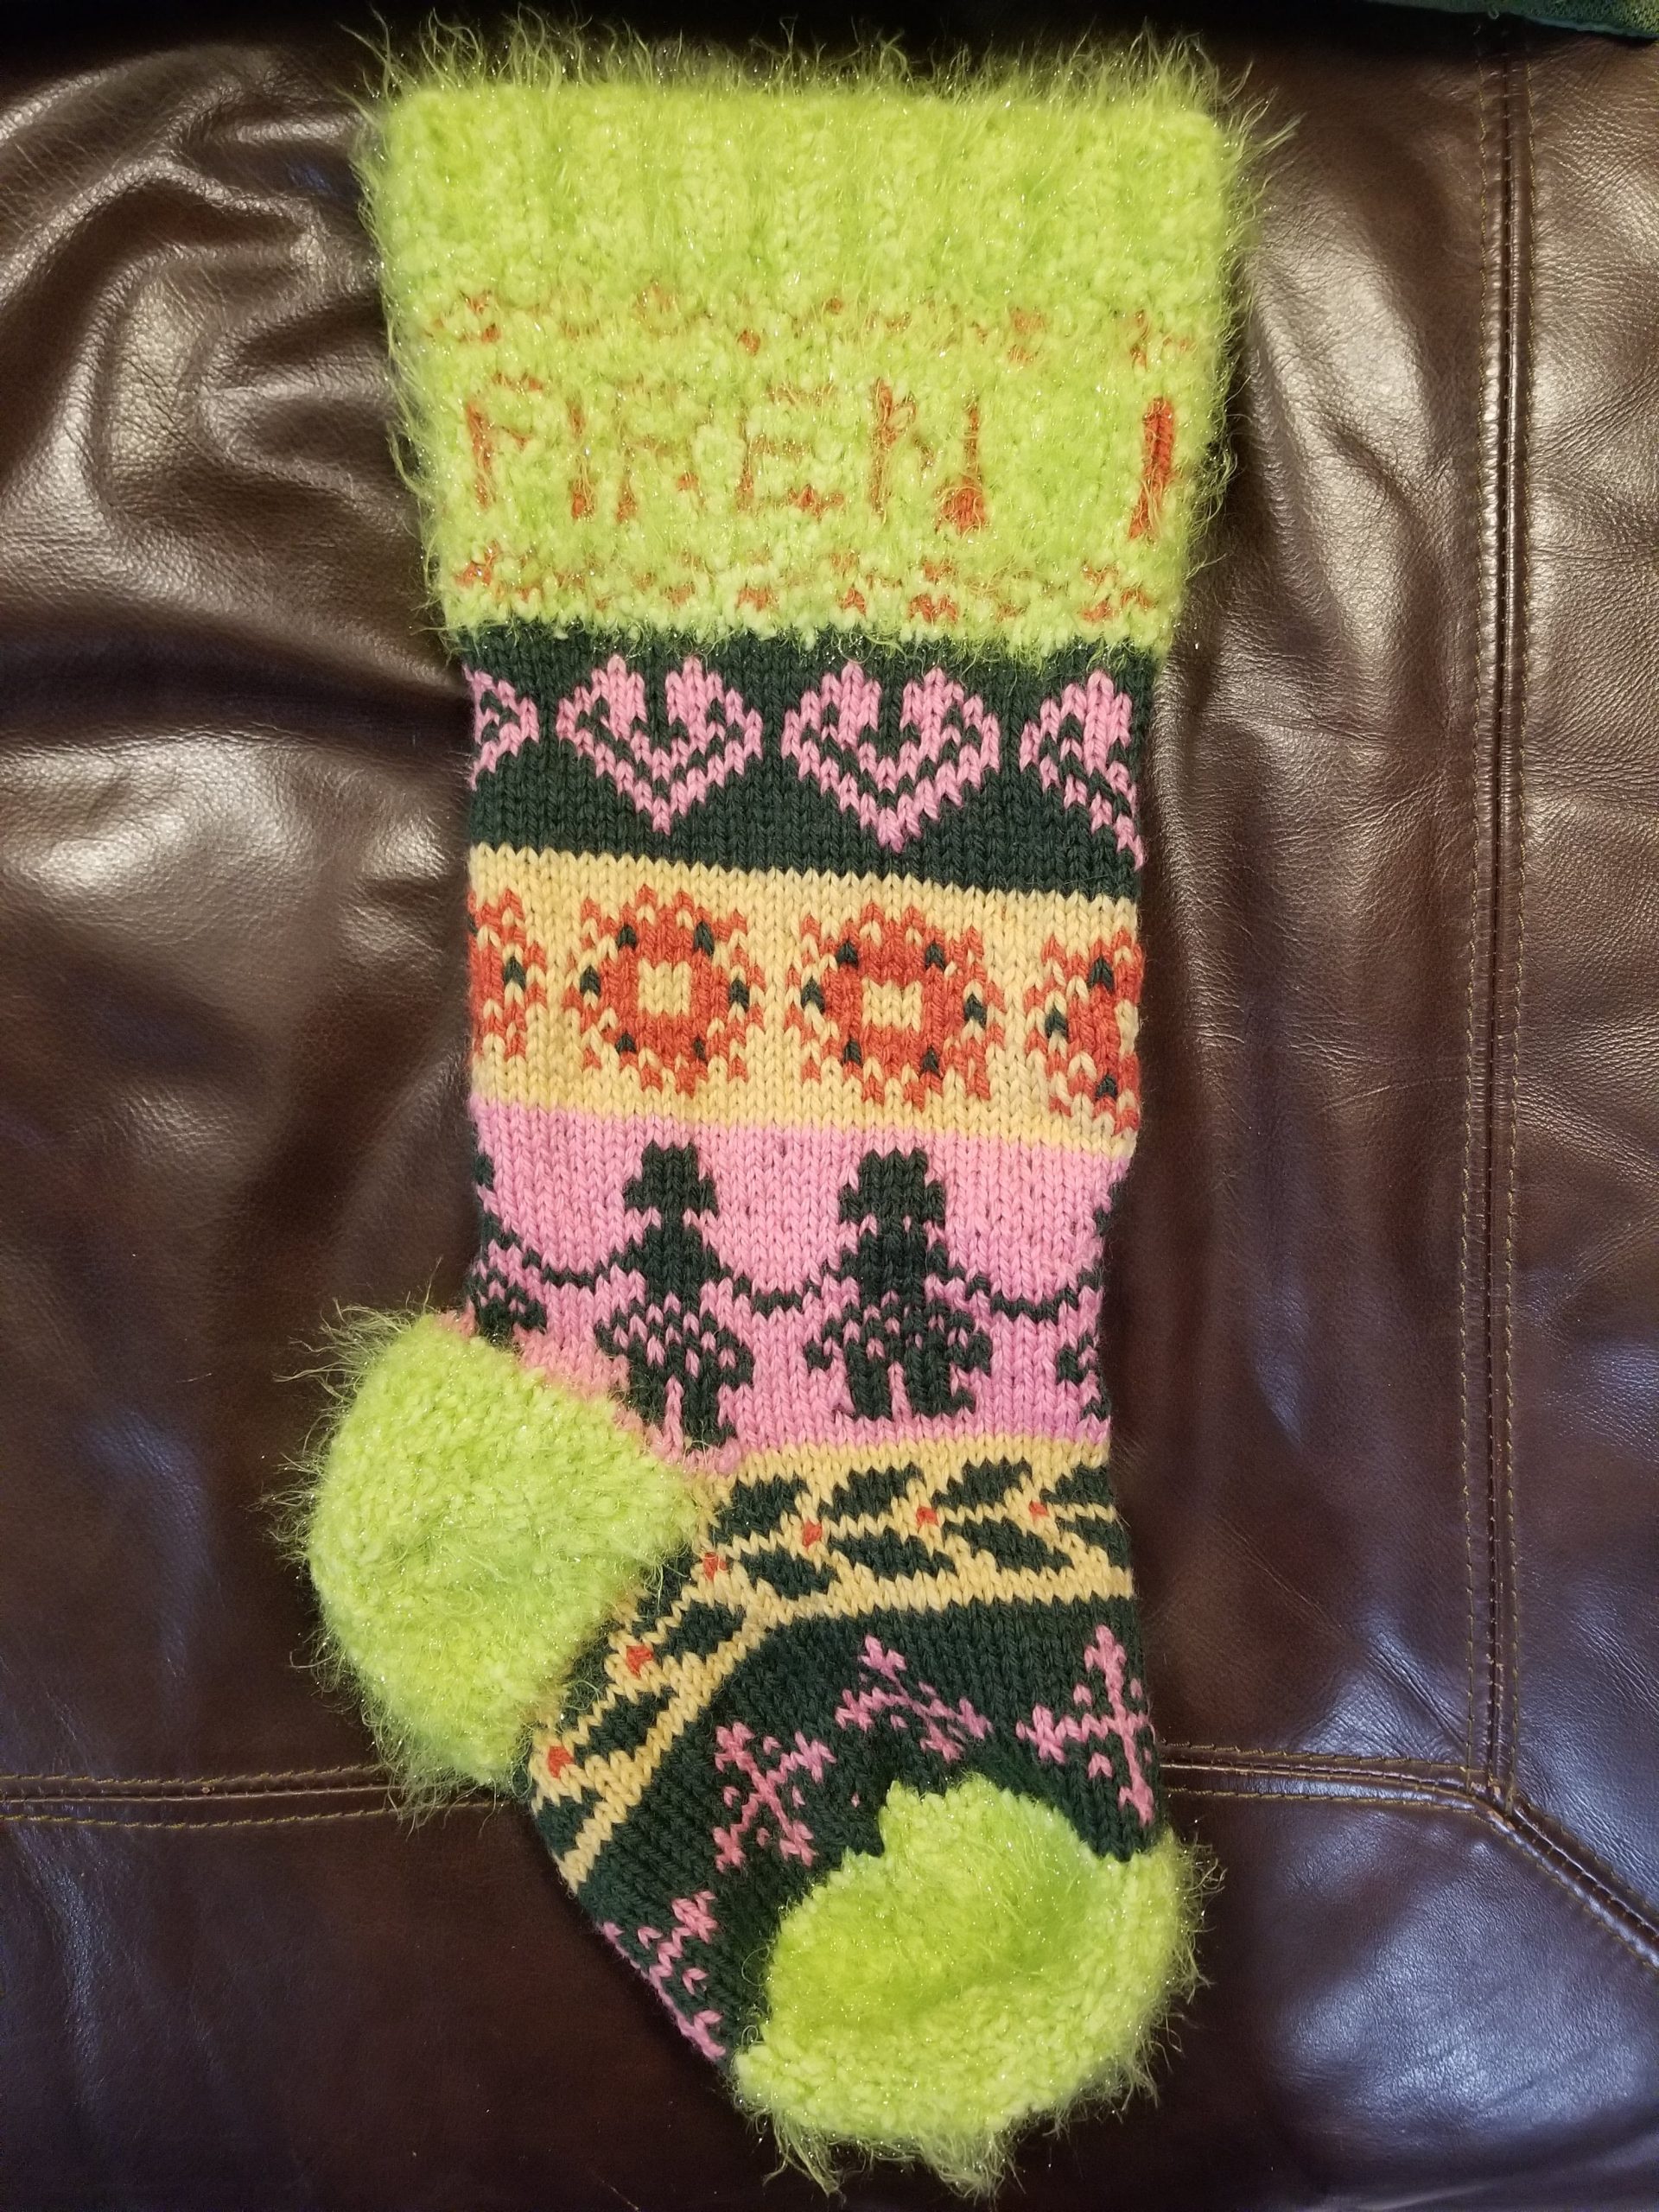
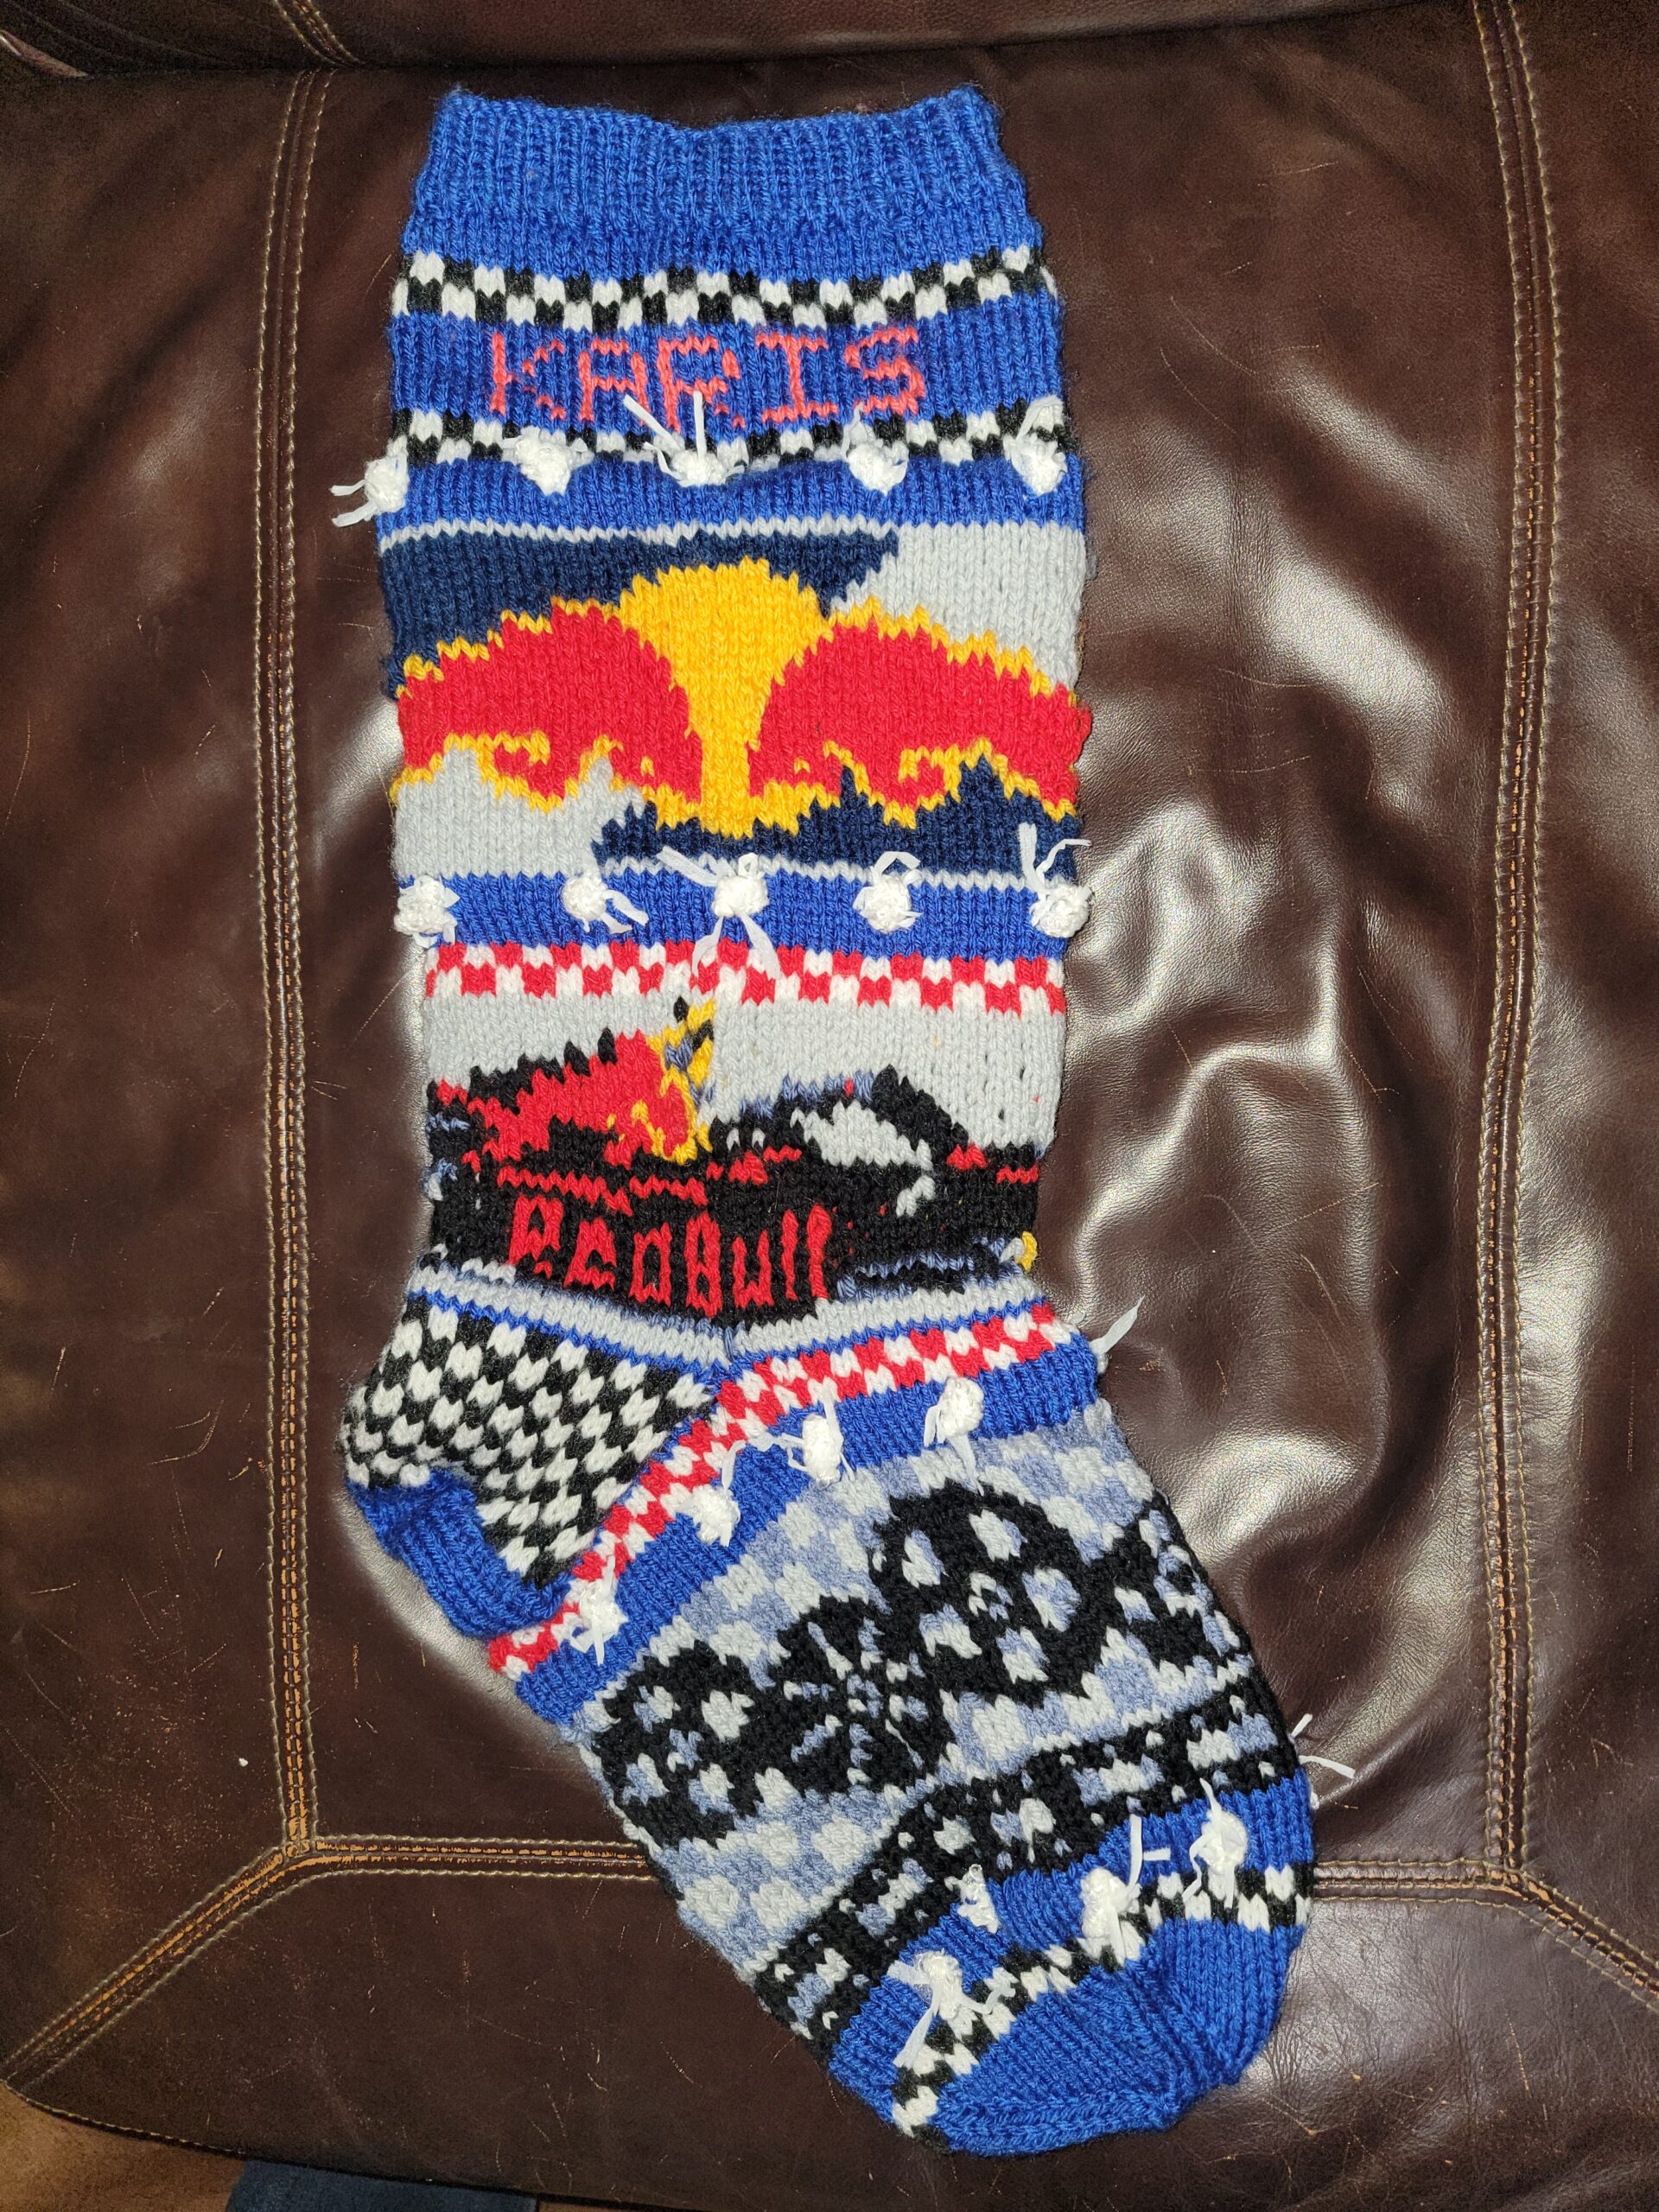
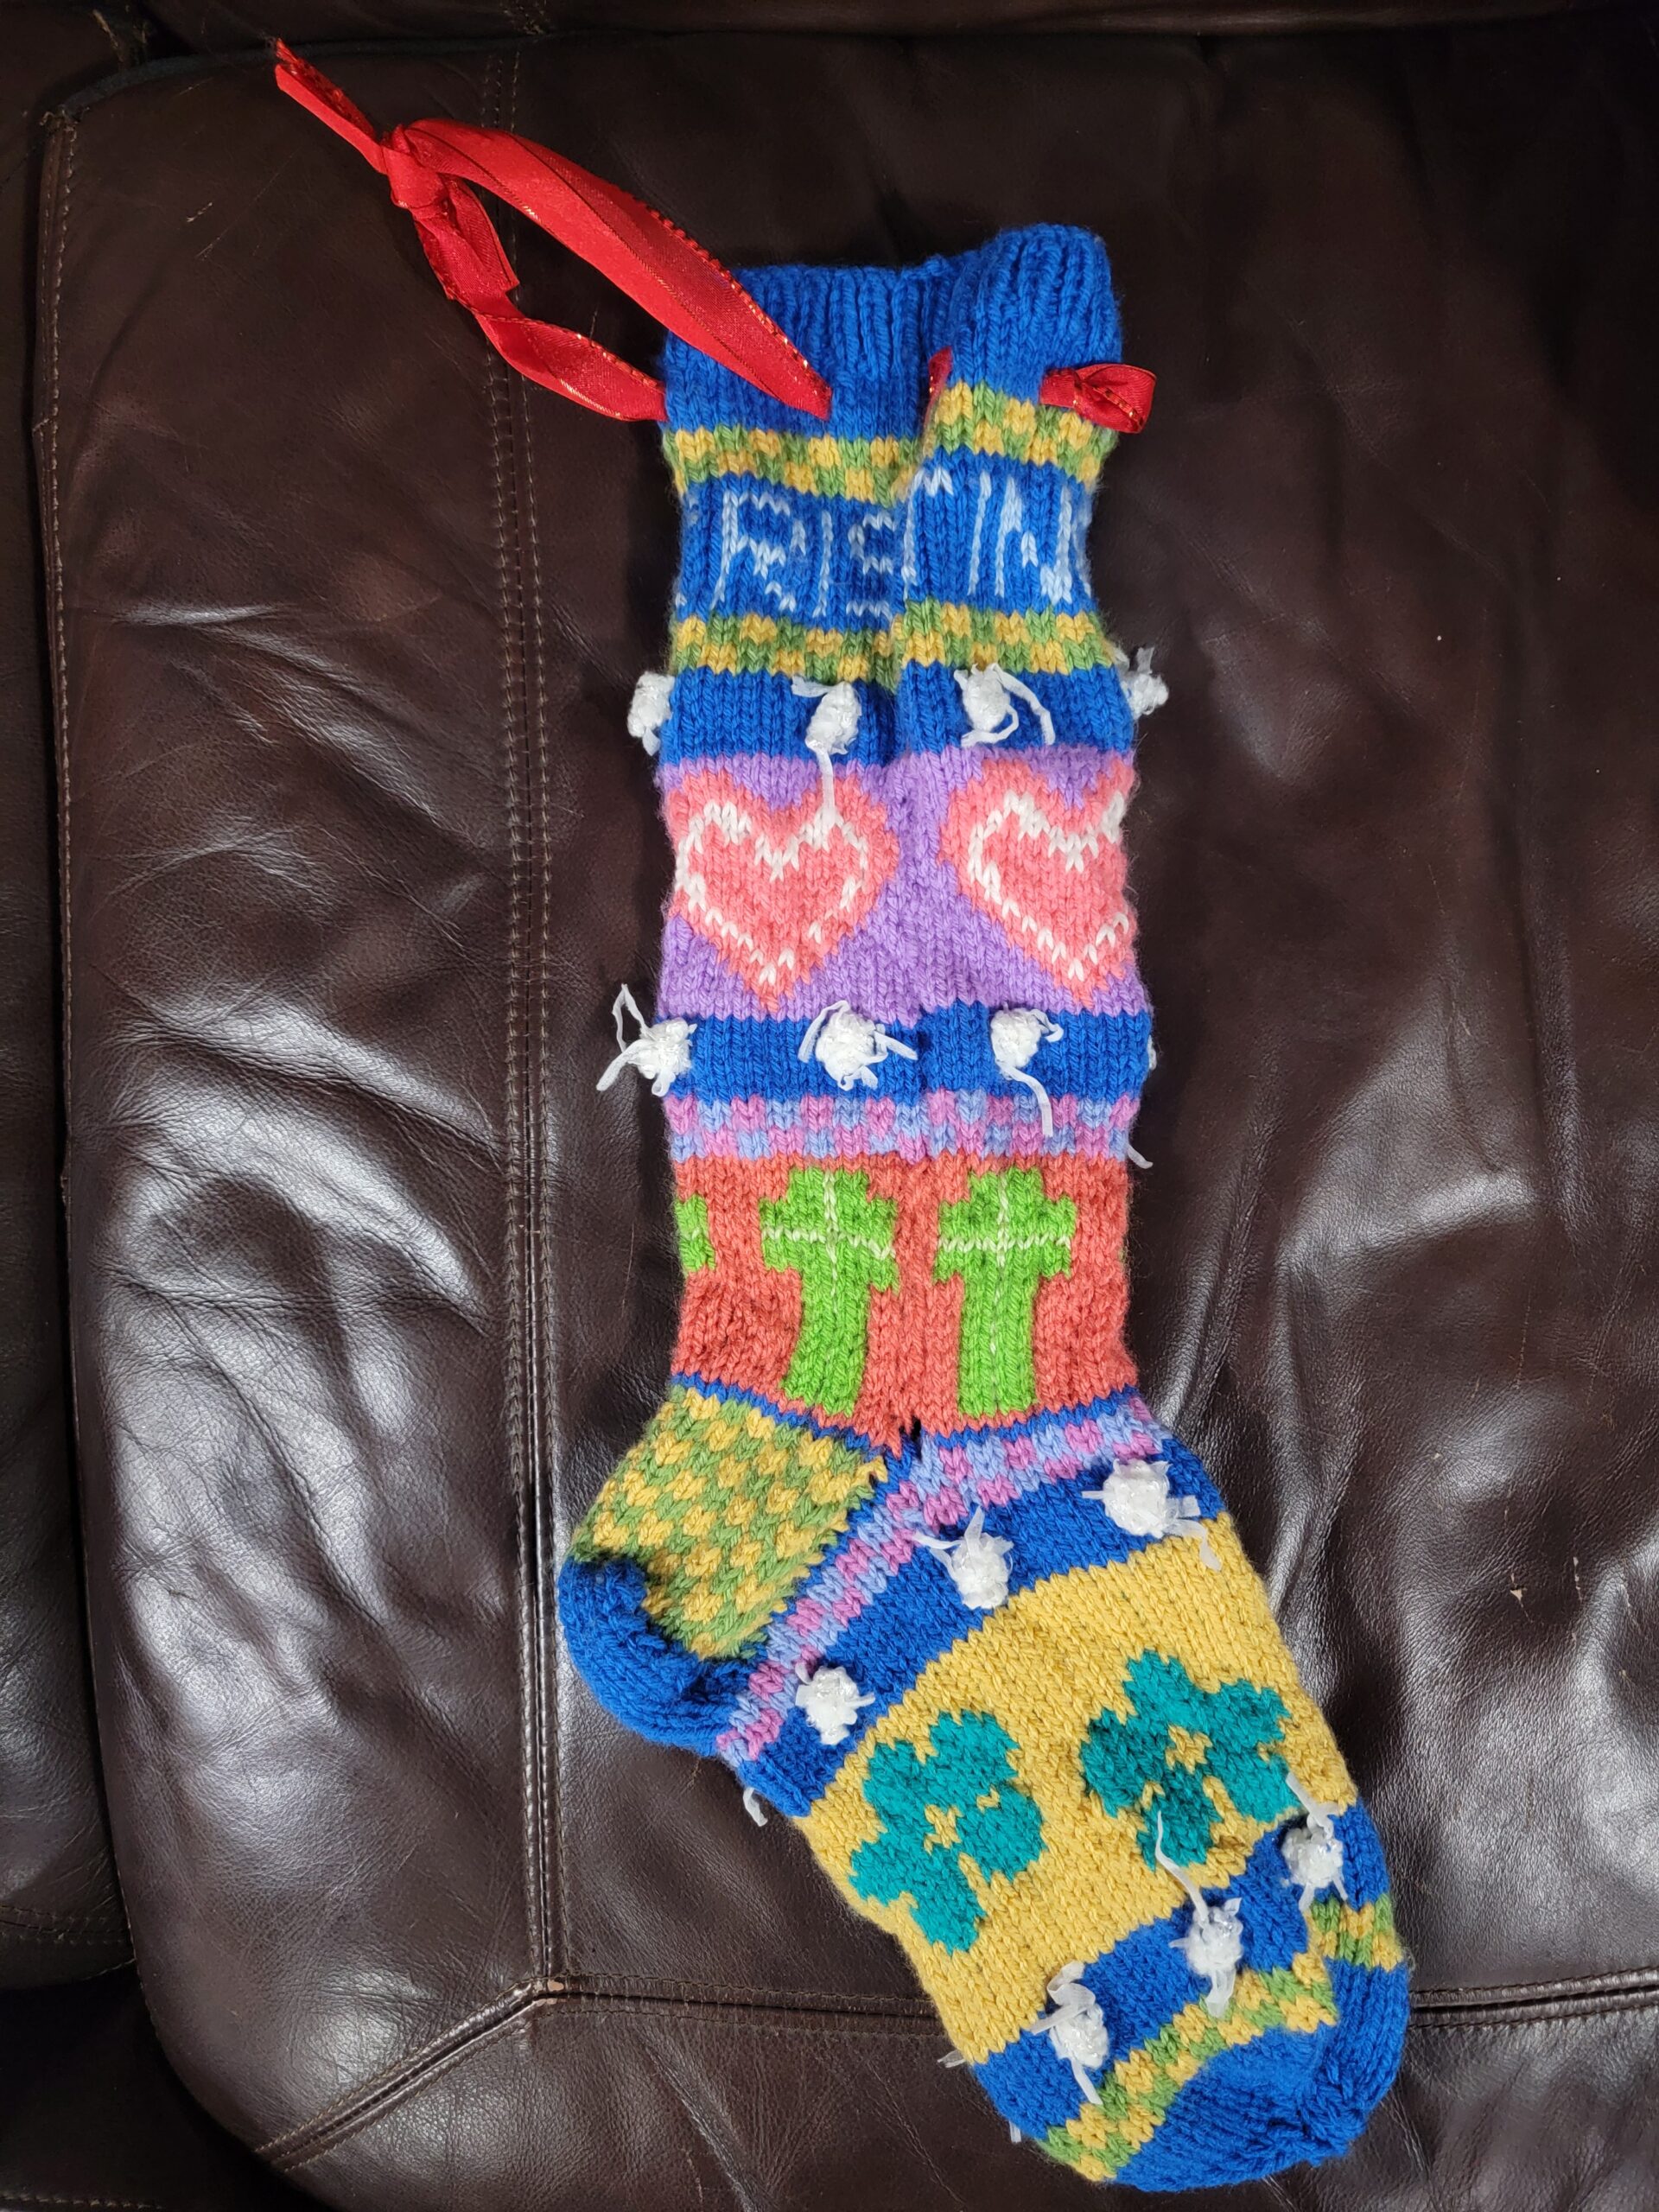
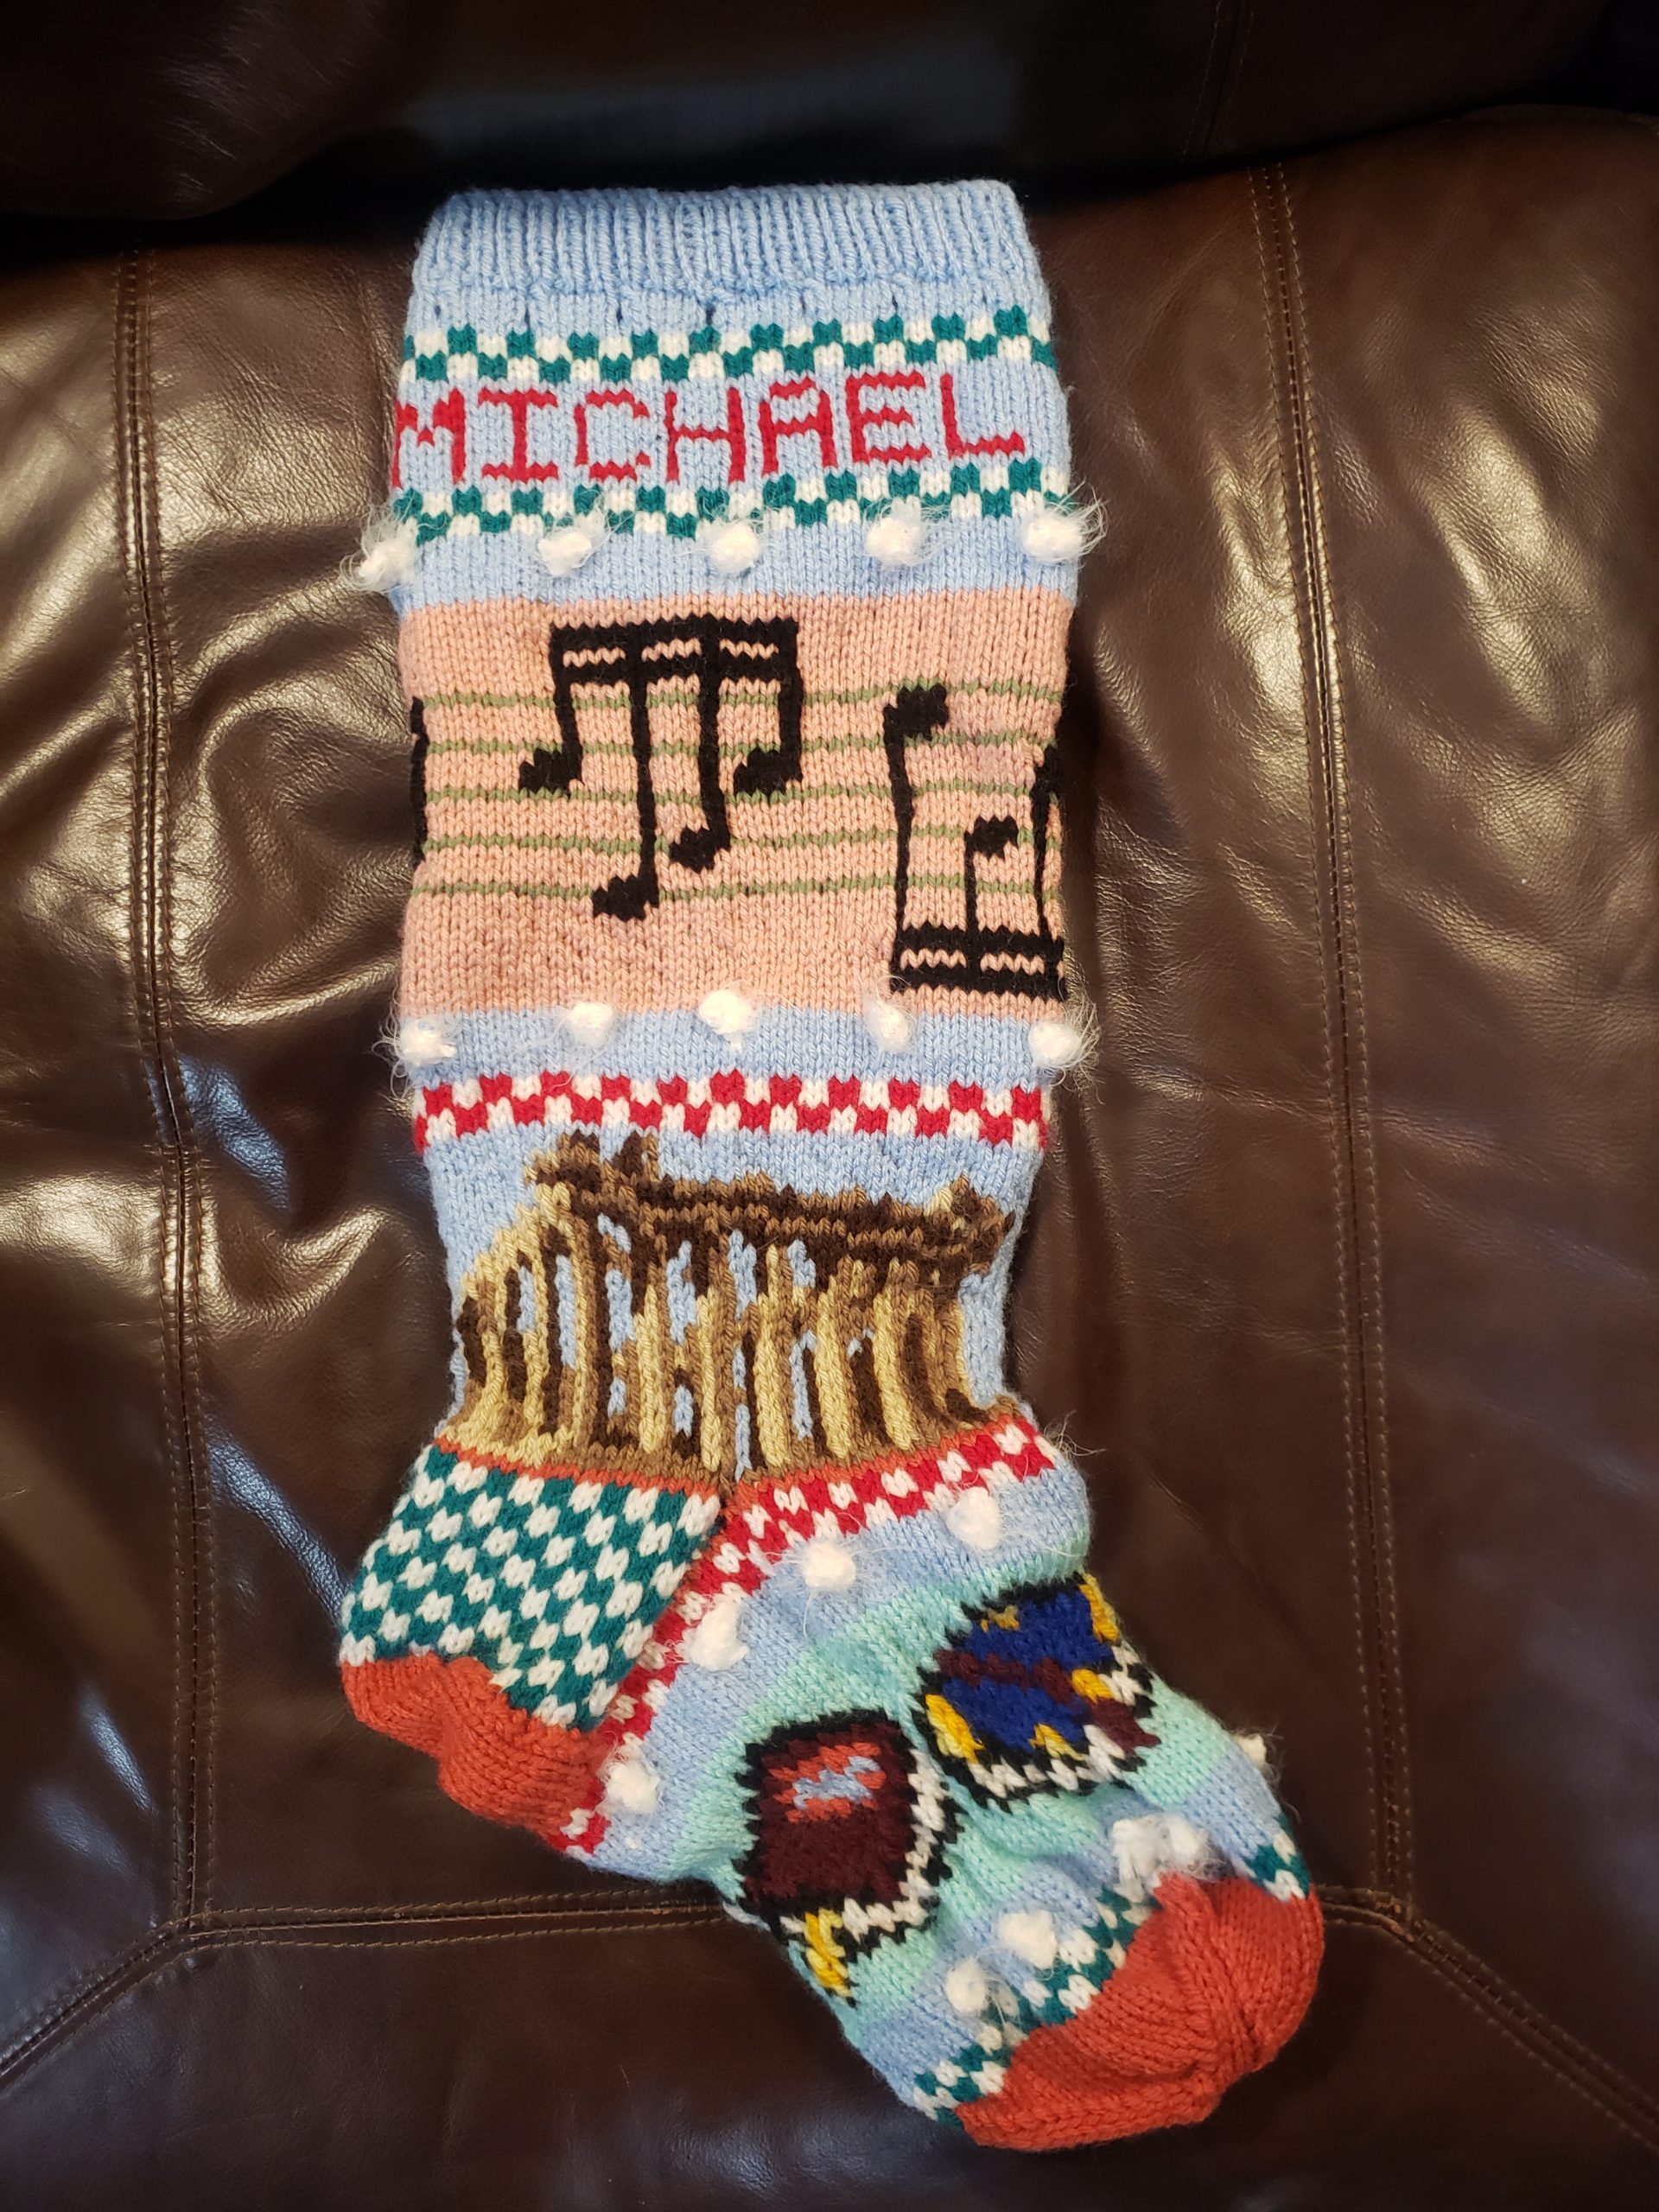
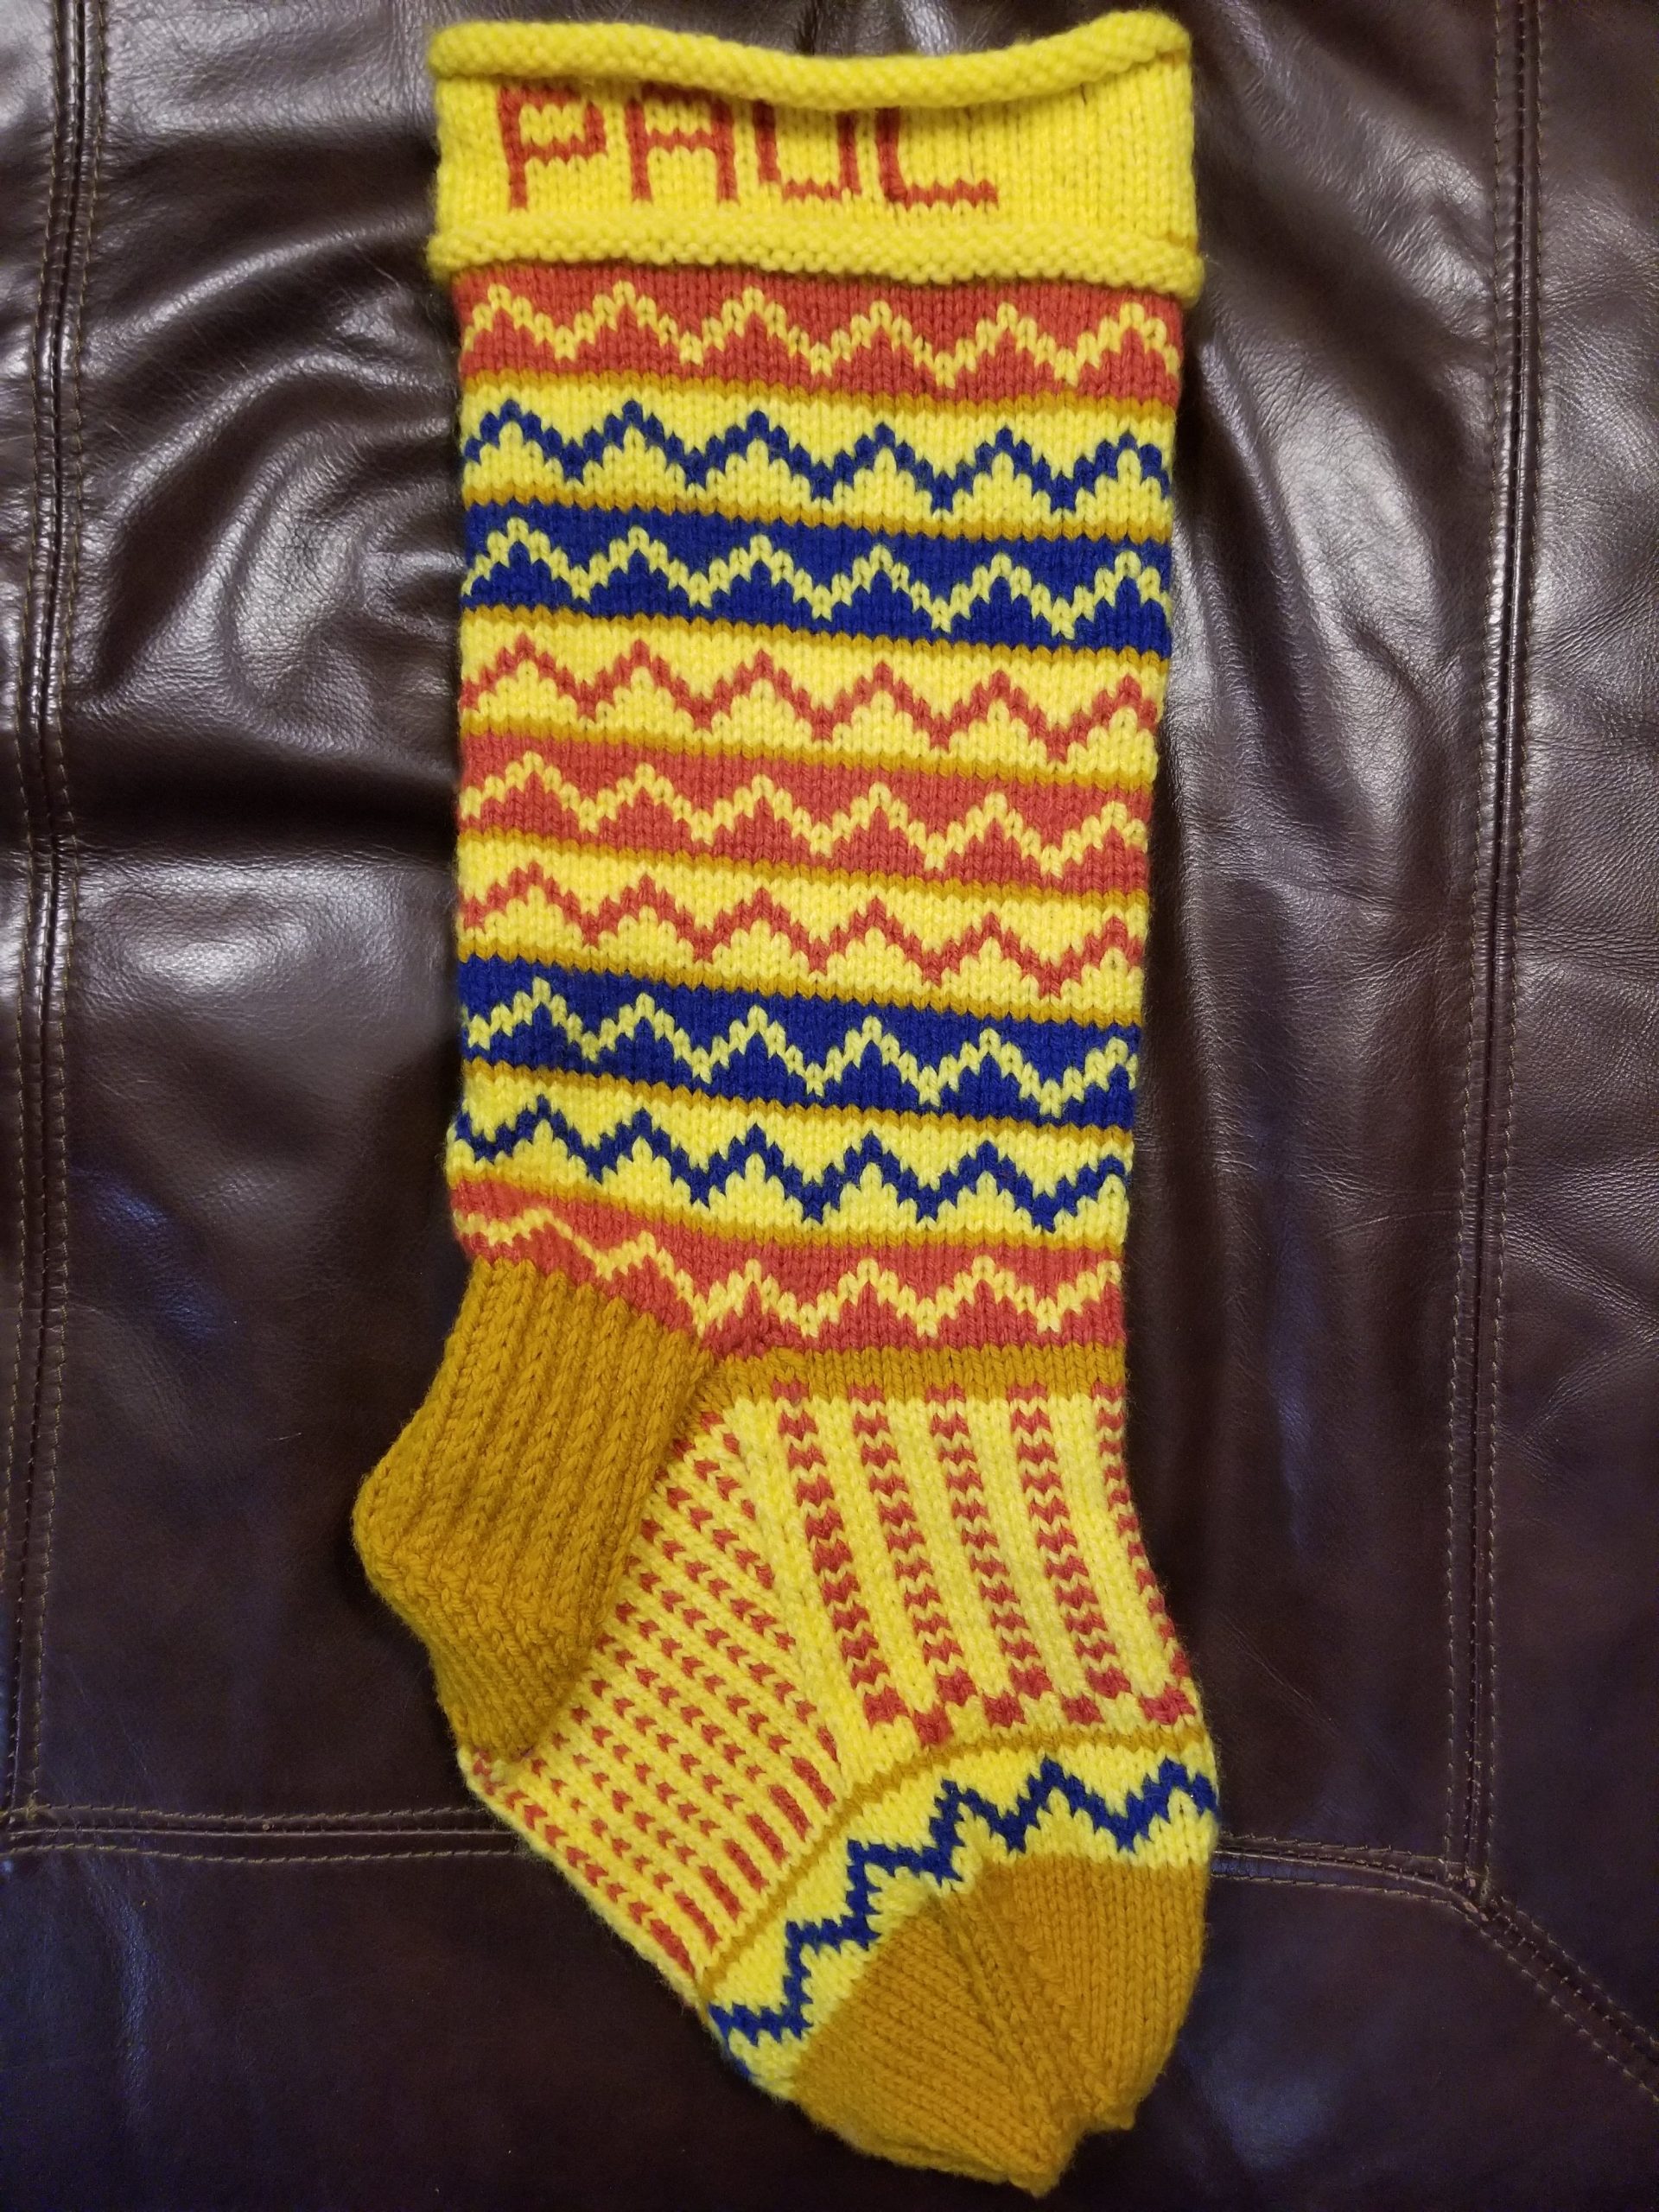
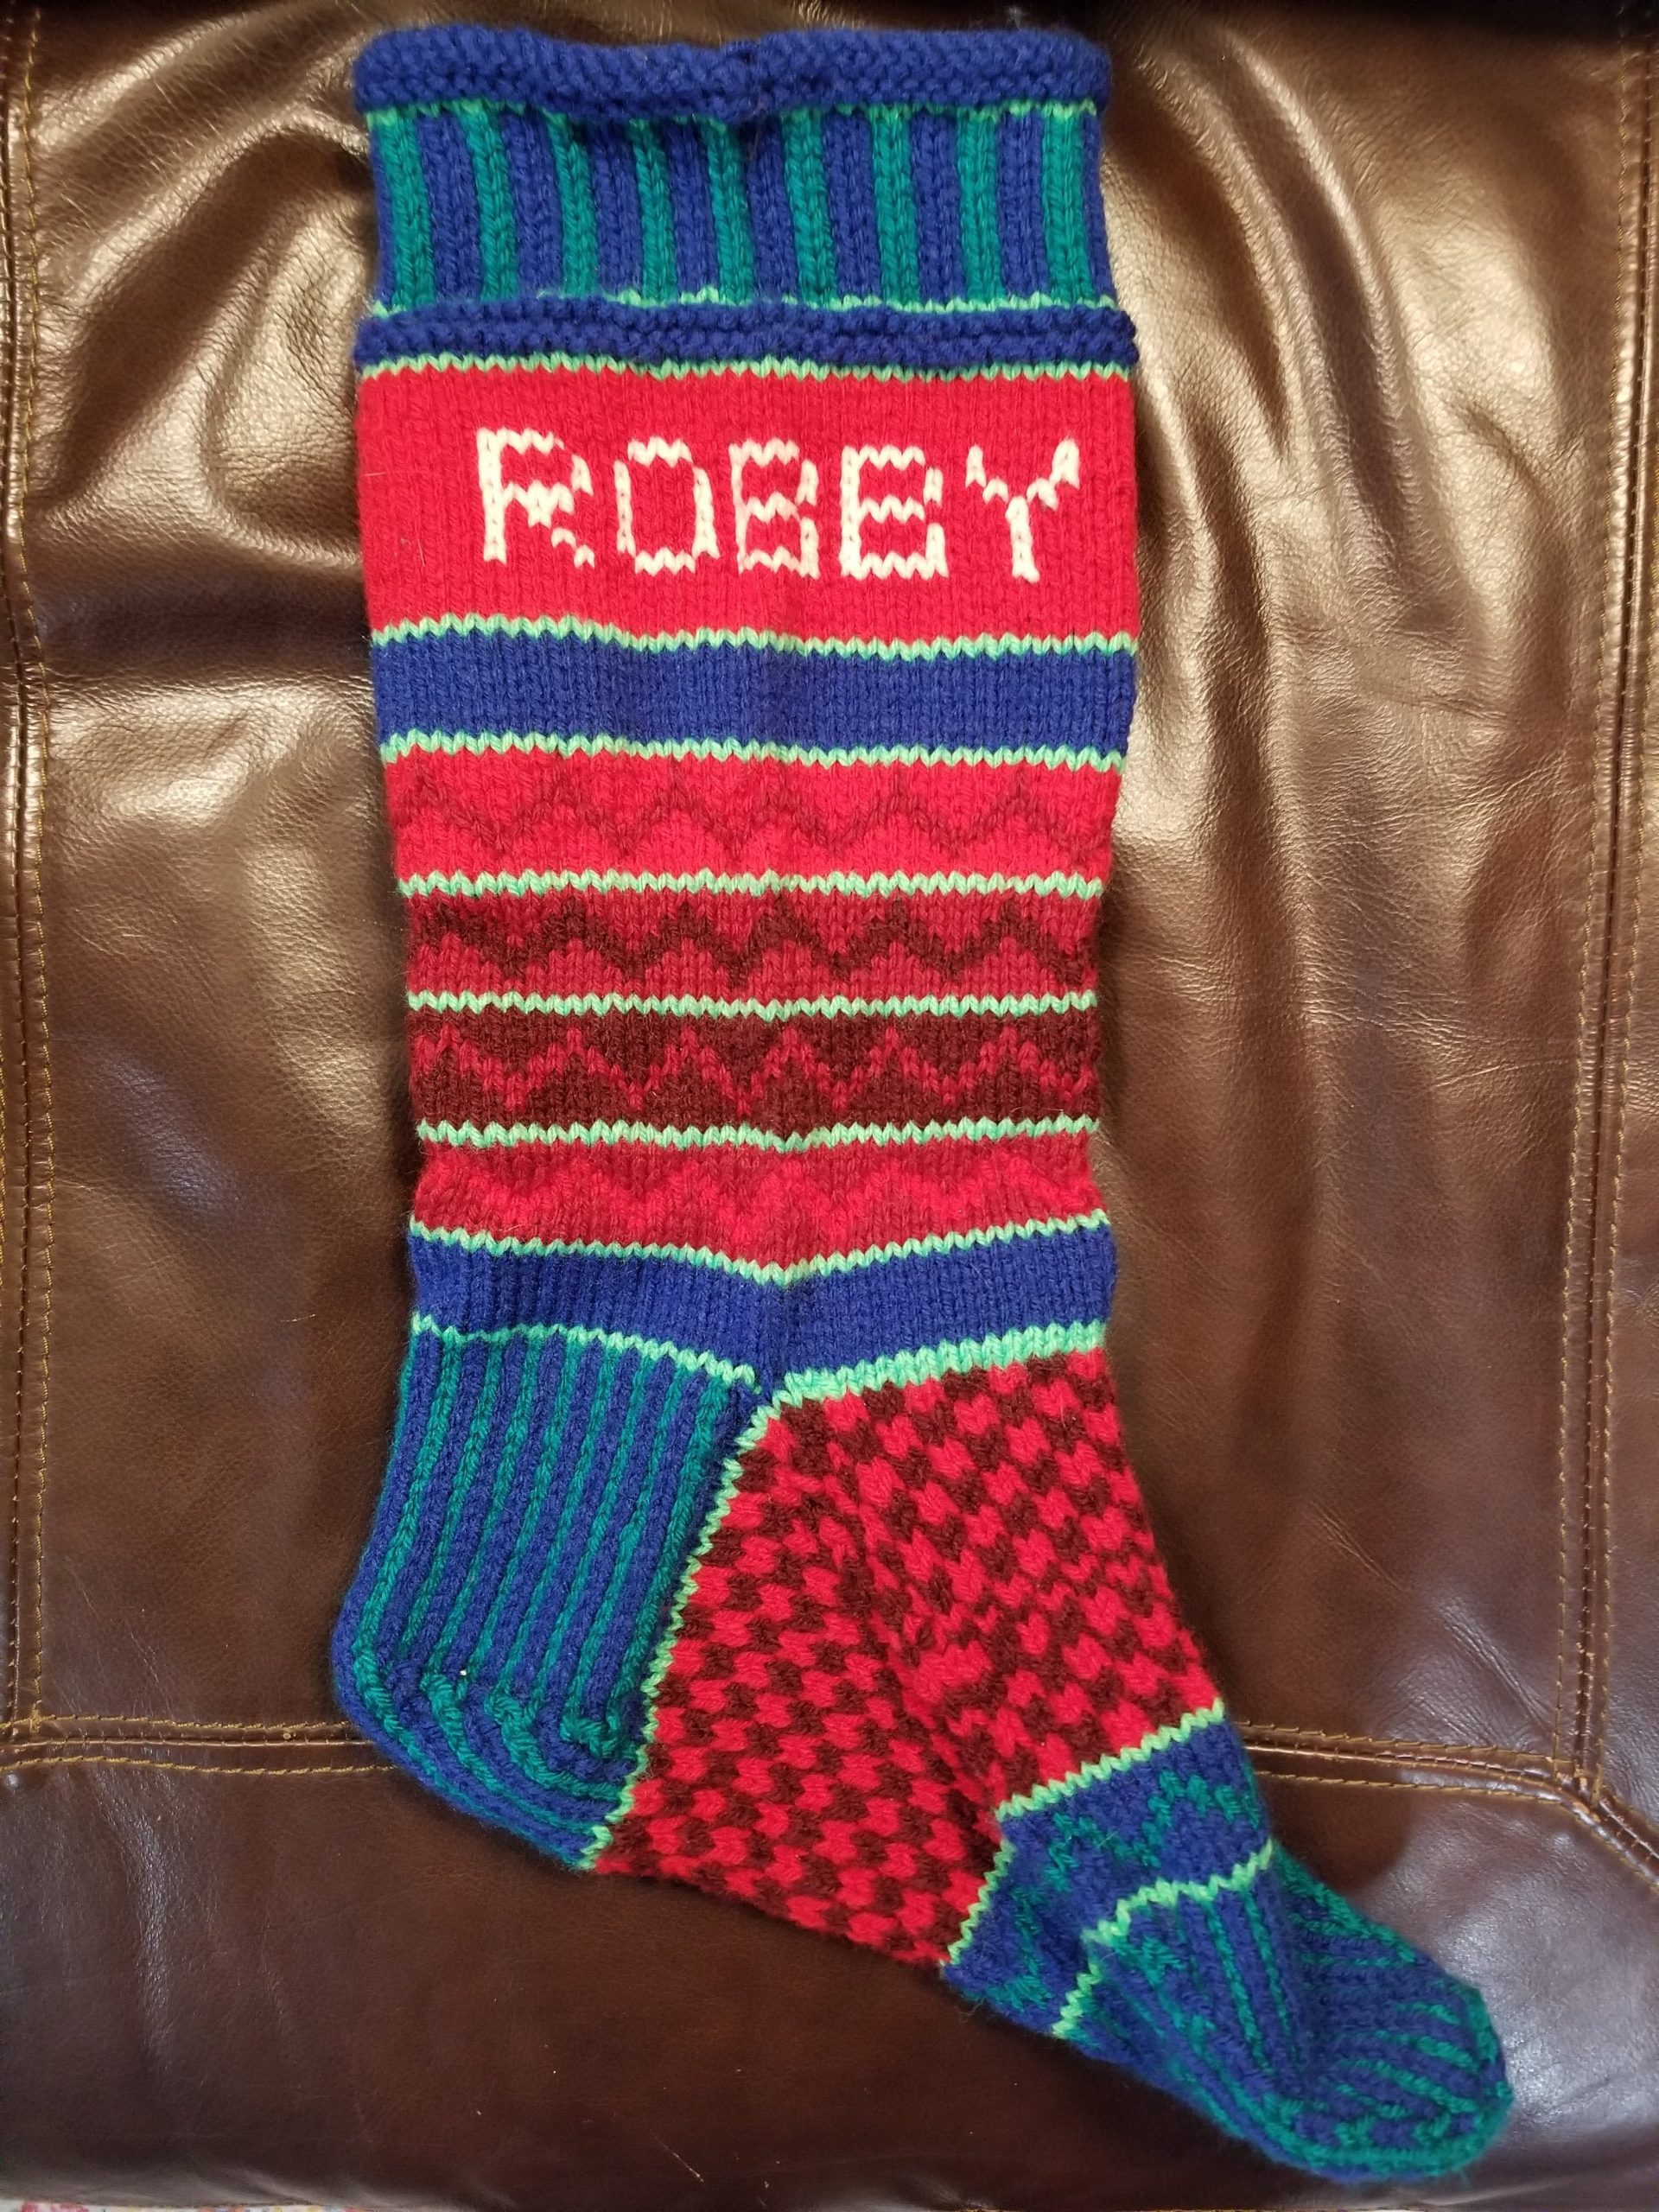
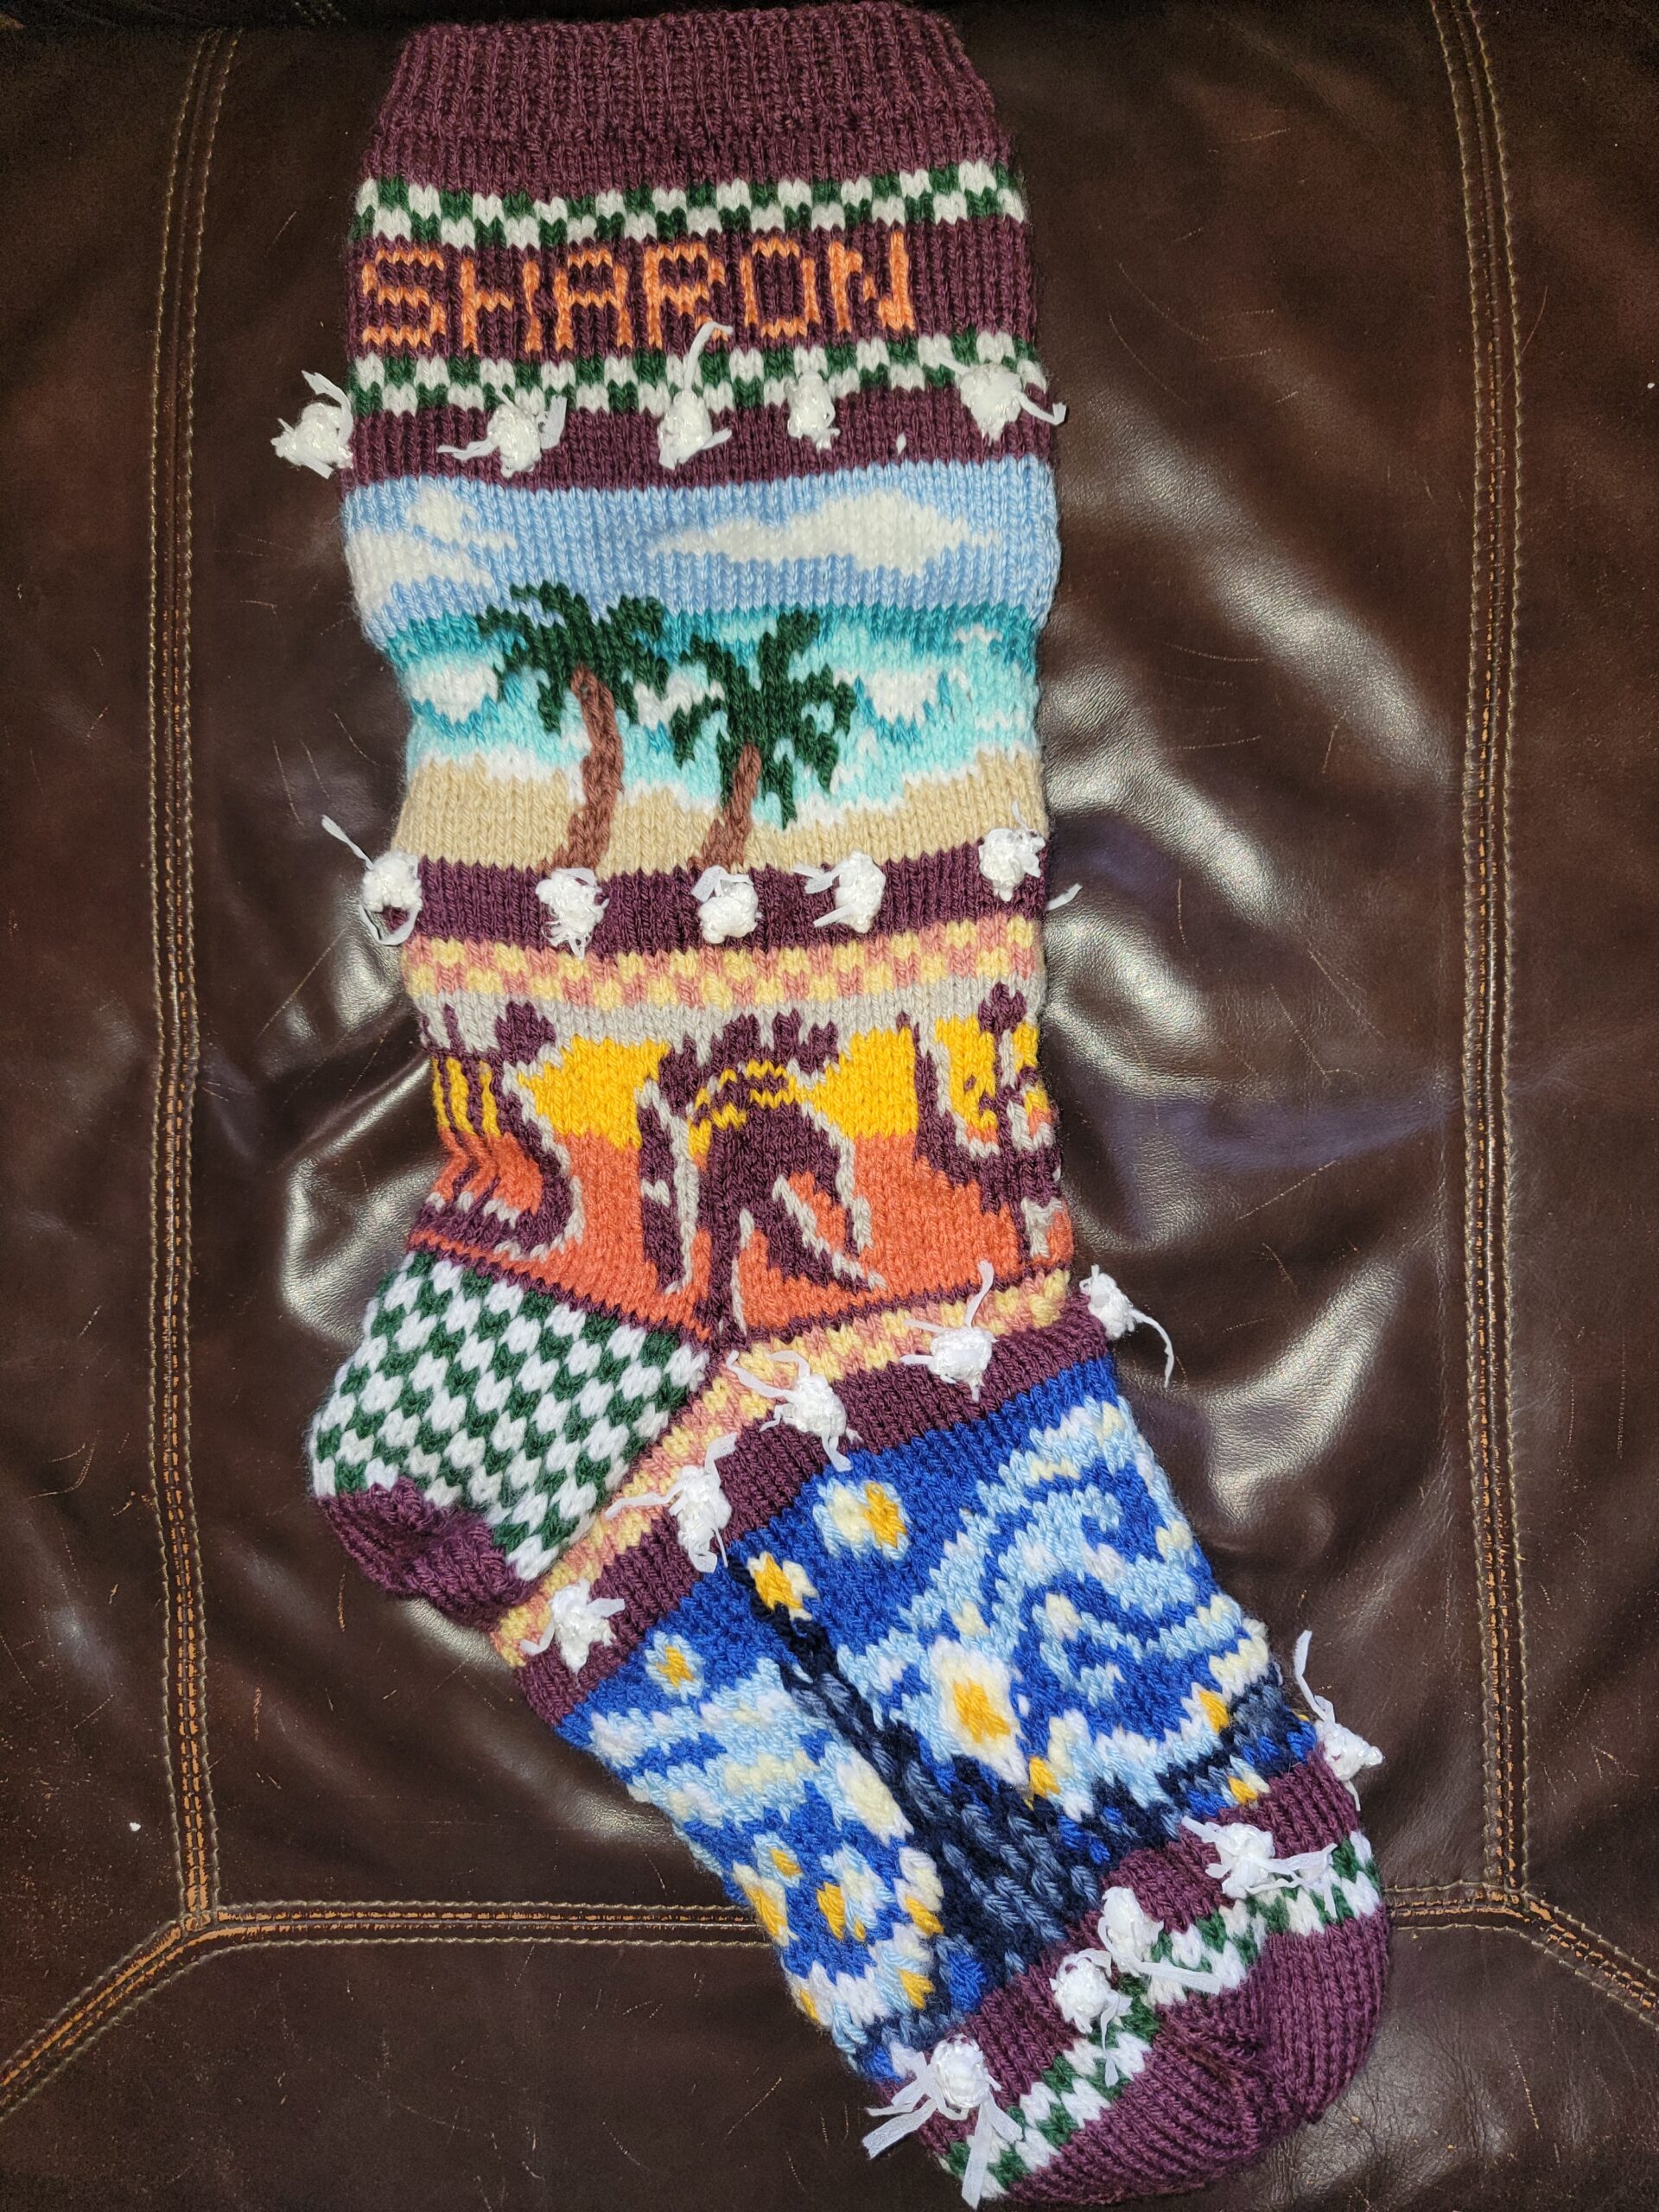
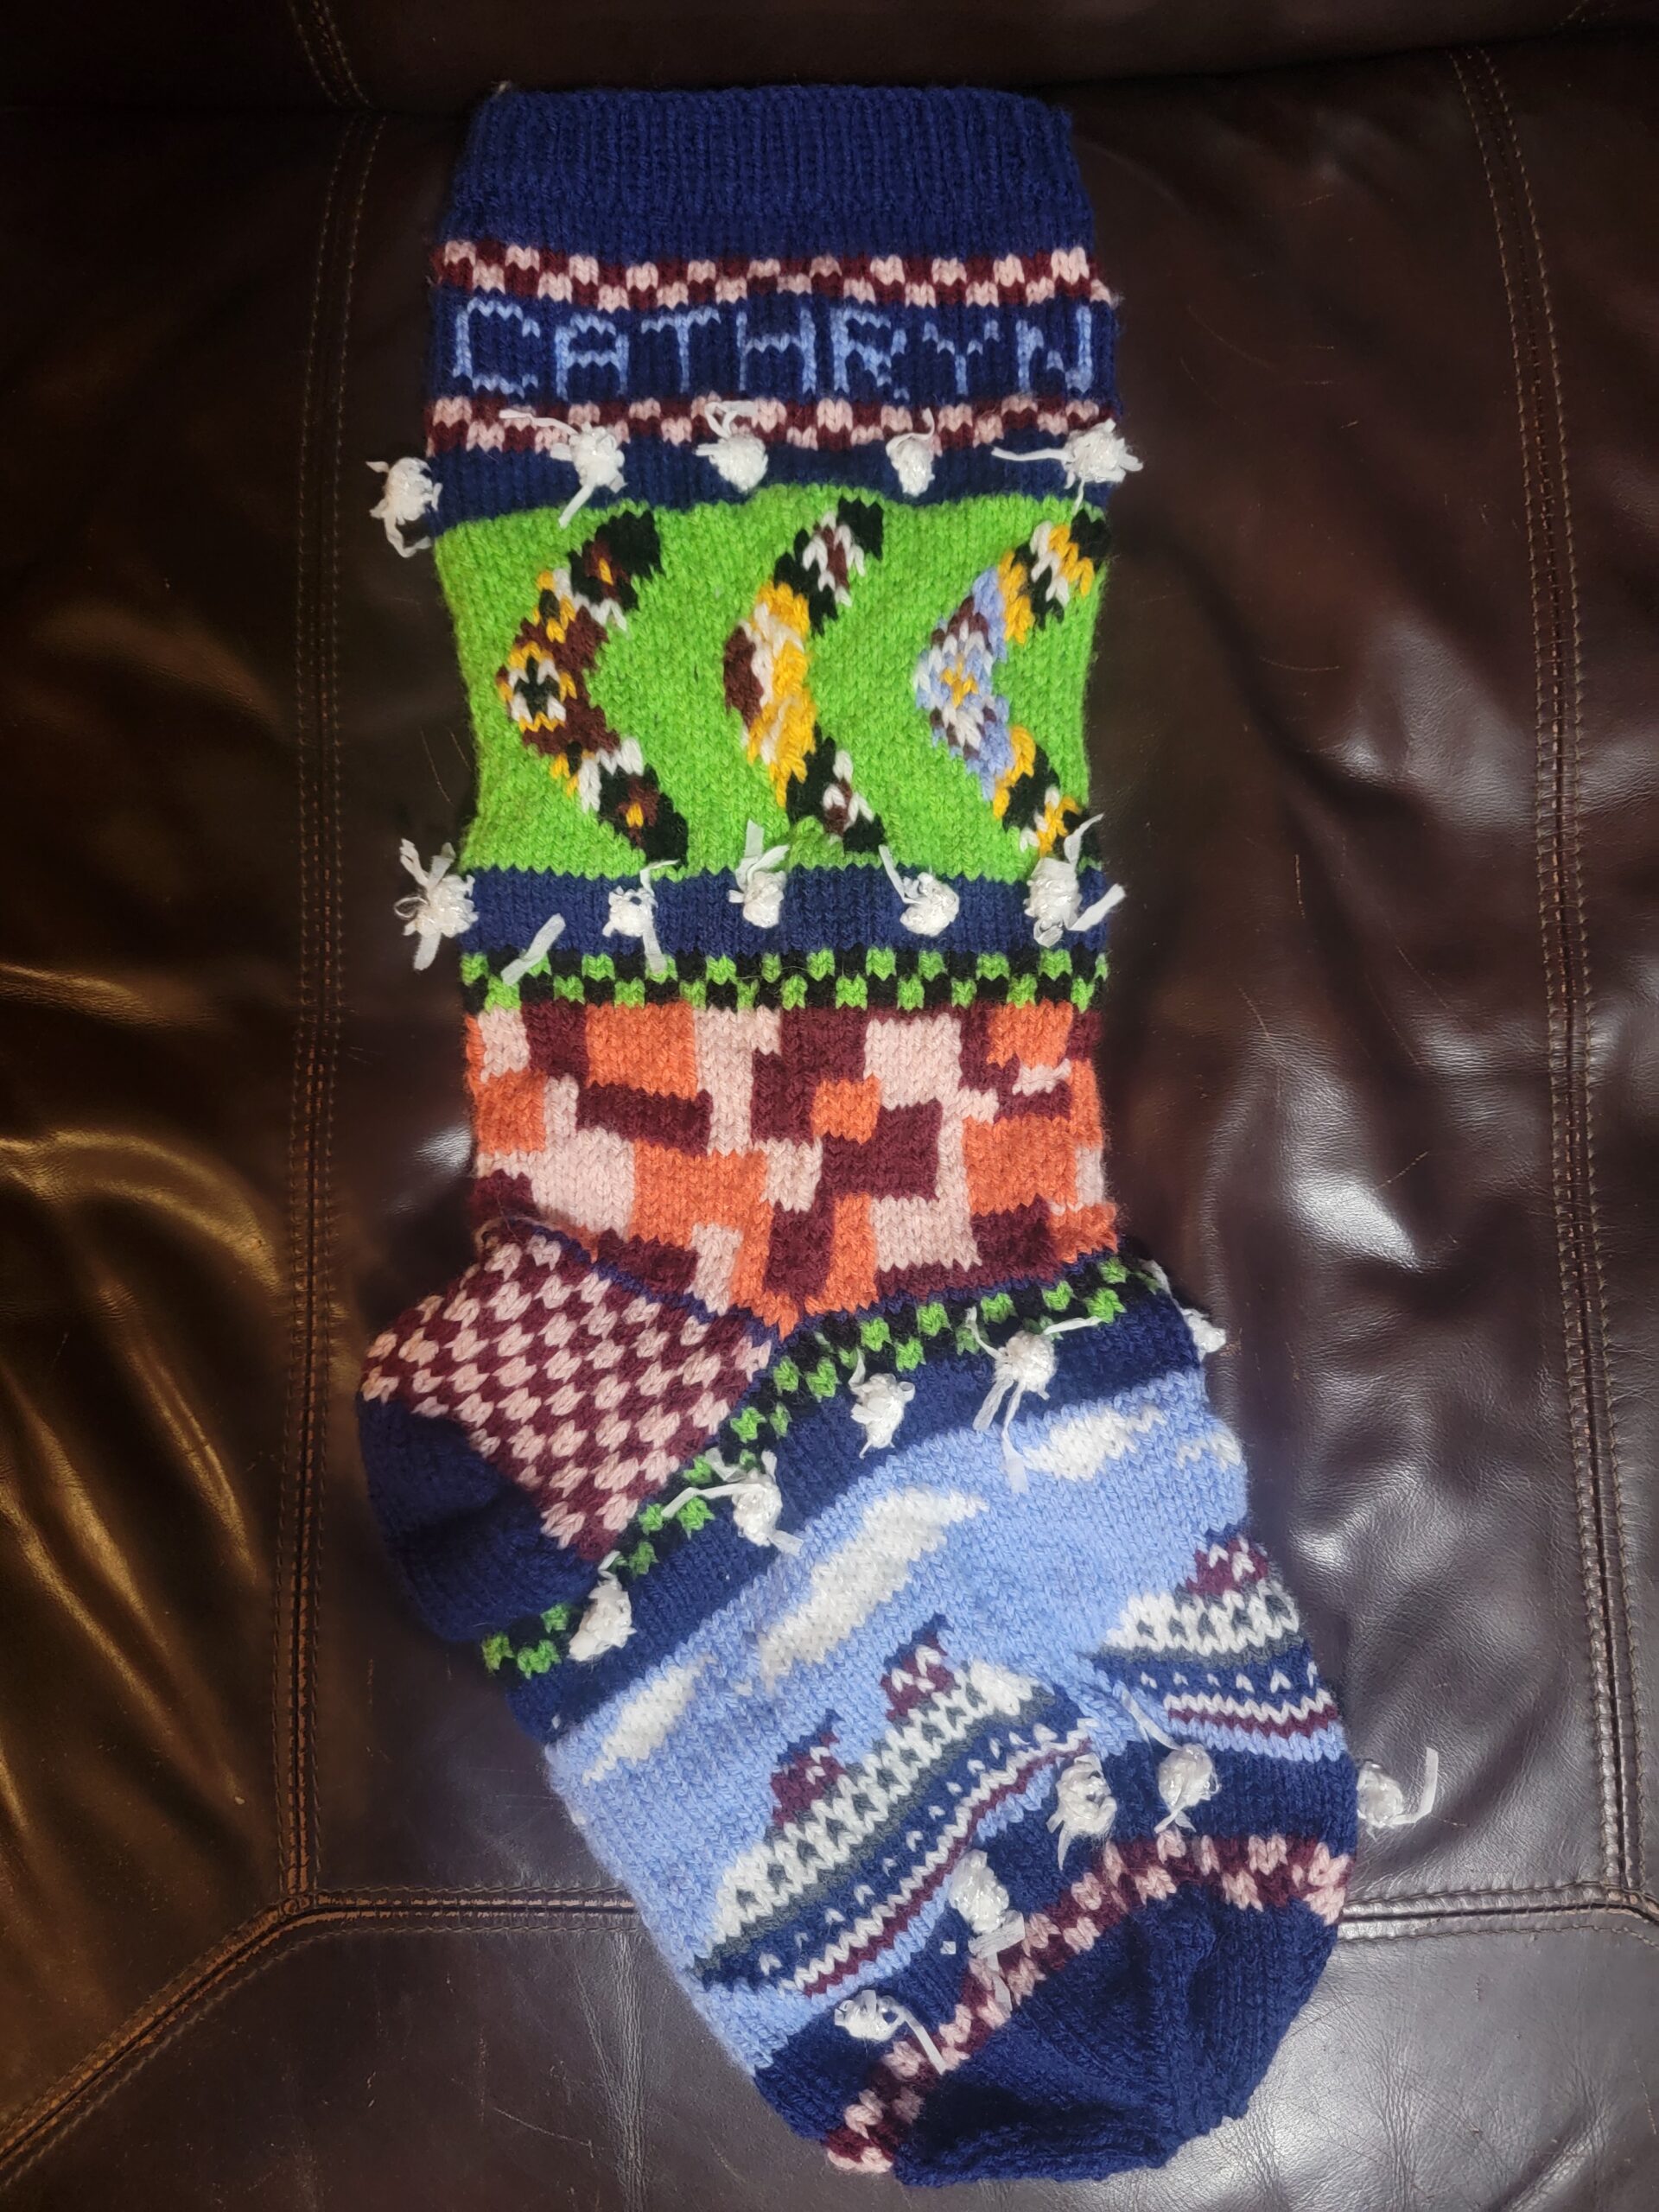
Extended Family & Friend stockings
(if I made you one that’s not included here, please send me a photo!)


Groups of stockings by year